
Size
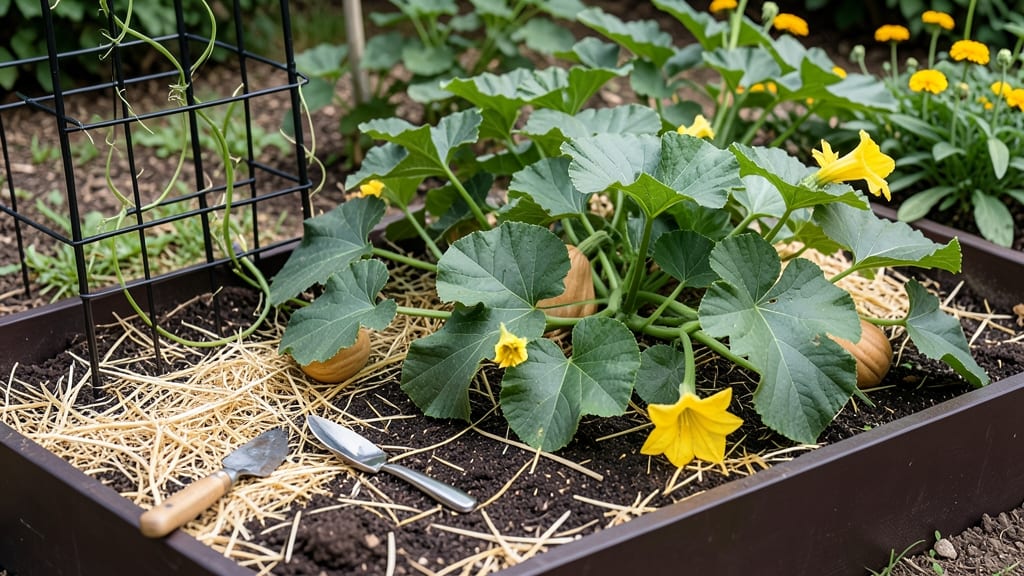
How to grow butternut squash in a small space—it’s easier than you think! I’ve grown 12-pound squash in a 4-foot-wide raised bed using this vertical trellis trick. 🌱 The key? Choosing bushier varieties and training vines upward instead of sprawling. My first attempt last summer produced more than I expected, and the trellis kept the fruit off damp soil, preventing rot.
You’ll need just three supplies: a sturdy trellis (DIY with PVC pipes works), a compact variety like 'Waltham Butternut,' and a 5-gallon container or raised bed for each plant. Sunlight matters most—6+ hours daily—but even partial shade works if you adjust spacing.
The real magic happens when vines climb instead of spreading, freeing up ground space for other crops.
By midsummer, you’ll watch those smooth, golden squash grow vertically, saving space while maximizing yield. The trellis also makes harvesting easier—no more bending over muddy soil.
Plus, vertical growth improves air circulation, cutting down on powdery mildew risks. My neighbors still ask how I fit so much in so little room.
This method works for balconies, patios, or even large containers. Just add a companion plant like bush beans at the base to fix nitrogen in the soil. The only challenge? Pruning early side shoots to keep vines focused upward—but trust me, the harvest makes it worth it.
📚 In This Guide
- What you need
- Instructions
- Tips and common mistakes
- Wrapping up and next steps
What you need
- ● Butternut squash seeds: 3–5 seeds (or 1–2 plants if starting with seedlings). Choose a compact variety like ‘Waltham’ or ‘Sweet Dumpling’ for small spaces.
- ● Containers or raised beds: Large pots (5+ gallons each) or grow bags (at least 12–18 inches deep).
- ○ Fabric planters or self-watering containers (optional but helpful for moisture control).
- ● Vertical trellis or support: DIY trellis (pvc pipes, bamboo stakes, or wire mesh) or a pre-made vertical garden trellis (4–6 feet tall).
- ● Twine or soft plant ties for securing vines.
- ● Potting mix: High-quality, well-draining mix (avoid garden soil—it compacts in containers). Add compost for nutrients.
- ● Fertilizer: Balanced organic fertilizer (10-10-10) or compost tea. Start with a slow-release option.
- ● Mulch: Straw or shredded leaves to retain moisture and suppress weeds.
- ● Drip irrigation system or soaker hoses for consistent watering.
- ● Pruning shears to trim excess foliage and encourage upward growth.
- ● Liquid seaweed extract or fish emulsion for a mid-season nutrient boost.
- ● Row covers (early in the season) to protect seedlings from pests.
- ● Garden gloves and a small hand trowel for planting.
Step-by-Step instructions for growing butternut squash vertically in small spaces
Here’s how to transform limited space into a productive squash garden using a simple trellis system.
🌱 Step 1: Select and Prepare Your Trellis and Containers
Butternut squash vines can climb 10-15 feet if given support, so choose a sturdy A-frame trellis or strong wire grid at least 6 feet tall. I prefer a 5-gallon bucket trellis (stacked buckets with vertical netting) because it’s lightweight and portable. Place it in a sunny spot receiving 6-8 hours of direct sunlight—partial shade will stunt growth.
Use large containers (at least 15 gallons each) if growing in pots, or prepare a raised bed with 12 inches of loose, well-draining soil. Butternut squash needs room for roots, so avoid shallow planters. Mix in 2-3 inches of compost to enrich the soil before planting—this ensures strong vines and heavy fruit production.
🌿 Step 2: Plant Seeds at the Right Depth and Spacing
Sow 2-3 seeds per container (or 1 seed every 2 feet in a raised bed) at a depth of 1 inch. Butternut squash seeds germinate best in warm soil (70-85°F), so wait until nighttime temperatures stay above 55°F before planting. If starting indoors, transplant seedlings after the last frost when they have 2-3 true leaves.
Thin seedlings to one per container once they’re 3-4 inches tall, snipping weaker stems at the base. Leave the strongest plant—it’ll need space to sprawl and climb. Water deeply after thinning to help roots establish. You’ll see first true leaves in 7-10 days, signaling healthy growth.
☀️ Step 3: Train Vines Up the Trellis and Prune Strategically
When vines reach 12 inches long, gently weave them through the trellis mesh or guide them up the netting. Butternut squash is a vining plant, so encourage upward growth by tying stems to the trellis with soft plant ties every 12-18 inches. Avoid metal or tight ties—they’ll damage tender vines as they thicken.
Prune side shoots (suckers) that grow below the first 3-4 leaves on the main vine. These compete for energy but don’t produce fruit. Focus on keeping the primary vine strong—it’ll support 2-3 female flowers (identifiable by tiny squash forming at the base) per plant. Remove male flowers (long stems with no squash) to redirect energy to fruit development.
💧 Step 4: Water and Fertilize for Heavy Fruit Production
Butternut squash needs consistent moisture—water deeply 2-3 times per week, aiming for 1-2 inches of water per week. Let the top 2 inches of soil dry out between waterings to prevent rot, but never let the plant wilt. Drip irrigation or soaker hoses work best, keeping leaves dry to avoid powdery mildew.
Feed plants every 3-4 weeks with a balanced fertilizer (10-10-10) or compost tea once flowers appear. Stop fertilizing 2 weeks before harvest—too much nitrogen late in the season leads to leafy growth at the expense of fruit. You’ll know you’re on track when female flowers (with tiny squash) appear 4-6 weeks after planting.
⏰ Step 5: Harvest and Store for Maximum Shelf Life
Butternut squash is ready to harvest when the rind turns hard and dull tan, and the stem near the fruit dries and browns. Use a sharp knife to cut the fruit from the vine, leaving 1 inch of stem attached. Harvest in the morning for peak flavor and texture—this is when sugars are highest. Expect 80-100 days from planting to harvest.
Cure squash by placing it in a warm (80-85°F), dry, well-ventilated space for 7-10 days. This hardens the skin and improves storage life. Store cured squash in a cool (50-55°F), dark place for 2-3 months. You’ll know it’s stored properly when the skin remains firm and unblemished—soft spots mean it’s past its prime.
Tips & tricks for vertical butternut squash cultivation
Transforming limited space into a thriving butternut squash garden isn't just possible—it's a game-changer for small gardens and urban growers. Here's how to maximize your harvest while avoiding common pitfalls that sabotage vertical growth.
Trellis Stability Secret: The 6-foot minimum height mentioned in Step 1 is non-negotiable for butternut squash, but don't stop there. For windy locations, add stakes or guy wires to your trellis structure. I've seen 10-foot vines topple entire trellises when unsecured—trust me, you don't want to lose months of growth to a storm. The bucket trellis system works beautifully, but reinforce the base with bricks or weights if you're in a breezy area.
Soil Preparation Insight: That 2-3 inches of compost recommendation in Step 1 is your foundation for success. Butternut squash is particularly sensitive to soil-borne diseases, so add 1 cup of perlite or vermiculite per 15-gallon container to improve drainage. I've found that amending with 1 tablespoon of mycorrhizal fungi at planting boosts root development—these beneficial fungi help roots absorb nutrients more efficiently, which translates to bigger squash. This is especially important in containers where roots have limited space to spread.
Pruning Strategy: When it comes to pruning side shoots in Step 3, focus on creating an open canopy. Remove any suckers growing within the first 3-4 leaves of the main vine, but leave the ones above—these can develop into secondary vines that produce additional fruit. I've had success with two strong vines per plant when growing in 15-gallon containers. The key is to maintain good air circulation to prevent powdery mildew, which thrives in dense foliage. Use sharp pruning shears and make clean cuts just above a leaf node to encourage healthy regrowth.
Watering Wisdom: Those 2-3 waterings per week in Step 4 are crucial, but timing matters just as much as quantity. Water in the early morning to give leaves time to dry before evening. I've noticed that wet foliage at night creates perfect conditions for powdery mildew, our nemesis in vertical squash growing. Consider adding 1 tablespoon of hydrogen peroxide (3%) to each gallon of water once a month as a preventative fungicide—it's safe, effective, and won't disrupt your plants' natural processes.
Pro Tips for Grow Butternut Squash In Small Space
- Transforming limited space into a thriving butternut squash garden isn't just possible—it's a game-changer for small gardens and urban growers.
- Trellis Stability Secret: The 6-foot minimum height mentioned in Step 1 is non-negotiable for butternut squash, but don't stop there.
- Soil Preparation Insight: That 2-3 inches of compost recommendation in Step 1 is your foundation for success.
Frequently asked questions
Got questions about growing butternut squash in tight spaces? You’re not alone! Here are some of the most common concerns—and their solutions—to help you crush your small-space harvest.
Can butternut squash really grow in containers or small gardens?
Butternut squash is a vine, not a bush, so it thrives in containers (at least 5-gallon pots) or raised beds with vertical support. Just ensure the container has drainage and your trellis or cage is sturdy—these vines can get heavy! For small gardens, opt for bush varieties like ‘Waltham’ or prune vines to control sprawl.
How long does it take for butternut squash to mature in a small space?
Butternut squash typically needs 85–100 days to mature, regardless of space. However, container-grown squash may take slightly longer (5–10 extra days) due to root restrictions. Start seeds indoors 2–3 weeks before your last frost, and choose compact varieties to maximize efficiency. Patience pays off—harvest when the rind turns hard and the stem dries slightly.
What pests or diseases should I watch for in small-space squash?
Squash bugs, cucumber beetles, and powdery mildew are the top villains. Prevent pests with row covers early on, handpick eggs (tiny flat spots under leaves), and rotate crops yearly. For mildew, improve airflow with pruning and water at the base (not leaves). Neem oil or insecticidal soap can help if problems arise—act fast!
Can I grow butternut squash indoors or under grow lights?
Not ideally! Butternut squash needs full sun (6–8 hours daily) and plenty of space to vine. However, you can start seeds indoors under grow lights (14–16 hours/day) for 4–6 weeks before transplanting outside. If you’re dead-set on indoor growing, consider smaller winter squash like ‘Sugar Pie’ pumpkin, which tolerates containers better.
What’s the best way to save seeds from small-space squash?
Save seeds from your healthiest squash! Scoop out seeds, rinse them, and dry on a paper towel for 3–5 days. Store in a cool, dark place for up to 5 years. Pro tip: If growing in containers, let 1–2 vines produce squash for seed-saving—overcrowding stresses plants and reduces seed quality. Label varieties to avoid mix-ups!
Do butternut squash need special care in hot or cold climates?
Butternut squash loves warmth but can handle light frosts (down to 25°F) if mature. In hot climates, mulch heavily to retain moisture and protect roots. In cooler areas, extend the season with black plastic mulch or a cold frame. If nights dip below 50°F, use row covers to shield young plants—slow growth is better than stunted vines!
Wrapping up and next steps
Growing butternut squash in small spaces is totally doable—you just need a little creativity and the right techniques! With vertical trellises, container gardening, and smart spacing, you can enjoy a bountiful harvest without sacrificing your patio or balcony.
Whether you're a beginner or a seasoned gardener, these methods prove that space isn’t a limitation—it’s an opportunity!
Now that you’re armed with tips and tricks, roll up your sleeves and get planting! Start small, experiment with what works best for your space, and soon you’ll be reaping the rewards of your hard work. Happy gardening—your future butternut squash pies are waiting! 🎉🍠