
Pruning
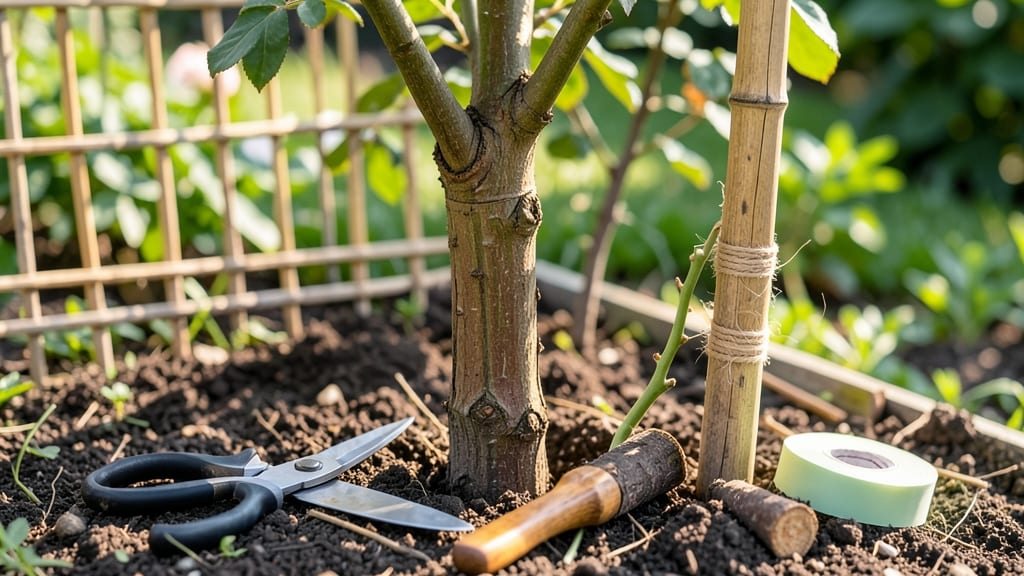
Your backyard could soon boast a rose tree that blooms like a cloud of pink and red. ✨ I’ve grafted roses onto strong rootstock for years, and the secret isn’t just in the technique—it’s in the timing and patience that turns a bare stem into a showstopper.
Most gardeners stop at bushes, but a rose tree adds drama, structure, and year-round interest.
The magic happens with a few key tools: sharp grafting knives, rootstock (like a hardy rose bush), scion wood (your desired rose variety), and grafting tape. You’ll work in late winter or early spring when the plant is dormant but ready to wake up.
The whip-and-tongue method is beginner-friendly, but even if you mess up, roses are forgiving—just try again.
By summer, your grafted union will be strong enough to support new growth, and by next year, you’ll have a lush, multi-stemmed rose tree that outshines any standard bush. The best part?
You can train it into a standard (single trunk) or an espalier (flat against a wall) for even more impact. No more hiding roses in the corner—they’ll be the centerpiece.
This method works for climates from zones 5-9, though colder areas need winter protection. The payoff? A rose that lives for decades, blooms reliably, and becomes the talk of the neighborhood. Let’s get those knives sharp and start grafting!
📚 In This Guide
- What you need
- Instructions
- Tips and common mistakes
- Wrapping up and next steps
What you need
- ● Healthy rose bush: Choose a disease-resistant variety (e.g., Knock Out® roses) with strong, flexible canes.
- ● Pruning shears: Bypass pruners (sharp, clean, and disinfected with rubbing alcohol).
- ● Hand pruners or loppers: For thicker canes (if needed).
- ○ Pruning saw: For stubborn, thick branches (optional but helpful).
- ● Rubbing alcohol (70% or higher): To sterilize tools between cuts.
- ● Garden twine or zip ties: For securing canes to the central support.
- ● Sturdy support structure: Wooden stake (4-6 ft tall)
- ● Or a metal trellis (for larger rose trees)
- ● Balanced fertilizer: (e.g., 10-10-10 or rose-specific formula).
- ● Mulch: Organic (e.g., shredded bark) to retain moisture.
- ● Pruning sealant: (e.g., tree paint) for large cuts to prevent disease.
- ● Gloves: Heavy-duty gardening gloves to protect hands.
- ● Hose with nozzle: For quick cleanup and watering.
- ● Plant ties or Velcro straps: For flexible cane adjustments.
- ○ Growth regulator: (e.g., B-Nine) to encourage bushier growth (optional for advanced gardeners).
Step-by-Step instructions for crafting a rose tree
Here's the method I've used to transform ordinary roses into stunning, multi-stemmed trees—no special tools required.
🌱 Step 1: Select and Prune Your Rose Bushes
Choose healthy, mature rose bushes with strong canes—at least 4-5 inches in diameter at the base. In late winter or early spring, when the plant is still dormant, prune back all stems to about 12-18 inches from the ground. This forces the plant to focus energy on producing multiple strong stems instead of one central trunk.
Use clean, sharp pruning shears to make cuts just above an outward-facing bud. I always sterilize my tools with rubbing alcohol first—rose canes are prone to disease, and you don’t want to introduce any infections. After pruning, you’ll have a bushy, multi-stemmed base ready for training into a tree shape.
✂️ Step 2: Train the Stems Into a Single Trunk
Select 3-4 of the strongest, straightest canes from your pruned bush. These will become the main trunk of your rose tree. Tie them together tightly at the base using soft garden twine or flexible plant tape, leaving about 6-8 inches of space between the tied stems and the first set of buds above.
As the canes grow, continue tying them together every 6-8 inches to encourage them to fuse naturally. This creates a single, sturdy trunk. If any canes start growing at odd angles, gently bend them into place while they're still flexible—don’t force them, or you’ll risk breaking them. Within a few weeks, the tied stems will begin to look like one thick trunk.
☀️ Step 3: Prune and Shape for a Natural Tree Form
Once your trunk is established and the canes have fused, it’s time to shape the tree. In early spring, prune back any side shoots or suckers growing below the first set of buds on your trunk. These will weaken the structure and encourage bushy growth instead of a clean, tree-like form. Remove any crossing or rubbing branches—these create wounds that can invite pests and diseases.
For the main branches, select 3-5 strong canes that emerge from the top of your trunk. Prune these back to just above a set of 3-5 buds, leaving the rest to grow naturally. This creates a natural, layered look while ensuring your rose tree stays balanced. Water deeply after pruning to help the plant recover and encourage new growth.
🌿 Step 4: Maintain and Encourage Year-Round Blooms
To keep your rose tree blooming consistently, prune lightly throughout the growing season. After each flush of flowers, trim back spent blooms to just above the next set of buds. This encourages the plant to produce more flowers instead of focusing energy on seed development. I also fertilize every 4-6 weeks with a balanced rose fertilizer to support steady growth and blooming.
Watch for signs of stress, like yellowing leaves or slow growth—these often mean your rose tree needs more nutrients or water. Mulch around the base with 2-3 inches of organic mulch to retain moisture and regulate soil temperature. With proper care, your rose tree will reward you with lush foliage and continuous blooms from spring through fall.
Tips & tricks for crafting a beautiful rose tree
Transforming a rose bush into a stunning tree takes patience, but these little tricks will help you avoid common pitfalls and create a showstopping centerpiece.
Pruning Precision: When pruning your rose bush in Step 1, make your cuts at a 45-degree angle just above an outward-facing bud. This angle helps rainwater run off the cut instead of pooling on it, which prevents rot. I always use the "bud facing outward" rule—this ensures new growth emerges away from the trunk, creating a more natural tree shape. The 12-18 inch height guideline is perfect for forcing multiple stems, but if your canes are particularly thick, you can trim slightly lower to give them more stability.
Tying Technique: In Step 2, when tying your 3-4 selected canes together, don't tie them too tightly at first. Start with loose knots that you can easily adjust as the canes grow. Every 6-8 inches you add a new tie, check if the canes have started to fuse naturally. If they're still separate, gently weave them together before tying. This gradual approach prevents the twine from cutting into the bark as the stems thicken. I've found that using soft garden twine rather than wire gives the canes room to grow without restriction.
Shape Maintenance: During Step 3's shaping phase, think of your rose tree like a natural tree—focus on creating a balanced silhouette. When selecting your 3-5 main branches, choose canes that emerge at different heights and angles. This creates visual interest and mimics how trees grow in nature. After pruning, step back and look at your tree from all sides—this helps you spot any uneven growth patterns early. I always make a habit of removing any branches that grow directly upward, as these can create a "Christmas tree" effect that looks unnatural.
Seasonal Care: The 4-6 week fertilization schedule in Step 4 works best when you adjust your approach based on the season. In early spring, use a fertilizer higher in nitrogen to promote leaf growth, then switch to a bloom-boosting formula in late spring. When applying your 2-3 inches of organic mulch, keep it several inches away from the trunk to prevent moisture buildup that can cause rot. I've noticed that my rose trees bloom most prolifically when I combine this mulching technique with a weekly deep watering during the growing season—it keeps the roots consistently moist without waterlogging.
Pro Tips for Make A Rose Tree
- Transforming a rose bush into a stunning tree takes patience, but these little tricks will help you avoid common pitf...
- Pruning Precision: When pruning your rose bush in Step 1, make your cuts at a 45-degree angle just above an outward-f...
- Tying Technique: In Step 2, when tying your 3-4 selected canes together, don't tie them too tightly at first. Start w...
Frequently asked questions
Got questions about creating a stunning rose tree? You’re not alone! Here are answers to the most common concerns—from timing to troubleshooting—so you can grow a lush, blooming beauty with confidence.
When is the best time to prune roses for a rose tree?
The ideal time is late winter or early spring (just before new growth starts). For climates with mild winters, prune in early spring to avoid frost damage. Avoid pruning in fall, as it can stimulate tender growth that won’t survive winter.
How do I know which branches to cut for a rose tree?
Look for healthy, sturdy canes (about pencil-thick) and remove:
- Dead, diseased, or crossing branches (cut at a 45° angle).
- Weak or spindly growth (prune back to a strong bud).
- Suckers (shoots from the base) unless you’re grafting a new variety.
Leave 3–5 main branches to form your tree’s structure.
Can I make a rose tree from any rose bush?
Not all roses work! Climbing roses, shrub roses, and some hybrid teas are great choices. Avoid miniature roses or ground-cover types—they lack the strong canes needed for a tree shape. Check your rose’s growth habit before starting!
How often should I water and fertilize a rose tree?
Watering: Keep soil consistently moist (1–2 inches deep) but avoid soggy roots. Water at the base early in the morning to reduce disease risk.
Fertilizing: Use a balanced rose fertilizer (like 10-10-10) every 4–6 weeks during growing season (spring–fall). Stop fertilizing in late summer to encourage winter hardiness.
Why aren’t my rose tree’s blooms lasting long?
Short-lived blooms often mean overcrowding, poor air circulation, or pests. Try these fixes:
- Thin out branches to improve airflow.
- Remove spent blooms (deadhead) to encourage new flowers.
- Check for aphids or Japanese beetles—spray with neem oil if needed.
- Ensure your rose gets 6+ hours of sunlight daily.
If blooms still fade fast, your rose may need more phosphorus-rich fertilizer (look for a 5-10-5 ratio).
Wrapping up and next steps
Creating a stunning rose tree is all about patience, precision, and a little love for your plants! 🌹 By mastering the art of pruning—choosing the right tools, understanding seasonal timing, and shaping with care—you’ll transform ordinary rose bushes into breathtaking, long-blooming masterpieces.
Remember, every snip is a step toward a garden that bursts with color year-round.
Now that you’re armed with the know-how, roll up your sleeves and get pruning! Start with one bush, experiment with techniques, and soon, your yard will be the talk of the neighborhood. Happy gardening—your rose tree awaits! 🌿✨