
Size
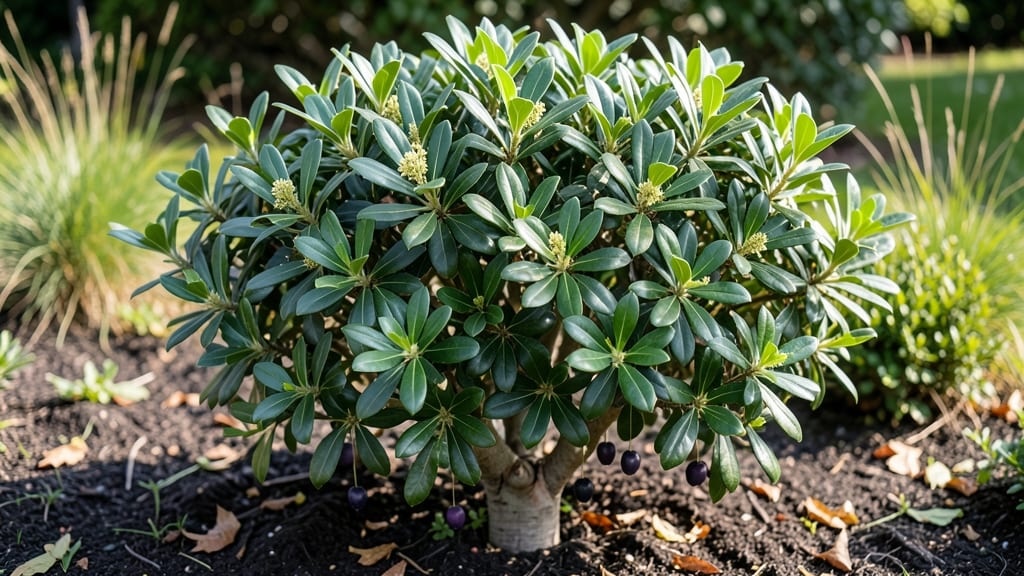
How to grow a laurel plant straight from your yard—year after year. 🌿 I’ve grown this fragrant evergreen for five seasons, and it’s become my go-to for both cooking and garden borders. The secret isn’t complicated: it’s about matching its Mediterranean roots to your growing conditions. Laurel thrives in well-draining soil and full sun, but it’s tough enough to handle partial shade. Water when the top inch of soil feels dry—overwatering is the #1 killer. Prune lightly after harvests to encourage bushier growth, and you’ll have fresh leaves for soups, stews, and garnishes without ever buying a bundle from the store. The payoff? A lush, glossy plant that smells amazing when brushed against, plus the satisfaction of growing your own culinary herb. Even better, it stays evergreen through winter, making it a standout in any garden. Works as a hedge, potted plant, or kitchen garden staple. Here’s how to get started without the guesswork!
📚 In This Guide
- What you need
- Instructions
- Tips and common mistakes
- Wrapping up and next steps
What you need
- ● Laurel plant: Seeds, cuttings (4–6 inches long), or a 1–2 gallon potted sapling from a nursery (e.g., Laurus nobilis for sweet bay laurel).
- ● Well-draining soil: 5–10 gallons of a mix of 60% potting soil, 30% perlite or coarse sand, and 10% compost (for nutrients).
- ● Container or garden space: For containers: 1–3 gallon pots (with drainage holes) for young plants; upgrade to 5+ gallon pots or in-ground planting as the plant matures (laurel can grow 15–20 feet tall!).
- ● For in-ground: A sunny spot with 6+ hours of light daily and well-draining soil (amend with compost if needed).
- ● Watering can or hose: With a gentle spray nozzle (laurel dislikes soggy roots!).
- ○ Fertilizer (optional but helpful): Balanced 10-10-10 fertilizer (1 tbsp per gallon of soil) every 4–6 weeks during growing season (spring–fall).
- ● OR organic options like fish emulsion or worm castings.
- ● Pruning shears: Sharp, bypass-style shears (for trimming and harvesting leaves).
- ○ Gloves (optional): Laurel leaves can be mildly irritating to sensitive skin.
- ○ Mulch (optional): 1–2 inches of wood chips or straw to retain moisture and suppress weeds.
- ● Support stake (for young plants): A 4–5 foot bamboo stake if planting in windy areas.
- ○ pH test kit (optional): To check soil acidity (laurel prefers 6.0–7.5 pH).
- ● Hardiness zones: 7–10 (outdoors). Can be grown indoors in cooler zones with bright, indirect light.
- ● Temperature: Thrives in 60–85°F; protect from below 20°F (use a frost cloth if needed).
- ● Humidity: Prefers moderate to high humidity (mist leaves occasionally if indoors).
Step-by-step instructions for growing laurel plants
Laurel thrives with patience and the right conditions—here’s how to cultivate it like a pro.
🪴 Step 1: Choose the Right Location and Soil
Laurel loves bright, indirect light—think 4-6 hours of morning sun with afternoon shade, especially in hotter climates. A south- or east-facing window works well indoors, while outdoors, it thrives under dappled sunlight or in partial shade. Avoid harsh afternoon rays, which can scorch its glossy leaves.
Use well-draining, slightly acidic soil (pH 6.0-7.0). A mix of 50% potting soil, 30% perlite, and 20% compost keeps roots aerated and prevents waterlogging. Laurel hates soggy feet, so if your soil drains poorly, amend it with sand or coconut coir. Test the soil’s moisture by sticking your finger 1 inch deep—it should feel slightly damp but not wet.
☀️ Step 2: Plant and Establish Your Laurel
Plant your laurel in a container at least 12 inches deep and wide (or in the ground with 3 feet of spacing between plants). Dig a hole twice as wide as the root ball and place the plant so the top of the root ball sits level with the soil surface. Laurel roots are sensitive—don’t bury the stem too deep, or it’ll rot.
Water deeply immediately after planting to settle the soil around the roots, then let the top 1 inch of soil dry out before watering again. Overwatering is the fastest way to kill laurel—yellowing leaves or wilting are red flags. Mulch with 2 inches of organic mulch (like bark or straw) to retain moisture and regulate soil temperature.
💧 Step 3: Water and Fertilize for Healthy Growth
Laurel prefers moderate moisture—water when the top 1-2 inches of soil feel dry to the touch. In summer, this might mean every 5-7 days; in winter, every 10-14 days. Check the soil before watering—if it’s still damp, wait. Underwatering causes leaf drop, while overwatering leads to root rot.
Feed your laurel once in spring with a balanced, slow-release fertilizer (like 10-10-10). Too much fertilizer burns roots, so dilute it to half-strength. Skip fertilizing in fall and winter—laurel grows slowly then and doesn’t need extra nutrients. You’ll know it’s happy when new leaves emerge bright green and glossy in spring.
✂️ Step 4: Prune to Encourage Bushy Growth
Prune laurel after flowering (if applicable) or in early spring to shape it and encourage dense foliage. Use clean, sharp pruners to cut back 1/3 of the plant’s height if it’s leggy. Avoid cutting into old wood—laurel struggles to regrow from bare stems. Trim any dead, yellow, or crossing branches first.
For a hedge, prune twice a year: once in late spring and again in early summer. Shape with light cuts to avoid stressing the plant. Laurel responds well to pruning but won’t tolerate harsh cuts. If you see new growth at the tips, you’re pruning correctly—old, woody stems won’t sprout new leaves.
⏰ Step 5: Overwinter Laurel for Year-Round Success
Laurel is evergreen but needs protection in winter if temperatures drop below 20°F. Move potted plants to a cool, bright spot (like a garage or shed) or wrap the pot in bubble wrap to insulate roots. If outdoors, mulch heavily (4-6 inches) and group plants together to share warmth.
Reduce watering in winter—laurel goes semi-dormant. Water only when the soil is completely dry (every 3-4 weeks). Watch for brown leaf tips, which signal dry air. Mist leaves occasionally or place a pebble tray with water nearby to boost humidity. With proper care, your laurel will reward you with lush, fragrant foliage year after year.
Tips & tricks for perfect laurel plant growth
Real talk: The difference between a thriving laurel and one that struggles often comes down to these small but critical details.
Lighting Strategy: Those 4-6 hours of morning sun are non-negotiable, but here's what nobody tells you—if you're growing indoors, rotate your plant every 2-3 weeks so all sides get even light exposure. Laurel will lean toward the light source, and consistent rotation keeps it balanced. I've seen plants grow lopsided when left in one spot too long, which weakens the structure.
Soil Mix Secrets: When mixing your 50% potting soil, 30% perlite, and 20% compost, sift the perlite first to remove any fine particles that could compact. The goal is to keep that mix fluffy—think "cloud-like" texture when you hold it. I learned this the hard way after compacting the soil too much, which led to root rot despite my careful watering habits.
Watering Rescue: If your laurel's leaves start yellowing between veins (a classic overwatering sign), stop watering immediately and let the top 2 inches of soil dry out completely before trying again. Then, repot into fresh, well-draining soil mix. I've revived several plants this way that were nearly lost—just give it time to recover in a bright spot with reduced watering.
Pruning Precision: When you're cutting back 1/3 of the plant's height in Step 4, always make your cuts just above a leaf node where new growth can emerge. Avoid cutting into old, woody stems—they won't regenerate. I use a small white marker to trace where I'll cut before making the actual snip, which helps me visualize the final shape better.
Pro Tips for Grow Laurel Plant
- Real talk: The difference between a thriving laurel and one that struggles often comes down to these small but critical details.
- Lighting Strategy: Those 4-6 hours of morning sun are non-negotiable, but here's what nobody tells you—if you're growing indoors, rotate your plant every 2-3 weeks so all sides get even light exposure.
- Soil Mix Secrets: When mixing your 50% potting soil, 30% perlite, and 20% compost, sift the perlite first to remove any fine particles that could compact.
Frequently asked questions
Got questions about growing laurel? You’re not alone! Here are some of the most common concerns—and their answers—to help you cultivate a thriving plant with confidence.
How fast does a laurel plant grow?
Laurel plants grow at a moderate pace, typically adding 12–24 inches per year under ideal conditions. Young plants may grow faster, while mature specimens slow down. Pruning regularly encourages bushier, denser growth. Patience is key—these evergreens are built to last!
Can laurel survive winter frost?
Most laurel varieties (like Laurus nobilis) are hardy to USDA Zones 7–10 and can tolerate light frost. However, young plants or severe freezes (below 15°F) may damage leaves. Protect tender plants with mulch or a burlap wrap. If you’re in a colder zone, grow laurel in containers and move it indoors during winter.
Why are my laurel leaves turning yellow?
Yellowing leaves usually signal overwatering, poor drainage, or nutrient deficiency. Check soil moisture—laurel prefers it slightly dry between waterings. Yellow edges may also mean chlorosis (iron deficiency), common in alkaline soils. Amend soil with chelated iron or compost, and ensure pots have drainage holes.
Can I grow laurel indoors?
Laurel thrives indoors near bright, indirect light (e.g., a south-facing window). Use a well-draining potting mix and a pot with drainage. Keep humidity moderate and prune regularly to maintain shape. Just avoid drafts—laurel dislikes sudden temperature swings.
What’s the difference between laurel and bay leaves?
Laurel and bay leaves are the same plant
—Laurus nobilis. The terms are often used interchangeably, though "bay leaf" refers specifically to the aromatic leaves used in cooking. The true bay laurel tree is the same species, just grown for ornamental or culinary purposes.
How do I propagate laurel from cuttings?
Propagating laurel is easy! Take 4–6 inch cuttings from healthy stems in spring or summer. Remove lower leaves, dip in rooting hormone, and plant in moist perlite or sand. Keep cuttings in indirect light and maintain humidity (use a plastic bag). Roots should form in 4–8 weeks.
Still stumped? Drop your question in the comments—we’re happy to help your laurel thrive!
Wrapping up and next steps
Growing laurel plants is a rewarding journey that brings fragrant greenery and culinary versatility to your garden—whether you're a seasoned gardener or just starting out! 🌿 With the right soil, sunlight, and care, these evergreen shrubs thrive year-round, offering both beauty and practical benefits.
Now that you’re armed with tips on planting, pruning, and troubleshooting, take the next step and plant your first laurel cutting or seedling today!
Watch your herb garden flourish, and soon you’ll be harvesting fresh laurel leaves for cooking, crafts, or simply enjoying the lush, aromatic presence in your outdoor space. Happy growing! 🌱