
How To
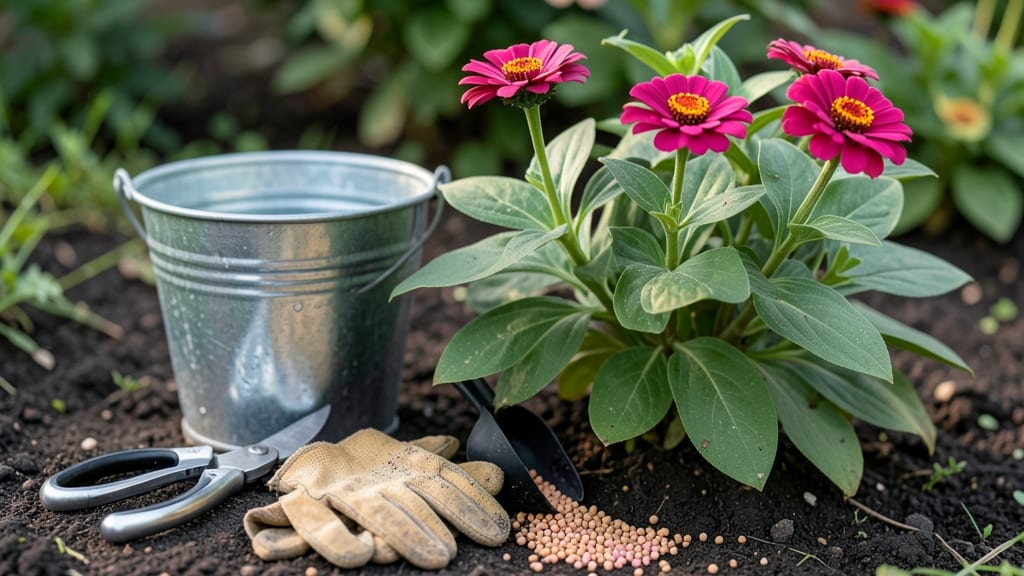
Those leggy zinnias reaching for the sky? ✂️ It’s time to learn how to make zinnias bushier. I’ve turned my once-tall-and-lean zinnias into dense, full bushes with just a few strategic cuts—and you can too.
The secret isn’t complicated, but timing and technique make all the difference. Skip the guesswork and let’s get those plants thick with blooms instead of just height.
You’ll need clean pruners, a sunny spot, and a little patience. The best time to prune is early morning when plants are hydrated, and you’ll want to focus on the top 1/3 of each stem.
Snip just above a leaf node (that little bump where leaves grow), and watch as new branches sprout within 7-10 days. Over-pruning? That’s the fast track to floppy stems—so less is more here.
By midseason, you’ll have zinnias so bushy they’ll block weeds and keep blooming until frost. The key is repeating the process every 2-3 weeks to encourage new growth. No more sad, stretched-out stems—just compact, vibrant plants that turn heads (and attract pollinators). Ready to transform your garden?
Works for all zinnia varieties—dwarf, tall, or everything in between. Just adjust your pruning height based on the type. Here’s exactly how to do it without killing your plants (I’ve made that mistake too).
📚 In This Guide
- What you need
- Instructions
- Tips and common mistakes
- Wrapping up and next steps
What you need
- ● Pruning shears or sharp scissors: Clean, sharp tools (sterilized with rubbing alcohol) to make precise cuts without damaging stems.
- ○ Gloves (optional but recommended): Protect your hands from thorns and dirt—gardening gloves work great!
- ● Balanced fertilizer (10-10-10 or 5-5-5): A small amount (½ tsp per plant) to promote bushy growth after pruning.
- ● Watering can or hose with a gentle nozzle: Keep zinnias well-hydrated (1–2 inches of water per week) to support recovery.
- ○ Compost or mulch (optional): Improves soil health and retains moisture—sprinkle a 1-inch layer around the base.
- ● Healthy zinnias: Choose plants with no signs of disease (yellowing leaves, spots, or wilting).
- ● Sunlight: Full sun (6+ hours daily)—zinnias need it to thrive and branch out!
- ● Well-draining soil: Amend clay soil with compost if drainage is poor.
- ● Patience: Bushier growth takes 2–3 weeks after pruning—consistency is key!
Step-by-Step instructions for pruning zinnias to encourage bushier growth
Here's the method I rely on to transform leggy zinnias into full, compact bloomers—no fancy tools required.
✂️ Step 1: Identify and Remove Leggy Stems
Start by pinching or cutting back stems that have grown taller than 12 inches without branching. These vertical shoots are called "main stems," and they focus all their energy on height rather than lateral growth. Use clean, sharp pruners or simply pinch with your thumb and forefinger just above a set of healthy leaves or a leaf node.
I always look for stems that stretch between blooms with bare spots—these are the ones to prune. Cutting at a 45-degree angle just above a leaf node encourages new growth to sprout from that exact spot. Never cut into leaf tissue or you'll risk disease entry points. If you're unsure which stems to trim, focus on the tallest, thinnest stems first—they're the biggest energy vampires.
🌱 Step 2: Pinch Back New Growth for Branching
Once you've removed the leggy stems, focus on the remaining growth. When new shoots emerge that are 4-6 inches tall and have 3-4 sets of leaves, pinch back the top 1/3 of the stem. This might seem counterintuitive—why remove growth when you want more flowers?—but this forces the plant to redirect energy into producing side branches rather than one long stem.
I like to do this on a cloudy morning when the plants are slightly turgid with water. The fresh cut will seal faster in cooler temperatures, reducing the risk of infection. Watch for new growth sprouting from the leaf axils within 7-10 days. These lateral shoots will become your bushy framework, so give them space to grow without crowding.
☀️ Step 3: Deadhead and Fertilize for Compact Growth
After pruning, remove any spent blooms by cutting the stem back to the first set of healthy leaves below the flower head. This prevents the plant from wasting energy producing seeds and redirects it toward new flower buds. I always use clean pruners and wipe them with rubbing alcohol between cuts to prevent spreading disease.
Feed your zinnias with a balanced liquid fertilizer (10-10-10) diluted to half strength immediately after pruning. The new growth will be more vigorous and produce thicker stems. Water deeply at the base—never overhead—to keep foliage dry and prevent fungal issues. You'll notice new buds forming at the leaf nodes within 2-3 weeks, signaling your pruning worked.
🌿 Step 4: Provide Support and Optimal Conditions
Stake or cage your zinnias if they're reaching 18 inches tall to prevent them from flopping over. I use bamboo stakes tied loosely with soft twine to avoid damaging the stems. The goal is to support the plant's new bushy structure without restricting growth. Place your zinnias in full sun (6+ hours daily) and ensure they have well-draining soil.
Here's the thing—zinnias thrive on neglect after the initial pruning. Water only when the top 1-2 inches of soil feel dry, and avoid over-fertilizing. Too much nitrogen will produce lush foliage but fewer flowers. You'll see the full transformation when your zinnias develop a compact, multi-branched habit with blooms along every stem, not just at the top.
⏰ Step 5: Repeat Pruning Throughout the Season
Zinnias are prolific bloomers, but they need regular maintenance to stay bushy. Every 3-4 weeks, repeat the pinching process on any new leggy growth. I also remove any stems that become overcrowded to improve air circulation. This keeps your plants looking full and encourages continuous flowering.
Don't be afraid to get aggressive with your pruning—zinnias are resilient and will bounce back quickly. If you see a stem growing too tall again, cut it back immediately. The key is consistency. By the end of the season, you'll have a dense, bushy zinnia plant that looks like a professional display rather than a wild, straggly specimen.
Tips & tricks for perfectly bushy zinnias
These gardening secrets will help you transform straggly zinnias into lush, full plants that bloom like crazy.
Timing Secret: In Step 2, when pinching back new growth at 4-6 inches, focus on the top two sets of leaves—this is where lateral buds form most vigorously. I've found that pinching just above the third set of leaves (not the fourth) gives the best branching response. The key is patience: those new shoots won't appear until 7-10 days, so resist the urge to check daily!
Pruning Precision: For Step 1, use a 45-degree angle cut just above a leaf node—this creates a larger surface area for water absorption and reduces disease risk. I always sterilize my pruners with rubbing alcohol between cuts, especially when working with multiple plants. If you're using your fingers to pinch, make sure your hands are clean to prevent bacterial spread through the cuts.
Fertilizer Strategy: After deadheading in Step 3, I recommend applying that half-strength 10-10-10 fertilizer directly to the soil around the base, not the leaves. This prevents leaf burn while ensuring roots get the nutrients they need for vigorous regrowth. The 2-3 week window for new buds to form is your reward for this timing—don't skip the fertilizer step!
Support System: When your zinnias reach 18 inches in Step 4, I suggest using soft garden twine instead of wire for staking. The gentle give prevents stem damage as the plant grows. Place stakes 2-3 inches away from the main stem to avoid restricting growth while still providing support. This small detail makes a big difference in maintaining a healthy structure.
Pro Tips for Make Zinnias Bushier
- These gardening secrets will help you transform straggly zinnias into lush, full plants that bloom like crazy.
- Timing Secret: In Step 2, when pinching back new growth at 4-6 inches, focus on the top two sets of leaves—this is where lateral buds form most vigorously.
- Pruning Precision: For Step 1, use a 45-degree angle cut just above a leaf node—this creates a larger surface area for water absorption and reduces disease risk.
Frequently asked questions
Got questions about making your zinnias bushier?
You’re not alone! Here are answers to the most common queries—so you can grow a lush, full zinnia bush without the guesswork.
How often should I prune zinnias for bushiness?
Prune zinnias every 2–3 weeks during the growing season (spring to fall) to encourage branching. Focus on pinching back the top sets of leaves when plants are 6–8 inches tall—this triggers lateral growth. Avoid over-pruning, though, as zinnias are resilient but not indestructible!
Can I prune zinnias too late in the season?
Yes, but timing matters! Prune zinnias before the first frost (typically late summer/early fall) to allow new growth to harden off. Late-season pruning may stunt flowering or leave plants vulnerable to cold. If frost is imminent, skip it—zinnias focus on survival, not bushiness!
What if my zinnias keep stretching tall instead of bushy?
Tall, leggy zinnias usually mean too little light or overcrowding. Move plants to full sun (6+ hours/day) and thin them so stems aren’t competing. Also, check your fertilizer—too much nitrogen promotes leafy growth over blooms. Switch to a balanced 10-10-10 or bloom-boosting formula.
Do I need special tools to prune zinnias?
Not at all! Use clean, sharp scissors or pruners (disinfect with rubbing alcohol between cuts) for precision. For quick jobs, your fingers work fine—just pinch above a leaf node. Avoid dull tools, which crush stems and invite disease. A small pair of bypass pruners is ideal for larger stems.
Will pruning zinnias reduce their flowers?
Not if done right! Pruning encourages more blooms by promoting bushier growth. Just avoid cutting into flower buds or old blooms (deadhead those instead). Focus on new growth—you’ll see a surge in flowers as the plant fills out. Think of it as a bloom reset button!
Wrapping up and next steps
Growing bushier zinnias is all about timely pruning, proper spacing, and a little extra care—and you’ve got the know-how now! With regular deadheading, strategic trimming, and the right balance of sunlight and water, your zinnias will thrive, blooming fuller and more vibrant than ever. 🌸
Ready to put these tips into action? Grab your pruners, step outside, and give your zinnias the love they deserve. Watch them transform into a lush, eye-catching display! Happy gardening! 🌱