
How To
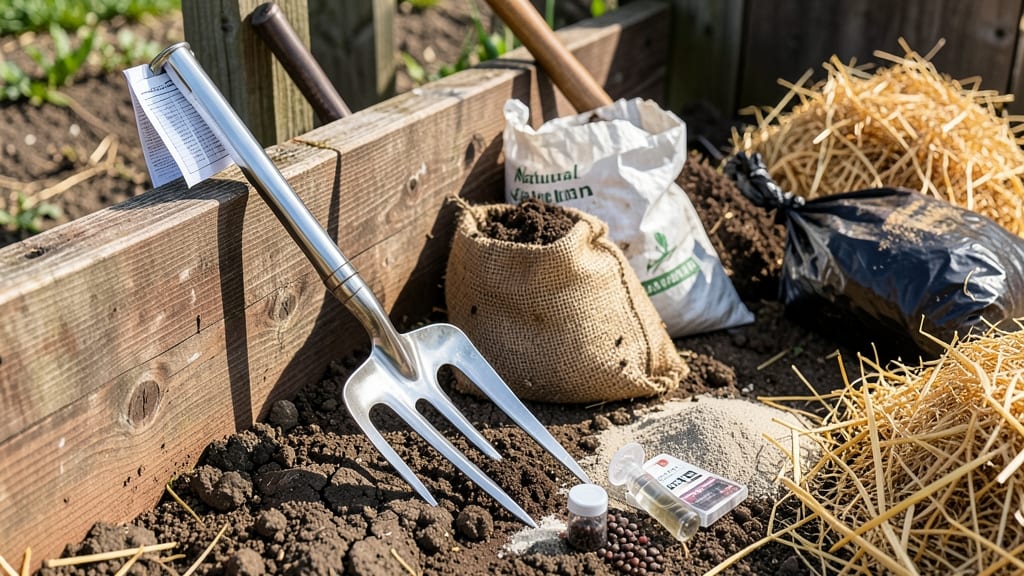
Last spring, I nearly lost my vegetable garden to drowning in rain—until I learned how to amend clay soil for vegetable gardening. 🌱 The heavy, waterlogged mess became a crumbly, root-friendly bed in just a few months, and my tomatoes tripled in size. The secret?
Breaking up that dense clay without turning it into sand. Start with organic matter—compost, aged manure, or leaf mold—to loosen compaction. Work it into the top 6-12 inches of soil, mixing thoroughly. For stubborn clay, add sand (coarse, not fine) or gypsum to improve drainage, but don’t overdo it.
Think of it like fluffing a pillow: you want air pockets, not a powdery mess. By summer, roots will spread easily, and water will drain instead of pool. You’ll notice darker, richer soil that holds moisture without turning to mud. The payoff?
Healthier plants that fight disease and produce bigger harvests—no more sad, stunted veggies. This works for raised beds, in-ground plots, and even containers. The key is patience; soil structure takes time to improve, but every season gets better. Let’s get your clay soil working for you!
📚 In This Guide
- What you need
- Instructions
- Tips and common mistakes
- Wrapping up and next steps
What you need
- ● Organic Matter: Compost (2–3 inches per square foot) – homemade or store-bought
- ● Well-rotted manure (1–2 inches per square foot) – cow, horse, or chicken (aged 6+ months)
- ○ Leaf mold or peat moss (1–2 inches) – optional but great for moisture retention
- ● Amendments for Structure: Coarse sand (1–2 inches) – builder’s sand or horticultural sand (avoid fine sand!)
- ● Perlite or vermiculite (½ cup per square foot) – for long-term aeration
- ● Tools: Garden fork or broadfork (essential for breaking up clay without compacting it)
- ● Shovel or spade (for mixing amendments)
- ● Rake (to level the soil after amending)
- ● Wheelbarrow (for hauling materials)
- ● Garden hose or sprinkler (for watering)
- ○ Prerequisites: Test your soil’s pH (optional but helpful) – aim for 6.0–7.0 for most veggies
- ● Clear debris from the garden bed (rocks, weeds, old plants)
- ● Work on a dry day (clay is easier to amend when slightly damp, not soggy!)
- ● 🔥 Layer it right: Alternate between clay and amendments (e.g., clay → compost → sand) for even distribution.
- ● 🌡️ Timing matters: Amend in early spring or fall—avoid working clay when it’s frozen or waterlogged.
- ● ✨ Go slow: Heavy clay needs gradual improvement. Spread amendments over 2–3 seasons for best results.
Step-by-Step instructions for amending clay soil for vegetable gardens
Clay soil can feel overwhelming, but with the right amendments, you'll transform it into fertile, well-draining ground.
🌱 Step 1: Test Your Soil’s Current Condition
Take a handful of damp clay soil and squeeze it tightly. If it forms a hard, dense ball that cracks when dropped, you're dealing with high clay content. Next, poke a stick into the soil—if it resists and feels slick, that's your clue to focus on loosing it up. This test helps you gauge how much organic matter you'll need to add.
Dig a small hole about 6 inches deep and observe the soil layers. Clay often compacts in distinct layers, making it harder for roots to penetrate. This visual check will guide how thoroughly you need to amend the area. The goal is to break up these layers so roots can spread easily.
🪴 Step 2: Spread Organic Matter Evenly Across the Area
Use 3-4 inches of compost or well-rotted manure as your base layer. Spread it evenly over the entire garden bed, working it into the top 6 inches of soil. Organic matter improves soil structure by creating tiny air pockets, which helps break up the clay's dense nature. I like to use a garden fork to gently loosen the soil before adding compost—this prevents clumping.
For larger areas, consider layering 1 inch of compost with a thin layer of coarse sand or perlite every 6 inches down. This method mimics natural soil stratification and prevents compaction. Water the area lightly after spreading to help the organic matter integrate with the clay.
☀️ Step 3: Incorporate Bulk Amendments for Long-Term Improvement
Add 2-3 inches of coarse sand or perlite to improve drainage, especially in low-lying areas where water pools. Mix it into the top 8 inches of soil using a broadfork or shovel. Avoid fine sand—it compacts easily and defeats the purpose. Coarse sand or perlite creates larger pores that help water drain while still holding enough moisture for roots.
For nutrient-rich soil, work in 1-2 inches of aged leaf mold or peat moss alongside the compost. These materials hold moisture without suffocating roots, which is critical in clay soil. I like to mix these amendments in layers, alternating between organic matter and coarse materials to create a balanced texture.
💧 Step 4: Water and Let the Soil Settle
After amending, water the bed deeply to help the materials integrate. Aim for 1 inch of water to encourage the compost and organic matter to break down and fill the gaps in the clay. Avoid overwatering, which can compact the soil again. Let the soil settle for 1-2 weeks before planting—this gives the amendments time to work their magic.
During this waiting period, check the soil’s moisture level by sticking your finger 2 inches deep. Clay soil holds moisture well, so you’ll likely need to water less frequently than with sandy soil. If the soil feels too wet or sticky, add a thin layer of mulch to help regulate moisture and prevent compaction.
✂️ Step 5: Plant and Monitor for Adjustments
Once the soil has settled, plant your vegetables, spacing them according to their needs. Keep an eye on how the soil behaves—if water pools around plants after rain, add more coarse sand or perlite to improve drainage. If the soil feels too dry or cracks appear, increase the organic matter to help retain moisture.
Over time, clay soil amended with organic matter will become looser and more fertile. I’ve seen dramatic improvements in just one growing season. Continue adding compost annually to maintain the soil’s structure and fertility. This ongoing care ensures your vegetables thrive in the improved conditions.
Tips & tricks for transforming heavy clay soil
Working with clay soil doesn't have to be a battle—these practical strategies will help you create the perfect foundation for your vegetable garden.
Soil Testing Technique: I've found that the squeeze test in Step 1 reveals more than just clay content—it also shows how much resistance your roots will face. If the soil forms a dense ball that cracks when dropped, you're dealing with extreme compaction. For these cases, consider adding an extra 1-2 inches of compost to the 3-4 inches recommended, especially in the top 6 inches where most roots will grow. This extra organic matter creates critical air pockets that break up the clay's natural tightness.
Layering Strategy: When you're layering amendments in larger areas as mentioned in Step 2, think of it like building a lasagna—alternating textures matters just as much as the ingredients. After spreading your 1 inch of compost, add a ½-inch layer of coarse sand or perlite, then repeat. This creates natural drainage channels while preventing compaction from settling. The key is to keep these layers loose—never tamp them down after adding.
Drainage Check: In Step 3, when adding your 2-3 inches of coarse sand or perlite, focus on low-lying areas first where water naturally pools. After mixing into the top 8 inches, create small test mounds (about 6 inches high) and pour water over them. If water drains within 10-15 minutes, you've achieved proper drainage. If not, add another ½-inch layer of coarse material and retest. This simple test prevents soggy soil problems before they start.
Post-Watering Insight: That 1-inch watering in Step 4 isn't just about hydration—it's about activating your amendments. The water helps break down the compost and organic matter, filling those critical gaps in the clay. After watering, run your finger 2 inches deep. If it feels cool and slightly springy (not wet or dry), you've hit the perfect moisture balance. This is your signal that the amendments are integrating properly.
Pro Tips for Amend Clay Soil For Vegetable Gardening
- Working with clay soil doesn't have to be a battle—these practical strategies will help you create the perfect founda...
- Soil Testing Technique: I've found that the squeeze test in Step 1 reveals more than just clay content—it also shows ...
- Layering Strategy: When you're layering amendments in larger areas as mentioned in Step 2, think of it like building ...
Frequently asked questions
Got questions about transforming clay soil into a veggie garden paradise? We’ve got answers! Here are some of the most common concerns—plus quick fixes to keep your plants thriving.
How soon can I plant after amending my clay soil?
After adding organic matter (like compost or aged manure), wait at least 2–4 weeks before planting. This gives microbes time to break down materials and improve soil structure. For heavy clay, extend this to 6–8 weeks—patience pays off with better root growth!
Will sand really help my clay soil?
Not the right kind! Coarse sand (like builder’s sand) can worsen drainage by creating pockets. Instead, use organic amendments like compost, peat moss, or coconut coir to loosen clay naturally. Think of it as "fluffing" the soil—gentle and effective!
How often should I re-amend clay soil?
Test your soil every 1–2 years (a simple jar test or pH kit works). If it feels dense or waterlogged again, add 2–3 inches of compost and mix lightly. Heavy clay benefits from annual top-dressing with organic matter to maintain structure.
What if my amended soil still puddles after rain?
Puddling means your soil needs more organic material or better aeration. Try:
- Gypsum (calcium sulfate) to break up clay particles over time.
- Deep tilling (if not compacted) to create air pockets.
- Planting cover crops like clover or ryegrass to improve drainage naturally.
Can I grow vegetables in clay soil without amending it?
Yes, but with adaptations! Choose clay-tolerant crops like kale, Swiss chard, or potatoes. Raise beds slightly to improve drainage, and mulch heavily to prevent compaction. Just expect slower growth—amending will unlock your soil’s full potential!
Wrapping up and next steps
Amending clay soil for your vegetable garden is all about patience, persistence, and a little elbow grease—but trust us, the results are worth it! 🌱 By adding organic matter like compost, sand, or gypsum, you’ll transform dense, waterlogged clay into a nutrient-rich, well-draining paradise for your plants.
Start small, test your progress, and soon you’ll be harvesting thriving veggies with ease.
Ready to dig in? Roll up your sleeves and get started today! Your future garden (and taste buds) will thank you. 🥕✨