
Pruning
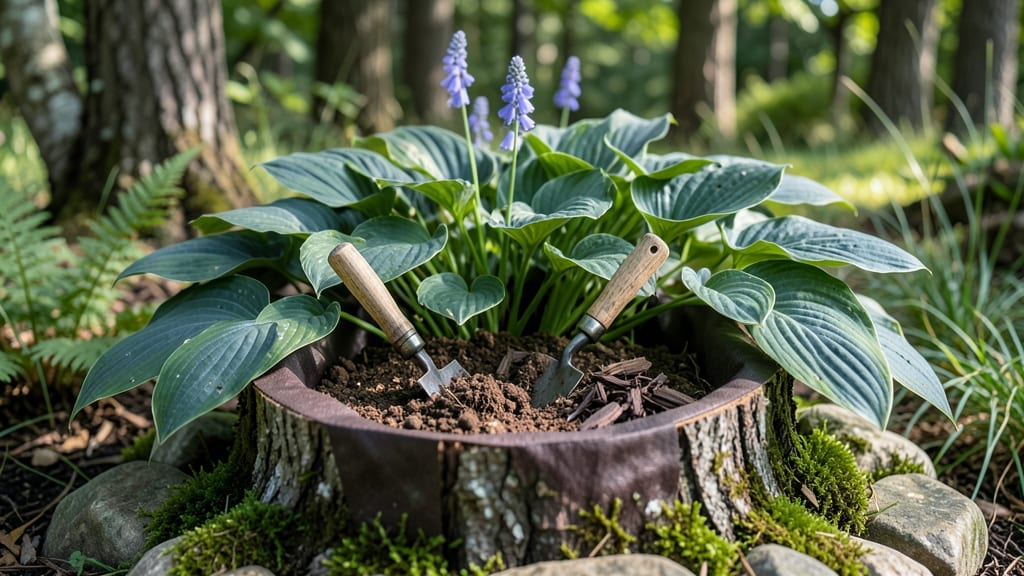
That gnarled tree stump isn’t trash—it’s a waiting garden statement. ✨ I’ve turned half-a-dozen stumps into lush, living planters that steal the show in any yard, and the best part? It takes less than an afternoon to transform it from eyesore to eco-friendly art.
The secret starts with the right stump: fresh cuts work best, but even old, weathered ones can shine with a little prep. You’ll need basic tools—a drill, some waterproof sealant, and a few hours of weekend time—and suddenly, you’ve got a built-in planter that’s both functional and stunning.
No two stump planters look alike, which is half the fun. By the end, you’ll have a thriving mini-garden that attracts pollinators, hides the stump’s hollow center, and adds textural contrast to your landscape.
Succulents, ferns, or even trailing ivy will spill over the edges, creating a natural, organic look that’s impossible to ignore. Works for any yard size, from city balconies to sprawling backyards. Here’s how to make it happen—no green thumb required.
📚 In This Guide
- What you need
- Instructions
- Tips and common mistakes
- Wrapping up and next steps
What you need
- ● Tree stump: A freshly cut, clean stump (diameter: 6–18 inches; height: 12–24 inches). Pro tip: If the stump is old, sand or scrape off any remaining bark or mold!
- ● Drill (cordless recommended) with drill bit set (1/4"–1/2" for drainage holes).
- ○ Saw (hand saw, circular saw, or reciprocating saw) for shaping (optional but helpful).
- ● Sandpaper (80–120 grit) or an electric sander to smooth rough edges.
- ● Waterproof liner: Heavy-duty plastic sheeting (6–10 mil thickness, cut to fit stump interior).
- ● OR a pre-made planter liner (fabric or plastic, sized to your stump).
- ● Potting soil: Well-draining mix (1–2 bags, depending on stump size). Pro tip: Add perlite or orchid bark for extra aeration!
- ● Drainage material: Small rocks, gravel, or broken pottery shards (1–2 inches deep).
- ● Plants: Choose stump-friendly plants like ferns, moss, succulents, or ornamental grasses (avoid heavy rooters).
- ○ Outdoor paint or sealant: Non-toxic, weather-resistant (e.g., Milk paint or acrylic exterior paint). Optional: Stencils or stamping tools for designs!
- ● Paintbrushes (various sizes) or a roller for sealing.
- ○ Screws or nails (optional, for securing liner if needed).
- ● Decorative elements: Mosaic tiles, LED string lights, or a mini water feature.
- ● Stump topper: A terracotta pot or wooden planter box to elevate your plants.
- ● Non-slip mat (for safety if placing on decks or patios).
- ● Weatherproof glue (to secure loose bark or decorative pieces).
Step-by-Step instructions for transforming a tree stump into a planter
Here's how I turn a simple stump into a charming, functional garden feature—no special tools required.
🪴 Step 1: Clean and Prepare the Stump Surface
Start by removing any loose bark, moss, or debris with a stiff brush or putty knife. I like to use a wire brush for stubborn patches—it scrubs away old growth and creates a rough texture for better adhesion later. The goal is a clean, dry surface where soil can grip properly.
If the stump has deep cracks or holes, fill them with a quick-drying wood filler or outdoor-grade spackle. Let it dry completely—this prevents soil from spilling out later. For extra stability, I sometimes add a few screws around the edges to create small pockets for soil retention.
✂️ Step 2: Drill Drainage Holes and Install a Liner
Using a 1-inch drill bit, create drainage holes in a spiral pattern around the stump's edges. Space them about 4-6 inches apart—this prevents waterlogging while allowing roots to breathe. For larger stumps, I add a few holes near the center too.
Line the inside with a heavy-duty landscape fabric or burlap sack, securing it with staples or small nails. This keeps soil in place while allowing excess water to drain. I tuck the fabric neatly into the drainage holes so it doesn't block them—water should flow freely out the bottom.
🌱 Step 3: Fill With Soil and Plant Your Choice of Greenery
Fill the stump about halfway with a mix of potting soil and compost (I use equal parts). For a 4-inch diameter stump, about 2 gallons of mix works perfectly—adjust for larger sizes. Press the soil down gently to eliminate air pockets, then add a 1-inch layer of mulch on top to retain moisture.
Plant shallow-rooted annuals like sedum, ferns, or ornamental grasses—they thrive in confined spaces. For a dramatic effect, I often add one small shrub (like a dwarf boxwood) in the center surrounded by trailing plants. Water thoroughly after planting, then keep the soil lightly moist until established.
💧 Step 4: Maintain and Enjoy Your Upcycled Planter
Water deeply once a week unless it rains—stumps dry out faster than ground-level planters. I check moisture by sticking my finger 1 inch into the soil; if it's dry, it's time to water. Fertilize lightly every 4-6 weeks with a balanced, slow-release fertilizer.
Here's the thing—I usually add a few small pebbles or decorative stones around the base to catch spilled soil and improve drainage. Over time, the stump becomes a lush, self-contained garden feature that adds character to any yard.
Tips & tricks for perfect tree stump planters
Transforming a stump into a planter is easier than you think—here are my go-to tricks to make the process smoother and your finished project even more stunning.
Surface Prep Secret: Don't rush the cleaning! I've found that using a wire brush in Step 1 removes more bark and creates better texture for soil adhesion. For extra grip, lightly sand rough patches with 80-grit sandpaper before filling—this helps prevent soil from sliding out later. The rougher the surface, the better the soil will cling.
Drainage Hack: When drilling holes in Step 2, I like to start with just 3-4 evenly spaced holes around the edges before adding the spiral pattern. This creates a quick drainage path while you're still working. For larger stumps, add a small hole at the very bottom center—this becomes the main drainage point and prevents waterlogging at the base.
Soil Mix Upgrade: In Step 3, while equal parts potting soil and compost works perfectly, I often add a handful of perlite to the mix for better aeration. This keeps the soil from compacting too much over time. For moisture retention, mix in a small amount of coconut coir—it holds water better than peat moss and won't compact like regular soil.
Plant Selection Strategy: For Step 3's planting, I recommend starting with drought-tolerant plants like sedum or hens-and-chicks—they thrive in the confined space and don't require frequent watering. If you want something more dramatic, try a small air plant (tillandsia) nestled in the mulch layer—it adds height and texture without needing soil.
Pro Tips for Make A Tree Stump Into A Planter
- Transforming a stump into a planter is easier than you think—here are my go-to tricks to make the process smoother and your finished project even more stunning.
- Surface Prep Secret: Don't rush the cleaning!
- Drainage Hack: When drilling holes in Step 2, I like to start with just 3-4 evenly spaced holes around the edges before adding the spiral pattern.
Frequently asked questions
Got questions?
You’re not alone—turning a tree stump into a planter is a creative project, and details matter! Here are answers to the most common queries to help you tackle this DIY with confidence.
Can I use any tree stump for this project?
Not all stumps are ideal! Avoid stumps from toxic trees like yew, black walnut, or oleander—they can leach harmful chemicals into your soil. Hardwoods (oak, maple) are great, while softwoods (pine, cedar) may rot faster. If unsure, test with a pH soil kit or research your tree type first.
How long does it take to dry and prepare a fresh stump?
Fresh stumps need 4–6 weeks to dry out completely before drilling or painting. Speed this up by splitting the stump with an axe (if safe) or using a stump grinder to expose more surface area. Pro tip: Store it in a dry, shaded spot during this time to prevent mold.
Do I need to paint or seal the stump before planting?
Yes! Sealing the stump with outdoor wood sealant or paint (non-toxic if plants will touch it) prevents rot and pests. Skip the sealant only if you’re using the stump as a natural compost bin—but even then, a light coat of food-safe sealant (like beeswax) can help. Bonus: Paint adds color and protects from weather!
What if my stump starts rotting after planting?
Rotting is normal over time, but you can slow it down by:
- Choosing hardwood stumps (oak, hickory).
- Avoiding waterlogged soil—ensure proper drainage.
- Reapplying sealant every 1–2 years.
Are there alternatives if I don’t want to use a tree stump?
Try these upcycled planter ideas:
- Cinder blocks or bricks (stack and paint).
- Old boots or well-worn tires (drill drainage holes).
- Galvanized buckets or metal troughs (add saucers to catch runoff).
- Pallet wood (sand and assemble into raised beds).
Wrapping up and next steps
Transforming a tree stump into a planter is more than just a creative project—it’s a way to breathe new life into your garden while reducing waste! With just a few tools and a little effort, you’ve turned an eyesore into a charming, functional centerpiece. 🌿✨
Now that you’ve mastered the basics, why not take it further? Experiment with unique paint designs, add a small water feature, or even plant succulents or herbs for a low-maintenance touch. Your green thumb is growing—keep exploring!