
Planting
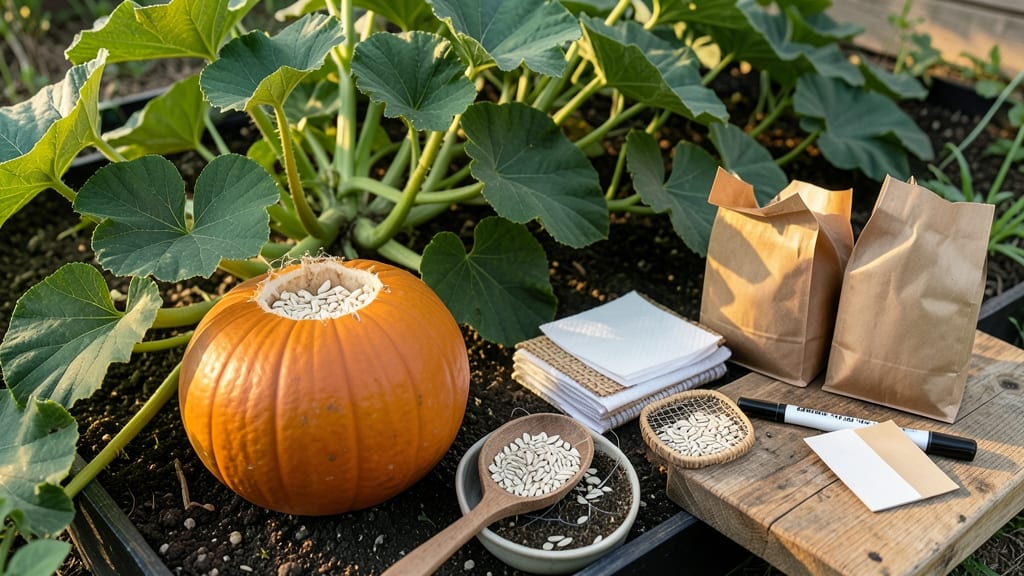
Learning how to keep pumpkin seeds to plant next year starts with the right pumpkin—pick a healthy, fully mature one with no soft spots or mold. 🌱 The seeds inside hold the potential for next season’s harvest, but only if you handle them properly from the moment you scoop them out.
I’ve saved seeds for years, and the difference between thriving plants and weak sprouts comes down to drying, storage, and timing.
First, you’ll need a clean workspace, a bowl of water, and a fine-mesh strainer—no fancy tools required. The goal is to separate viable seeds from the stringy pulp, then dry them completely to prevent mold.
Most gardeners skip this step and end up with seeds that sprout unevenly or not at all. A cool, dark, well-ventilated spot for drying (like a screened tray) is key—think of it as giving your seeds a gentle, natural cure.
Once dry, store them in an airtight container with a silica gel packet or a bit of rice to absorb moisture. Label with the variety and date—by next spring, you’ll have seeds ready to plant that’ll grow into strong, productive vines instead of scraggly starts.
The secret? Consistency in drying and storage keeps viability high for years.
Before planting, do a quick viability test: soak a few seeds overnight, then place them between damp paper towels. After 3-5 days, healthy seeds will sprout—if half or more do, your batch is ready for the garden.
Avoid common mistakes like rushing the drying process or storing seeds in humid conditions, and you’ll be rewarded with vigorous plants come planting season.
📚 In This Guide
- What you need
- Instructions
- Tips and common mistakes
- Wrapping up and next steps
What you need
- ● Fresh pumpkin seeds: Harvest seeds from a healthy, organic pumpkin (avoid store-bought or treated seeds). Aim for 1–2 cups (or more, if you’re ambitious!).
- ● Paper towels or clean cloth: 2–3 sheets (for drying). Use unbleached, seed-free paper to avoid contamination.
- ● Small bowls or containers: 1–2 shallow, breathable containers (like ceramic or glass) for initial drying.
- ● Air-tight storage container: A small jar, envelope, or seed packet with a tight seal (e.g., mason jar, ziplock bag, or paper envelope).
- ● Label & marker: To note the pumpkin variety and date (e.g., “Sugar Pie 2024”).
- ○ Optional drying aid: A fan (for faster airflow) or dehumidifier (if humidity is high).
- ● Desiccant packets: 1–2 (like silica gel) to absorb moisture inside the storage container.
- ● Seed catalog or notebook: To track germination rates and notes on next year’s planting.
- ● Food dehydrator: For speedy drying (set to 135°F (57°C) for 2–3 hours).
- ● Humidity monitor: To ensure storage conditions stay below 40% humidity.
Tips & tricks for perfect pumpkin seed preservation
Saving pumpkin seeds for next year's planting is easier than you think—these insider tricks ensure you'll have healthy, viable seeds ready when you need them.
Fermentation Timing: The 3-5 day fermentation in Step 1 is crucial for separating good seeds from bad, but don't rush it! The tangy aroma signals success—this chemical change kills mold spores and weak seeds. If you're in a hurry, you can speed up the process slightly by using slightly warmer water (around 75°F), but never exceed 80°F or you risk spoilage. Stir gently each day to prevent mold buildup on the surface.
Drying Strategy: In Step 2, the 12-hour stirring interval is key for even drying. I've found that using a mesh screen with holes slightly larger than the seeds allows better airflow underneath while keeping them contained. Place the screen on a baking rack in your oven with the light on (but oven off) for consistent warmth—this creates ideal drying conditions without heat. Monitor closely, as humidity affects drying time dramatically.
Storage Container Wisdom: For Step 3, while paper envelopes work well, I prefer glass jars with silica gel packets for long-term storage. The silica absorbs any residual moisture that might develop over years. If using paper envelopes, place them in a sealed container with a desiccant packet to maintain that critical 30-50% humidity range. Labeling with both the variety and year is essential—pumpkin varieties can have different growing requirements!
Germination Test Insight: The 7-10 day germination test in Step 4 reveals more than just viability—it shows how quickly your seeds will sprout. If germination drops below 70%, the freezer treatment can often revive them, but this works best for seeds stored less than 2 years. For older seeds, consider treating them with a seed starter solution to boost germination rates before planting.
Pro Tips for Keep Pumpkin Seeds To Plant Next Year
- Saving pumpkin seeds for next year's planting is easier than you think—these insider tricks ensure you'll have healthy, viable seeds ready when you need them.
- Fermentation Timing: The 3-5 day fermentation in Step 1 is crucial for separating good seeds from bad, but don't rush it!
- Drying Strategy: In Step 2, the 12-hour stirring interval is key for even drying.
Frequently asked questions
Got questions about saving pumpkin seeds for next year? You’re not alone! Here are some of the most common concerns—and straightforward answers to help you succeed.
Can I save seeds from any pumpkin or squash?
Most Cucurbita varieties (like pumpkins, butternut squash, and acorn squash) can be saved, but hybrid seeds (marked "F1") won’t grow true to type. Stick to heirloom or open-pollinated seeds for reliable results. Check the seed packet or ask local farmers for trusted varieties!
How long can I store pumpkin seeds before planting?
Properly dried and stored seeds stay viable for 3–5 years, though germination rates drop after 2 years. Store them in a cool, dark place (like a sealed jar in the fridge) to maximize freshness. Test a few seeds in warm water—if they sprout within 3–5 days, they’re still good!
What if my seeds mold or smell bad?
Mold or a musty smell means moisture got in during storage. Discard any seeds with discoloration or foul odors—they won’t sprout. To prevent this, ensure seeds are completely dry (≤5% moisture) before storing, and use an airtight container with a desiccant packet.
Do I need to scarify or soak seeds before planting?
Most pumpkin seeds don’t need scarification, but a quick 24-hour soak in warm water can speed up germination. For extra insurance, rub the seed coat lightly with sandpaper (scarification) if your seeds are old or hard. Plant them 1 inch deep in warm soil (70–90°F) for best results.
Can I save seeds from store-bought pumpkins?
Technically yes, but store-bought seeds are often hybrids or treated to prevent sprouting. If you’re determined, try it—just know germination rates may be low. For better odds, save seeds from heirloom pumpkins grown by local farmers or seed swaps!
Wrapping up and next steps
Saving pumpkin seeds for next year’s harvest is easier than you think—and the rewards are sweet! 🌱 By following these simple steps, you’ll ensure your seeds stay viable, healthy, and ready to sprout into vibrant pumpkins.
Whether you’re a seasoned gardener or a beginner, a little patience and care go a long way.
Now that you’re armed with the know-how, grab those seeds and get storing! Start small—even a handful can yield a bountiful crop. Happy planting, and may your garden bloom with success next season! 🎉