
Container Gardens
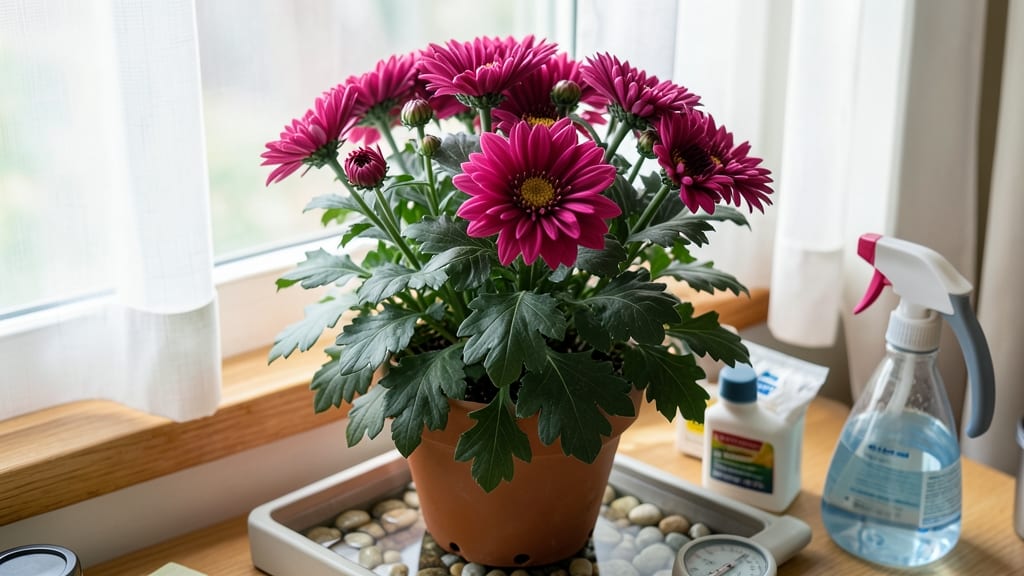
How to keep mums alive indoors—your mums are dying indoors because they’re starving for light. 💚 The moment they arrive from the garden center, they start counting days until their inevitable droop—but with a few simple adjustments, you can keep them vibrant for months instead of weeks.
Most people overwater and underlight these tough little plants. Mums need bright, indirect light (think east or south-facing windows) and well-draining soil that dries out between waterings. A grow light on a timer solves the light problem instantly, while terracotta pots help wick away excess moisture.
By adjusting humidity—mist them daily or place the pot on a tray of pebbles and water—you’ll see leaves stay plump and flowers last longer. I’ve kept my mums blooming through three full winters using these tricks, and they’ve even rebloomed in spring.
This works for both store-bought mums and potted garden varieties. The key is treating them like outdoor plants in miniature—just with a little extra TLC. Let’s fix that droop before it’s too late.
📚 In This Guide
- What you need
- Instructions
- Tips and common mistakes
- Wrapping up and next steps
What you need
- ● Healthy mum plants: 1–3 mature chrysanthemums (choose disease-free, vibrant blooms for best results).
- ● Container: A pot with drainage holes (6–12 inches wide, depending on plant size). Pro tip: Terracotta or ceramic works best!
- ● Potting mix: 2–3 gallons of well-draining, peat-based or cactus/succulent mix (avoid heavy garden soil).
- ● Drainage material: Small pebbles, perlite, or pumice (1–2 inches layer at the pot’s bottom).
- ● Pruning shears: Clean, sharp pair (sterilize with rubbing alcohol).
- ● Spray bottle: For gentle misting (8–16 oz size).
- ○ Humidity tray: Optional but helpful—a shallow tray + pebbles + water.
- ● Grow lights: LED or fluorescent (full-spectrum, 12–16 hours/day).
- ● Plant food: Balanced liquid fertilizer (diluted to half-strength).
- ● Thermometer/hygrometer: To monitor temp (60–75°F) and humidity (40–60%).
- ● Decorative pot: A snazzy outer cache pot for style (ensure it’s slightly larger than the nursery pot).
Step-by-Step instructions for reviving and caring for indoor mums
Bringing mums indoors for winter doesn’t have to be a guessing game—these steps ensure they thrive.
💧 Step 1: Adjust Watering to Prevent Root Rot
Mums hate soggy soil, so let the top 1-2 inches dry out between waterings. Stick your finger in the soil—if it feels damp just below the surface, wait another day. Overwatering is the fastest way to kill them indoors, where airflow is limited.
Use room-temperature water and pour it directly onto the soil, avoiding the foliage. If you notice yellowing leaves, you’re likely overwatering. Cut back immediately and let the soil dry out more thoroughly before trying again. A saucer under the pot helps catch excess water, but empty it after 10 minutes to prevent the roots from sitting in moisture.
☀️ Step 2: Provide Bright, Indirect Light Daily
Mums need 6-8 hours of bright, indirect light to stay vibrant. A south- or east-facing window is ideal, but avoid harsh afternoon sun, which can scorch the leaves. If your space is dim, supplement with a grow light placed 12-18 inches above the plant for 12-14 hours daily.
Watch for leggy growth or stretched stems—this is a sign they’re reaching for light. Rotate the pot a quarter turn weekly so all sides get even exposure. If leaves start losing color or dropping, move the plant closer to the light source immediately. Fluorescent bulbs work well, but full-spectrum LEDs are even better for keeping blooms healthy.
🌿 Step 3: Boost Humidity Without Overdoing It
Indoor air is often too dry for mums, causing brown leaf edges. Place the pot on a tray filled with pebbles and water, ensuring the pot sits above the waterline. As the water evaporates, it creates a humid microclimate around the plant. Mist the leaves lightly in the morning, but avoid doing it at night—moisture on leaves overnight can lead to fungal issues.
Grouping mums with other houseplants also helps increase humidity naturally. If your home runs very dry (below 40% humidity), consider investing in a small humidifier nearby. You’ll know humidity is just right when the leaves stay plump and green, not crispy or curled. Avoid placing mums near heat vents or drafty windows, as both can dry out the plant too quickly.
✂️ Step 4: Prune and Fertilize for Next Season’s Growth
After the blooms fade, trim the stems back by one-third to encourage new growth. Use clean, sharp scissors to cut just above a leaf node or bud. This isn’t just for looks—it helps the plant redirect energy toward root and foliage development, setting it up for next year’s blooms.
Feed the mums with a balanced, water-soluble fertilizer (like 10-10-10) diluted to half strength every 4-6 weeks during the growing season. Stop fertilizing in late fall to let the plant rest. If you notice slow growth or pale leaves, it’s time to fertilize again. Over-fertilizing in winter can burn the roots, so hold off until spring when growth naturally speeds up.
⏰ Step 5: Monitor for Pests and Adjust Care
Check the undersides of leaves weekly for spider mites, aphids, or whitefly. These pests thrive in dry indoor air, so early detection is key. Wipe leaves with a damp cloth to remove dust and deter pests. If you spot any, treat with neem oil (mixed as directed) or insecticidal soap, applying it in the evening when bees aren’t active.
If a mum starts looking sad—drooping, yellowing, or losing leaves—reassess its care. Too much water? Let it dry out. Not enough light? Move it closer. The goal is consistency: mums are tough but need predictable conditions. With these adjustments, you’ll have lush, blooming mums year after year, not just a winter survival story.
Tips & tricks for perfect indoor mum care
Keeping mums alive indoors isn't just about following steps—it's about understanding their subtle needs. Here's what I've learned after watching these tough little plants thrive through multiple winters.
Soil Moisture Test: The finger test in Step 1 is your best friend—press your finger about an inch deep into the soil. If it feels damp, wait another day. I've ruined mums by overwatering when they were already happy with less. The 10-minute saucer rule is non-negotiable: empty excess water promptly to prevent root suffocation.
Light Rotation Strategy: That quarter-turn weekly rotation in Step 2 prevents lopsided growth from leaning toward the window. I mark the pot's position with a small sticker to track rotations—it's a game-changer for even foliage development. If your space lacks natural light, full-spectrum LEDs placed 12-18 inches above actually mimic sunlight better than fluorescent bulbs for maintaining bloom color.
Humidity Balance: The pebble tray method in Step 3 works wonders, but I've found adding a thin layer of activated charcoal to the water prevents algae growth and keeps the air fresher. For extra dry climates, group mums with other plants like ferns or peace lilies—they all benefit from the shared humidity. Just remember: morning misting only, never at night, to avoid fungal risks.
Pro Tips for Keep Mums Alive Indoors
- Keeping mums alive indoors isn't just about following steps—it's about understanding their subtle needs.
- Soil Moisture Test: The finger test in Step 1 is your best friend—press your finger about an inch deep into the soil.
- Light Rotation Strategy: That quarter-turn weekly rotation in Step 2 prevents lopsided growth from leaning toward the window.
Frequently asked questions
How long can I keep mums alive indoors?
With the right care, chrysanthemums (mums) can last 4–8 weeks indoors. Proper light (6+ hours daily), humidity, and occasional deadheading extend their lifespan. Avoid drafts or sudden temperature drops—these stress the flowers and shorten their time. For longer enjoyment, choose hardy varieties like 'Dynasity' or 'Sahin.'
Why are my mums wilting indoors?
Wilting usually means overwatering, low humidity, or poor light. Check the soil—it should stay slightly moist but not soggy. Group plants together to boost humidity, or use a pebble tray. If leaves yellow, it’s often root rot from excess water. Move them to a brighter spot (but avoid direct sun) to revive them.
Can I keep mums alive indoors without grow lights?
Yes, but you’ll need bright, indirect light near a window (east or north-facing is ideal). South-facing windows can scorch leaves, while west-facing offers strong afternoon light. If natural light is weak, supplement with a basic LED grow light (10–12 hours/day). Avoid fluorescent bulbs—they’re too dim for mums.
What’s the best indoor pot for mums?
Use a container with drainage holes (terracotta or plastic) and a diameter 2–3 inches larger than the nursery pot. Mums hate soggy roots, so ensure excess water drains away. Add a 1-inch layer of gravel or perlite at the bottom for airflow. Avoid overly large pots—they retain moisture and risk root rot.
How do I revive drooping mums?
Start by trimming wilted stems (cut 1–2 inches above a leaf node) to encourage new growth. Check roots—if mushy, repot in fresh soil. Increase humidity with a mist spray or humidifier, and place them in bright, indirect light. Avoid fertilizing until they perk up. Most mums bounce back in 3–5 days with proper care!
Wrapping up and next steps
Keeping your mums alive indoors is totally doable with the right light tricks and humidity hacks! The key is balancing bright, indirect light (think east-facing windows or grow lights) and maintaining steady moisture—whether through misting, pebble trays, or a humidity dome.
Don’t forget to rotate your plants for even growth and trim wilted blooms to encourage fresh ones. 🌿
You’ve got this! Start with one small step—like adjusting your lighting setup or testing a humidity tray—then tweak as you go. Before you know it, your indoor mum will be thriving like a pro. Happy gardening! 🌸