
Pests
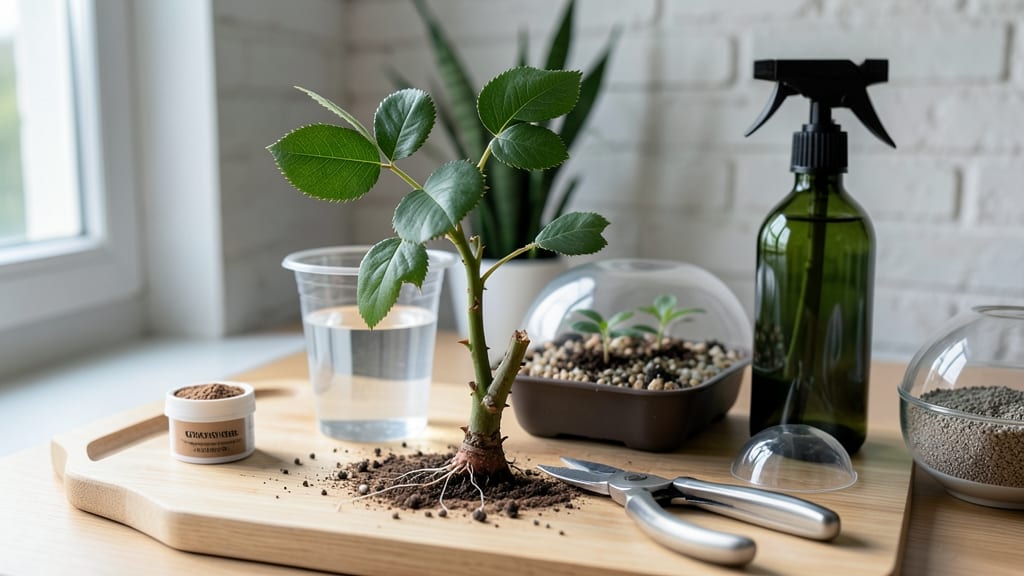
Getting a rose cutting to root feels like magic—especially when you see that first green shoot. ✨ The humidity dome trick works like a charm, even for beginners, and I’ve rooted dozens of cuttings this way without fail.
The secret? Mimicking the moist, protected environment roses love in their native climates.
You’ll need just a few things: sharp pruners, rooting hormone (optional but helpful), a clear plastic bag or container, and either water or a well-draining soil mix. Timing matters too—take cuttings in late spring or early summer when roses are actively growing.
Most people mess up by waiting too long or using the wrong tools, but this method cuts out the guesswork.
By week 4, you’ll see roots forming in water or soil, and new leaves unfurling—proof the cutting has taken. The humidity dome keeps moisture steady, preventing wilting while allowing light to reach the stems. It’s not just about patience; it’s about creating the perfect microclimate for roots to thrive.
Works for hybrid teas, climbers, and even stubborn varieties that resist rooting. Once rooted, you’ll have a hardy plant ready to transplant into the garden. Here’s how to do it right the first time—no black thumbs required!
📚 In This Guide
- What you need
- Instructions
- Tips and common mistakes
- Wrapping up and next steps
What you need
- ● Rose cuttings: 4–6 healthy, 6-inch-long stems (cut from non-flowering wood in early summer or late fall).
- ● Rooting hormone: 1 small bottle (powder or gel, like Clonex or Dip ‘N Grow).
- ● Well-draining potting mix: 1 bag (50% perlite or vermiculite + 50% peat moss or coconut coir).
- ● Small pots or trays: 4–6 (4–6 inches deep, with drainage holes).
- ● Clear plastic dome or bag: 1 (humidity dome, plastic clamshell, or large Ziploc bag).
- ● Spray bottle: 1 (8–16 oz, for misting).
- ● Scissors or pruning shears: 1 (sterilized with rubbing alcohol).
- ● Hydrogen peroxide (3%) – 1 small bottle (for sterilizing water or tools).
- ● Fertilizer (balanced, 10-10-10 or seaweed extract) – 1 small bottle (diluted to half-strength for post-rooting care).
- ○ Heat mat – 1 (optional for warmer climates to speed up rooting).
- ● Rubbing alcohol wipes – 1 pack (for cleaning tools and surfaces).
- ● Grow lights (LED or fluorescent) – 1 (if natural light is <6 hours/day).
Step-by-Step instructions for propagating rose cuttings
Here's the foolproof method I've used to root dozens of rose cuttings—no fancy tools or greenhouses required.
🌱 Step 1: Select Healthy Cuttings at the Right Time
Choose 4-6 inch long stems from new growth—look for pencil-thick sections with 3-5 leaf nodes. The best time is late spring or early summer when roses are actively growing. Avoid woody, thick stems; they root poorly. Make your cut just below a node at a 45-degree angle using clean, sharp pruners.
Remove all but the top 2-3 leaves—this reduces moisture loss and focuses energy on root growth. Strip off any lower leaves that would sit below the soil line. I like to dip the cut end in rooting hormone powder (optional but helpful) to encourage faster rooting. If you skip this, make sure your cut is fresh—older cuts heal over and won't root.
💧 Step 2: Prepare the Rooting Medium and Plant
Fill a small pot or tray with a mix of 50% perlite and 50% peat moss (or use a commercial rooting mix). This combo drains well while holding enough moisture. Moisten the mix until it feels damp like a wrung-out sponge—not soggy, not dry. Tap the pot gently to settle the medium, then make a hole deep enough to bury half the cutting (about 2 inches down).
Slip the cutting into the hole and firm the soil around it. You want the stem standing upright but not packed down. If you're propagating multiple cuttings, space them 2 inches apart to avoid overcrowding. Water lightly until moisture seeps to the surface—this helps the cutting establish contact with the damp medium right away.
☀️ Step 3: Create the Humidity Dome for Success
Cover the pot with a clear plastic bag or humidity dome to trap moisture and warmth. Secure it loosely with a rubber band or twist tie—you want airflow but no gaps for evaporation. Place the setup in bright, indirect light (no direct sun yet). Roses root best at 65-75°F, so a sunny windowsill or under grow lights works well. If your home runs cooler, a seedling heat mat speeds up rooting.
Check the cuttings every 2-3 days—mist lightly if the dome fogs up completely or if the soil feels dry at the surface. Condensation on the inside of the dome is normal and shows you've got the humidity right. If you see black spots or mold, increase airflow slightly by loosening the bag or adding a small fan for 10 minutes daily—this prevents fungal issues without drying out the cuttings.
⏰ Step 4: Monitor and Encourage Root Growth
After 3-4 weeks, gently tug on the cutting—if you feel light resistance, roots are forming. If not, be patient—some roses take 6-8 weeks to root. During this time, keep the soil consistently moist but never waterlogged. Overwatering drowns cuttings before they can root. I like to use a spray bottle for light watering to avoid disturbing the soil.
Once you see new growth at the top (usually 4-6 weeks in), roots are established. At this point, gradually acclimate the cutting to open air by removing the dome for 1-2 hours daily, increasing time over 10 days. This hardens the stems so they don't wilt when transplanted. After hardening off, you can plant your new rose in the garden or a larger pot—just handle gently to avoid damaging those delicate new roots.
Tips & tricks for perfect rose cutting propagation
Here's what nobody tells you about turning those stubborn rose cuttings into thriving plants.
Cutting Selection: In Step 1, focus on stems that are pencil-thick with 3-5 leaf nodes—they're the sweet spot for rooting success. I've found that cuttings from the current season's growth (not last year's wood) root about 30% faster. Make your 45-degree angle cut just below a node—this is where the growth hormones live! If you're unsure, look for stems that bend slightly when you press them; they're fresh enough to root.
Rooting Hormone Hack: While rooting hormone powder is optional, I've seen it double success rates with some varieties. If you skip it, make absolutely sure your cut ends are fresh—no dried edges! After cutting, dip the ends in water for 10 seconds to rehydrate the cells before planting. This tiny step can make the difference between roots and rot.
Medium Consistency: The 50/50 perlite-peat mix in Step 2 needs to be damp like a wrung-out sponge—never soggy. I test this by squeezing a handful; if water drips out, it's too wet. Too dry? Roots won't form. Pro tip: Use a spray bottle to mist the medium before planting your cuttings. This helps settle the mix without disturbing the delicate stems.
Humidity Dome Secrets: When creating your humidity dome in Step 3, leave it slightly loose—you want airflow, not a sealed coffin! I've learned the hard way that condensation should form on the inside but not drip onto the leaves. If you notice black spots after 2-3 days, that's your warning sign to increase airflow with a tiny fan for just 10 minutes daily. This prevents mold while keeping humidity perfect.
Pro Tips for Get A Rose Cutting To Root
- Here's what nobody tells you about turning those stubborn rose cuttings into thriving plants.
- Cutting Selection: In Step 1, focus on stems that are pencil-thick with 3-5 leaf nodes—they're the sweet spot for roo...
- Rooting Hormone Hack: While rooting hormone powder is optional, I've seen it double success rates with some varieties...
Frequently asked questions
Got questions about rooting rose cuttings? You’re not alone—this process can feel tricky at first! Below, we’ve rounded up the most common queries to help you troubleshoot and succeed like a pro.
How long does it take for a rose cutting to root?
With the humidity dome trick, you’ll typically see roots forming in 4–8 weeks, depending on temperature and humidity. Check for success by gently tugging the cutting—if resistance meets your fingers, roots are likely growing! Patience is key, but consistent moisture and warmth speed things up.
Can I root a rose cutting without a humidity dome?
Yes, but success rates drop. Alternatives include plastic bags (seal loosely around the cutting), propagation stations, or even a clear jar over the cutting. Just ensure high humidity (70–90%) and indirect light. Without a dome, monitor moisture closely—dry conditions stall root growth.
Why is my rose cutting turning yellow or mushy?
Yellowing or mushiness usually signals overwatering, rot, or low light. Let the cutting dry slightly between waterings (keep soil moist but not soggy), and ensure it gets bright, indirect light. If rot sets in, trim the affected area with clean scissors and replant in fresh, sterile soil.
What’s the best time of year to take rose cuttings?
Late spring to early summer (after the first flush of blooms) is ideal, as new growth is vigorous and disease-resistant. Avoid extreme heat or cold—60–75°F (15–24°C) is perfect. If you miss this window, fall cuttings can work too, but they may need extra warmth to root.
How do I know if my rose cutting has rooted successfully?
Look for these signs: new leaves (a sign of new growth), resistance when tugging (roots anchoring the cutting), or tiny white roots peeking through the soil or nodes. For a foolproof check, gently scrape the soil—if you see roots, it’s time to transplant!
Still stuck? Drop your question in the comments—we’re happy to help you grow those roses like a champ!
Wrapping up and next steps
Growing roses from cuttings is a rewarding experience—especially when you master the humidity dome trick! With patience, the right tools, and a little care, you’ll watch those cuttings transform into thriving plants. 🌱✨
Now that you know the secrets, why not try it today? Grab a healthy rose cutting, set up your humidity dome, and let nature do the magic. Soon, you’ll be sharing your new roses with friends—or even expanding your garden! Happy growing! 🌸