
Landscaping
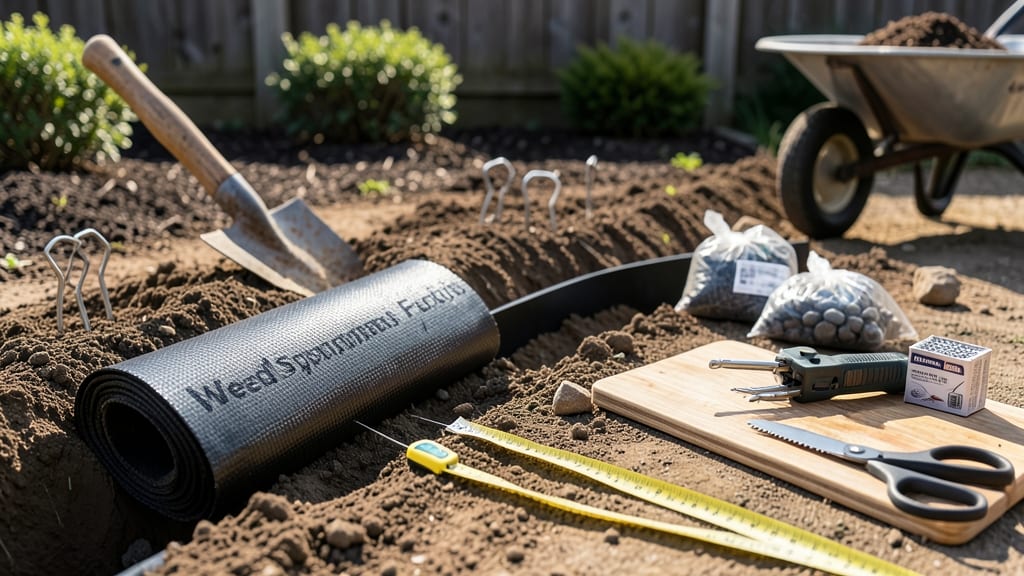
How to install landscape fabric and edging transforms messy garden beds into sharp, weed-free zones that last for years. That first clean sweep of your garden feels like cheating—until weeds creep back in. Landscape fabric and edging turn tangled borders into a neat, low-maintenance showpiece that actually stays that way.
You’ll need landscape fabric (3-ounce weight works best), plastic or metal edging (depends on your style), a staple gun, and some heavy rocks or mulch to secure everything. The key is cutting fabric 2 inches wider than your edging—this prevents weeds from sneaking in along the edges.
I swear by bending the edging slightly inward before staking it to keep soil contained.
By the time you’re done, you’ll have beds that stay clean, defined, and weed-free for 3-5 years with minimal effort. The fabric blocks sunlight from weed seeds while still letting water and air reach your plants.
Plus, the edging gives your garden a polished, finished look that makes every season easier.
Works for flower beds, vegetable gardens, or even around trees—just adjust the fabric width for larger areas. The best part? You’ll spend half the time weeding (or none at all) and more time enjoying your garden instead. Let’s get those borders looking sharp!
📚 In This Guide
- What you need
- Instructions
- Tips and common mistakes
- Wrapping up and next steps
What you need
- ● Landscape fabric: Choose a durable, UV-stabilized fabric (e.g., woven polypropylene) with a minimum 30-inch width and enough length to cover your entire bed area. For a 4' x 8' bed, plan for 32 sq. ft. of fabric (accounting for overlaps).
- ● Edging material: Plastic or metal edging: 1–2" tall, cut to fit your bed dimensions (e.g., 12' for a 4' x 8' bed).
- ● Brick, stone, or concrete: Pre-cut pavers or blocks (e.g., 2–4" wide) for a permanent, decorative edge.
- ● Staples or landscape fabric staples: Galvanized or plastic staples (1"–1.5" long) for securing fabric to edging or ground stakes.
- ● Ground stakes or U-shaped pins: 6–12 stakes (depending on bed size) to anchor fabric in windy areas.
- ● Shovel or spade: For digging trenches (if burying edging) or loosening soil.
- ● Measuring tape: 25' tape measure for precise cuts.
- ● Utility knife or scissors: For trimming fabric to size.
- ● Rake or hoe: To level the soil before installation.
- ● Garden hose: For wetting soil (helps secure fabric temporarily).
- ● Landscape fabric tape: To seal seams and prevent weeds from sneaking through.
- ● Pebbles or mulch: For covering fabric (¼"–½" gravel or 2–3" mulch).
- ● Level or string line: Ensures your edging is straight and even.
- ● Work gloves: Protect your hands from thorns or rough edges.
- ● Knee pads: For comfort during long installations.
Step-by-Step instructions for installing landscape fabric and edging
Here’s how to create a clean, weed-free garden bed that stays tidy for years.
Mark and Prepare the Garden Bed
Use a garden hose or spray paint to outline your bed’s shape and dimensions on the ground. This ensures your fabric and edging fit perfectly before digging. Measure the area to calculate how much fabric and edging you’ll need—most projects require 10-20% extra to account for overlaps and mistakes.
Remove any existing vegetation, rocks, or debris from the marked area using a shovel or edging tool. Dig down 2-3 inches to create a clean, level base. The deeper you dig, the better the fabric will stay in place and suppress weeds effectively. Smooth the soil with a rake to eliminate bumps that could tear the fabric later.
Lay Down the Landscape Fabric
Unroll the landscape fabric over the prepared bed, ensuring it extends 6-12 inches beyond the edges. This extra coverage prevents weeds from creeping in along the edges. Overlap seams by 6-12 inches and secure them with landscape fabric staples or heavy-duty staples to create a seamless barrier.
Smooth out any wrinkles or bubbles in the fabric, as these can create gaps where weeds might sprout. If the fabric shifts during installation, weigh it down with rocks or bricks temporarily until you finish edging. Avoid stretching the fabric too tightly—it should lie flat but not pull taut, which could cause tears over time.
Install the Edging Material
Place the edging material—such as plastic, metal, or stone—along the outer edge of the bed, aligning it with your marked outline. For flexibility, bend plastic or metal edging slightly to follow the bed’s contours. Secure it in place with landscape staples or ground spikes, driving them into the soil at 12-inch intervals to hold the edging firmly.
Check that the edging sits level with the ground—uneven edges can create drainage issues or make the bed look messy. If using stone or brick edging, lay a landscape fabric strip under it to prevent weeds from growing up through gaps. Press the edging lightly into the soil to ensure it stays in place without shifting.
Secure the Fabric and Edging Together
Fold the excess fabric over the top of the edging and tuck it underneath to fully contain weeds. Use landscape staples or U-shaped pins to pin the fabric securely to the edging, ensuring no gaps remain. This step is critical—even small openings can let weeds sneak through over time.
For added stability, especially in high-traffic areas, drive additional staples into the soil at 6-inch intervals along the edges of the fabric. This keeps everything in place and prevents the fabric from shifting when you mulch or plant. Once secured, the fabric and edging should form a tight, weed-blocking barrier.
Add Mulch and Plant Your Garden
Spread 2-4 inches of mulch over the fabric to suppress weeds further and retain moisture. Avoid piling mulch directly against plant stems—leave a 1-inch gap to prevent rot. Choose organic mulch like wood chips or shredded bark for best results, as it breaks down slowly and improves soil health over time.
Plant your desired flowers, shrubs, or vegetables directly into the fabric, making sure roots don’t get tangled. The fabric allows water and nutrients to penetrate while blocking weeds. Water the bed thoroughly after planting to settle the soil and encourage root growth. With this setup, your garden bed will stay neat and weed-free for years.
Tips & tricks for perfect weed-blocking garden beds
Creating a flawless weed barrier takes more than just following steps—it’s about the details that make the difference between a temporary fix and a long-lasting solution. Here’s what I’ve learned from years of trial and error in the garden.
Precision in Step 1: When marking your garden bed, use a straightedge or string line to create perfectly straight edges before digging. This ensures your edging will look crisp and professional, not wonky. I’ve found that even slight deviations can make the final installation look sloppy—take the extra 10 minutes to get it right from the start.
Fabric Overlap Strategy: The 6-12 inch overlap mentioned in Step 2 isn’t just a suggestion—it’s non-negotiable for high-traffic areas. For beds near sidewalks or driveways, consider doubling that overlap to 18 inches. I’ve seen too many installations fail because gardeners skimped on this step, only to have weeds creep in through those small gaps later.
Edging Stability Secret: For Step 3, when securing plastic or metal edging with ground spikes, drive them at a slight angle (about 30 degrees) rather than straight down. This creates more purchase in the soil and prevents the edging from popping up during freeze-thaw cycles. I learned this the hard way when my first installation shifted after just one winter.
Mulch Application Technique: In Step 5, when spreading your 2-4 inches of mulch, work in two layers. First spread 1-2 inches, then water thoroughly to settle it. After it’s settled, add the remaining mulch. This prevents the mulch from washing away during heavy rains and ensures even coverage that stays put for months.
Pro Tips for Install Landscape Fabric And Edging
- Creating a flawless weed barrier takes more than just following steps—it’s about the details that make the difference...
- Precision in Step 1: When marking your garden bed, use a straightedge or string line to create perfectly straight edg...
- Fabric Overlap Strategy: The 6-12 inch overlap mentioned in Step 2 isn’t just a suggestion—it’s non-negotiable for hi...
Frequently asked questions
Got questions about installing landscape fabric and edging?
You’re not alone! Here are answers to the most common concerns to help you plan like a pro.
Can I install landscape fabric in winter or rainy weather?
It’s best to install landscape fabric in dry, mild weather—spring or fall are ideal. Rain can make the soil too soggy, while freezing temps may make materials brittle. If you must work in wet conditions, wait until the ground is dry enough to avoid shifting or uneven installation.
Do I need edging if I’m using landscape fabric?
Edging isn’t mandatory, but it’s highly recommended! Without it, soil and mulch can creep into your fabric over time, reducing its effectiveness. Edging keeps everything neat, prevents erosion, and makes your garden look polished. Plastic, metal, or stone edging are all great options.
Will landscape fabric kill my plants?
No—if installed correctly, landscape fabric won’t harm healthy plants. Always cut X-shaped slits for existing plants and new roots, ensuring they can grow through. Avoid covering the base of trees or shrubs entirely, as they need airflow and moisture at the soil level.
Is landscape fabric worth the cost compared to mulch alone?
Yes, if you’re dealing with persistent weeds or poor soil. Fabric blocks weeds for years, reduces watering needs, and keeps mulch in place. While mulch alone suppresses weeds short-term, fabric offers long-term savings by cutting down on weeding and soil erosion. Think of it as an investment!
What’s the best way to secure landscape fabric so it doesn’t shift?
Use landscape staples or U-shaped pins to anchor fabric to the ground every 8–12 inches, especially along edges and slopes. For extra stability, overlap seams by 6 inches and secure them with staples. If using heavy mulch, consider adding landscape fabric weights or edging to prevent movement.
Wrapping up and next steps
Installing landscape fabric and edging is a game-changer for keeping your garden weed-free and neat—without the hassle! With the right materials and a little patience, you’ll create a long-lasting, low-maintenance bed that lets your plants thrive while blocking those pesky weeds. 🌱
Ready to see the results? Take a step back, admire your work, and then plan your next landscaping project—maybe a flower bed, a veggie patch, or even a cozy pathway! Your garden will thank you for it.