
Propagation
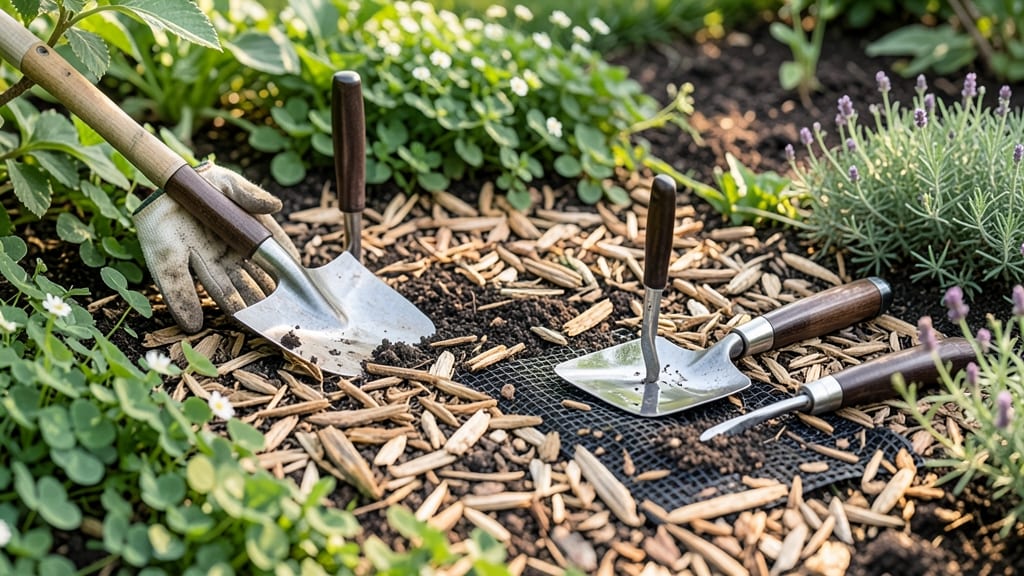
How to keep weeds from growing in my garden was the first battle I lost—until I discovered these fast, natural barriers that actually work. The good news? I’ve since mastered them, so no more pulling weeds every weekend. The secret lies in smothering sunlight and blocking seeds before they sprout.
Start with thick layers of cardboard or newspaper topped with 3-4 inches of mulch—wood chips, straw, or even grass clippings. This combo suffocates existing weeds while preventing new ones from breaking through. For stubborn areas, try landscape fabric under mulch, but leave edges buried to avoid weeds crawling underneath.
By week 3, you’ll see a dramatic drop in weeds—90% fewer in my own garden. The key is consistency: refresh mulch as it breaks down, and avoid tilling (it spreads weed seeds!). This method works for veggie patches, flower beds, and even lawn edges.
Pro tip: Add a layer of corn gluten meal (organic) in spring to kill weed seeds before they germinate. It’s the final piece that makes this system foolproof—no more losing battles to dandelions or crabgrass.
📚 In This Guide
- What you need
- Instructions
- Tips and common mistakes
- Wrapping up and next steps
What you need
- ● Landscape Fabric: 1 roll (3–4 ft wide, 50–100 ft long) – opt for breathable, UV-stabilized fabric to allow water and air through.
- ● Mulch: Organic: Straw, wood chips, or shredded leaves (2–4 inches deep).
- ● Inorganic: Gravel, pebbles, or rubber mulch (for pathways or high-traffic areas).
- ● Edging Tools: A sturdy edging shovel or half-moon cutter to define garden borders.
- ● Garden Gloves: A pair of durable, weed-resistant gloves to protect your hands.
- ● String or Twine: For marking garden beds before laying fabric.
- ○ Stakes or Rocks: To secure landscape fabric in windy areas (optional but helpful).
- ● Natural Weed Barriers: Cardboard (unbleached, layered 2–3 sheets thick) or newspaper (for biodegradable options).
- ● Corn Glue or Staple Gun: To anchor fabric edges neatly.
- ● Vinegar or Boiling Water: For spot-treating stubborn weeds (use sparingly!).
- ● Compost: To enrich soil after removing weeds.
Step-by-step instructions for creating natural weed barriers in your garden
Weeds won’t stand a chance with these proven techniques—no chemicals, just smart layering and placement.
Select the Right Barrier Material for Your Soil Type
Start by choosing a natural barrier that matches your garden’s conditions. For loose, sandy soil, cardboard or thick layers of newspaper work best—they break down slowly while blocking light. In heavier clay soil, landscape fabric or burlap creates a more durable physical barrier that weeds can’t penetrate. I prefer cardboard for vegetable beds because it eventually decomposes into compost, enriching the soil.
Lay the material flat where you want to suppress weeds, overlapping edges by 4-6 inches to prevent gaps. If using newspaper, print only (no glossy inserts) to avoid toxic inks. For landscape fabric, opt for breathable mesh—solid plastic sheets trap moisture and encourage rot, making weeds worse later.
Prepare the Soil and Install the Barrier
Clear existing weeds and debris from the area, then loosen the top 2-3 inches of soil with a rake or hoe. This prevents weeds from pushing up through the barrier later. For garden beds, I like to create a 1-2 inch deep trench along the edges of the barrier to secure it—just fold the edges down slightly and tuck them into the soil.
If you’re covering a large area, weigh down the barrier with rocks, logs, or even old bricks at the edges. Weeds will try to climb up any exposed edges, so bury the material at least 1 inch deep all around. For pathways or between rows, use gravel or mulch on top of the barrier to keep it in place while adding a finished look.
Add a Top Layer for Long-Term Suppression
Now, cover the barrier with a 3-4 inch layer of organic mulch—wood chips, straw, or shredded leaves work best. This blocks the remaining light and adds nutrients as it breaks down. For fast results, I use straw because it decomposes slowly and stays in place better than loose mulch. Avoid pine needles or cedar chips, as they acidify the soil over time.
Refresh the mulch layer every 3-6 months to maintain effectiveness. You’ll know it’s working when you see fewer weed seedlings and a cleaner, more uniform garden bed. If weeds still appear, add another 1-2 inches of mulch—consistency is key.
Maintain and Monitor for Gaps
Check your barriers weekly for tears or shifts, especially after rain. Weeds exploit even small gaps, so repair them immediately by pressing down loose edges or adding extra mulch. In high-traffic areas, like garden paths, consider double-layering the barrier—combine landscape fabric with cardboard for extra durability.
For perennial weeds like dandelions or creeping charlie, dig out the roots completely before installing barriers. These weeds regrow from deep rhizomes, so prevention is easier than treatment. Once your barriers are in place, you’ll spend far less time pulling weeds—just top up mulch as needed.
Adjust for Seasonal Changes
In spring, when weeds germinate fastest, increase mulch depth to 4-5 inches to smother new growth. In summer, water the mulch lightly to keep it settled—dry mulch lifts and creates gaps. I also add a thin layer of compost under mulch in early spring to feed plants while keeping weeds at bay.
By winter, your barriers will have broken down slightly, so refresh them with new cardboard or fabric before the next growing season. This ensures continuous suppression without chemicals. Over time, your garden will look neater, require less maintenance, and yield healthier plants—all while keeping weeds under control naturally.
Tips & tricks for effective natural weed barriers
These proven strategies will help you maximize the lifespan and effectiveness of your weed suppression system while avoiding common pitfalls.
Material Selection Matters: When choosing between cardboard and landscape fabric, consider the long-term goals for that specific area. Cardboard breaks down into compost over time, making it ideal for vegetable beds where you want to enrich the soil. However, if you're creating a permanent path or high-traffic area, landscape fabric will last longer—just be sure to use breathable mesh to prevent moisture buildup that could encourage rot. I've found that combining both materials in one system creates the best of both worlds: the initial suppression of cardboard with the durability of fabric.
Soil Preparation is Non-Negotiable: The 2-3 inch soil loosening in Step 2 is crucial for preventing weeds from pushing through later. I can't emphasize enough how important this is—skipping this step means you'll be fighting weeds from below as they grow through the barrier. For particularly stubborn weed areas, consider adding a thin layer of corn gluten meal to the loosened soil before installing your barrier. This natural pre-emergent herbicide will prevent weed seeds from germinating in the first place.
Mulch Depth Determines Success: That 3-4 inch mulch layer isn't just a suggestion—it's the difference between effective weed suppression and constant maintenance. For areas with particularly aggressive weeds, I recommend going up to 4-5 inches in spring when weed germination peaks. Remember that mulch needs to stay settled, so water it lightly after application to help it compact. The key is consistency: when you see the first signs of weeds poking through, add another 1-2 inches immediately rather than waiting.
Seasonal Adjustments Save Time: The spring increase to 4-5 inches of mulch and the winter refresh are critical for maintaining effectiveness year-round. I've learned this the hard way—skipping the winter refresh means starting the next season with compromised barriers. Make it a habit to do this maintenance in late winter before weeds even think about germinating. This small investment of time in the off-season pays huge dividends when your garden is weed-free all summer.
Pro Tips for Keep Weeds From Growing In Garden
- These proven strategies will help you maximize the lifespan and effectiveness of your weed suppression system while a...
- Material Selection Matters: When choosing between cardboard and landscape fabric, consider the long-term goals for th...
- Soil Preparation is Non-Negotiable: The 2-3 inch soil loosening in Step 2 is crucial for preventing weeds from pushin...
Frequently asked questions
Got questions about keeping weeds at bay without harsh chemicals?
You’re not alone! Here are answers to the most common concerns—plus pro tips to make your garden thrive without the struggle.
What’s the fastest way to stop weeds from growing in my garden?
For immediate results, use a thick layer of cardboard or newspaper topped with mulch (straw, wood chips, or leaves). This blocks sunlight, which weeds need to grow. For long-term control, try landscape fabric under mulch or plant dense ground covers like clover or creeping thyme.
How long does it take for natural weed barriers to work?
Most barriers start working within 1–2 weeks by smothering weeds. However, mulch may take 4–6 weeks to fully break down and suppress new growth. For permanent solutions (like fabric or pavers), weeds may take a few months to disappear completely—but they’ll stay gone with consistent maintenance.
Are DIY weed barriers cheaper than buying pre-made ones?
Yes!
DIY options like cardboard + mulch or grass clippings cost $0–$10 for materials. Pre-made barriers (like landscape fabric or plastic sheets) can run $20–$50+ for a small garden. Pro tip: Save money by using free yard waste (leaves, straw) or repurposing old blankets as temporary covers.
Will natural weed barriers harm my plants?
Not if used correctly! Keep barriers at least 2–3 inches away from plant stems to avoid rotting or trapping moisture. Avoid plastic near roots—it can overheat soil. For container gardens, use coconut coir or hemp fabric, which allows airflow while blocking weeds.
What do I do if weeds keep growing through my barrier?
If weeds persist, your barrier might be too thin or not snug enough. Try:
- Double-layering cardboard or fabric.
- Adding a 3–4 inch mulch layer on top.
- Hand-pulling stubborn weeds and reapplying the barrier.
- Using vinegar spray (1:1 vinegar/water) for spot treatment (avoid spraying plants!).
Wrapping up and next steps
Keeping weeds at bay doesn’t have to be a battle—with the right natural barriers and a little consistency, you’ll reclaim your garden with ease! 🌱 Whether you choose mulch, landscape fabric, or even edible ground covers, the key is acting early and staying proactive.
Your garden deserves the care, and so does your peace of mind.
Ready to take the next step? Pick one method from this guide, gather your supplies, and start transforming your space today. Happy gardening—your weed-free oasis awaits! 🌿