
Landscaping
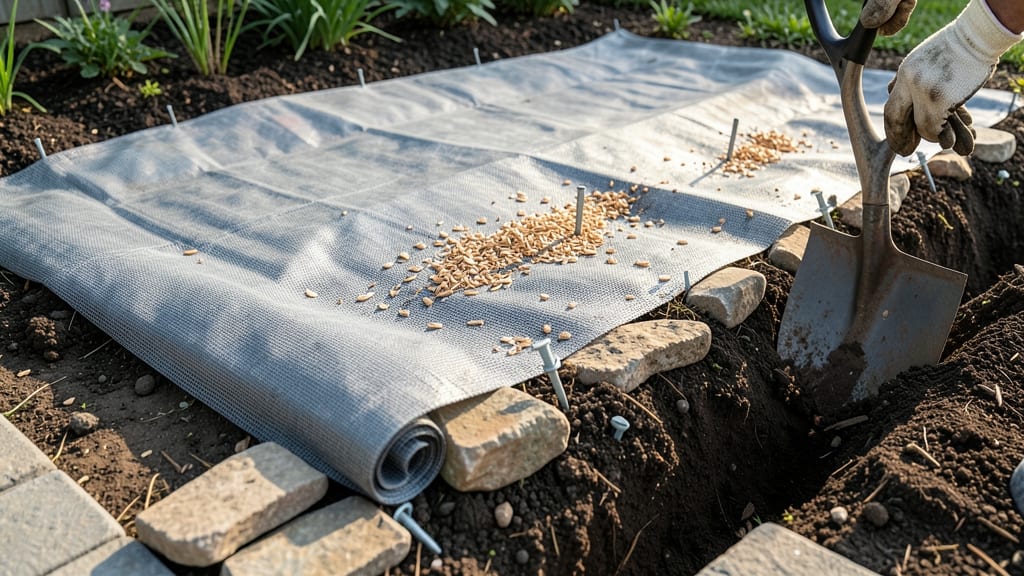
How to hold down landscape fabric properly is the difference between a flawless project and a windstorm disaster. 🌱 I’ve seen it happen—those expensive stakes and edging flying away in the first windstorm, leaving weeds back in charge. The key isn’t just any method; it’s the right combo of weight, tension, and placement to keep fabric flat and effective for years.
Start with heavy-duty U-shaped landscape staples (not those flimsy ones) every 12–18 inches along edges, then add galvanized metal stakes every 3–4 feet for corners and high-wind areas.
For extra security, top it with 3–4 inches of mulch or river rocks—this adds weight and doubles as weed suppression. No more fabric flapping like a sail.
You’ll end up with a clean, professional look that stays put—no more digging up fabric later or dealing with weeds sneaking through gaps. The fabric stays in place, your soil stays healthy, and your design stays neat and intentional for seasons to come.
Works for flower beds, vegetable gardens, or even under pathways. The trick is balancing tension (not too tight!) and weight distribution. Let’s lock that fabric down for good.
📚 In This Guide
- What you need
- Instructions
- Tips and common mistakes
- Wrapping up and next steps
What you need
- ● Landscape fabric: 4–6 ft wide, heavy-duty (3–5 oz per sq yd). Buy 10–20% extra for overlaps.
- ● Edging material: Plastic or metal edging (1–2 ft deep, galvanized for longevity).
- ● Brick, pavers, or landscape timbers (for decorative borders).
- ● Heavy-duty staples or fabric staples: Galvanized or stainless steel, ½–¾ inch long. Aim for 1 staple every 6–12 inches along edges.
- ● Landscape fabric stapler: Manual or pneumatic (for quick, secure fastening).
- ● U-shaped landscape staples: For securing fabric to edging (1–2 staples per foot).
- ● Utility knife or scissors: For clean cuts (sharp blade = no fraying).
- ● Measuring tape & string line: Mark edges precisely before cutting.
- ● Post-hole digger or shovel: For installing edging stakes 12–18 inches deep.
- ● Rake or tamper: To press fabric into soil before securing.
- ● Gloves & knee pads: Because landscaping is tough work!
- ● Landscape fabric adhesive: For extra grip on tricky spots (e.g., slopes).
- ● Rocks or mulch: 1–2 inches thick to weigh down fabric in high-traffic areas.
- ● Ground spikes or rebar: For windy areas (drive into fabric corners).
- ● Spray paint: To mark cut lines before slicing.
Step-by-Step instructions for securing landscape fabric properly
Here's the method I rely on for keeping fabric firmly in place—no more fluttering edges or shifting soil.
🪴 Step 1: Prepare the Edges Before Installing Fabric
First, create a clean, defined border where the fabric will meet the lawn or pathway. Use a shovel or edging tool to cut a ½-inch deep trench along the perimeter where the fabric will sit. This prevents the fabric from rolling up when mowed or walked on. I like to make the trench just wide enough to accommodate the fabric's thickness plus a ¼-inch margin for secure placement.
For curved edges, use a string line and stakes to mark the path before digging. This ensures your edges stay straight and professional-looking. If you're working around existing plants, tuck the fabric edges under the mulch or soil rather than cutting—this creates a natural barrier that won't shift.
✂️ Step 2: Trim and Secure Fabric with Heavy-Duty Stakes
Once the fabric is laid out, trim any excess with sharp utility shears to avoid overlapping seams. Overlapping fabric creates weak points where weeds can push through. I recommend using galvanized or plastic landscape staples (not regular staples—they rust and fail) to secure the fabric to the trench edges. Drive the staples every 12-18 inches along the perimeter, angling them slightly inward to grip the fabric tightly.
For high-traffic areas or sloped ground, add U-shaped aluminum edging along the trench before stapling. This creates a physical barrier that keeps the fabric in place even under pressure. If you're working on a slope, bury the edging 2-3 inches deep to prevent shifting during rain.
💧 Step 3: Anchor Fabric with Landscape Fabric Stakes
After stapling the edges, drive heavy-duty landscape fabric stakes into the ground every 2-3 feet across the fabric's surface. These stakes should be 12-18 inches long and made of galvanized steel or recycled plastic—they need to penetrate deep enough to resist wind and foot traffic. I like to angle the stakes slightly outward from the center to create a downward pull that keeps the fabric flat.
For extra security, especially in windy areas, use T-pins or landscape nails in addition to stakes. Drive them in at a 45-degree angle through the fabric and into the soil. This creates a crisscross pattern that prevents the fabric from lifting. Avoid over-staking—too many points can create weak spots where weeds might still emerge.
🪴 Step 4: Reinforce Edges with Mulch or Pavers
Once the fabric is fully staked, add a 2-inch layer of mulch or crushed gravel along the perimeter where the fabric meets the lawn or pathway. This not only holds the fabric down but also creates a clean, finished look. For driveways or high-traffic areas, use concrete pavers or bricks pressed firmly against the fabric's edge. The weight of these materials keeps everything in place.
If you're using mulch, avoid piling it directly against the fabric—leave a ½-inch gap to prevent moisture buildup, which can cause rot. Instead, create a slight slope away from the fabric to allow water to drain properly. This step is especially critical in clay-heavy soils where water tends to pool.
⏰ Step 5: Perform a Final Inspection and Adjustments
After securing everything, do a final walkthrough to check for loose edges, lifted fabric, or areas where weeds might still push through. Gently tug on each stake and staple to ensure they're firmly in place. If you notice any gaps, add extra stakes or staples immediately—small adjustments now prevent major repairs later.
Pay special attention to corners and seams, which are the most vulnerable spots. If you used overlapping fabric, ensure the seams are fully buried under mulch or soil. This isn't just about looks; it's about creating a long-term barrier that actually works. A little extra effort here means fewer weeds and less maintenance down the road.
Tips & tricks for secure landscape fabric installation
These game-changing tricks will help you create a weed barrier that stays put—no more flapping fabric or pesky weeds sneaking through.
Edging Depth Matters: When installing your galvanized steel edging or plastic landscape edging in Step 1, don't just eyeball that 2-3 inch depth. Use a measuring tape to verify—deeper really is better, especially in windy areas. I've found that edging set at exactly 3 inches holds up far better than 2 inches when storms hit. For slopes, angle the edging downward slightly to prevent water pooling, which can weaken the soil over time.
Staple Placement Strategy: In Step 2, when attaching fabric with landscape staples, focus on creating a "staple triangle" at corners and seams. Place one staple at the corner, then add two more at 45-degree angles within 6 inches. This triangular reinforcement prevents fabric from tearing at stress points. For high-wind areas, I recommend adding an extra row of staples every 6 inches along the entire perimeter—it's worth the extra effort to avoid fabric lift.
Pin Pattern Precision: During Step 3, when placing U-shaped landscape pins, think of a checkerboard pattern rather than random placement. Space them every 18-24 inches in a grid formation—this creates uniform pressure across the fabric. For loose soil, drive the pins slightly deeper than usual (about 1 inch deeper) to maximize grip. If you're using landscape rocks, place them in concentric circles around each pin to distribute weight evenly.
Maintenance Shortcut: In Step 4, mark your staple and pin locations with a spray paint dot when you first install them. This creates a visual map for future maintenance checks. When you do your periodic inspections (every 6 months is ideal), you'll know exactly where to look for loose staples or lifted fabric edges. I've saved hours of weeding by catching small issues early with this simple system.
Pro Tips for Hold Down Landscape Fabric
- These game-changing tricks will help you create a weed barrier that stays put—no more flapping fabric or pesky weeds sneaking through.
- Edging Depth Matters: When installing your galvanized steel edging or plastic landscape edging in Step 1, don't just eyeball that 2-3 inch depth.
- Staple Placement Strategy: In Step 2, when attaching fabric with landscape staples, focus on creating a "staple triangle" at corners and seams.
Frequently asked questions
Got questions about keeping your landscape fabric in place? You’re not alone! Here are some of the most common concerns—and their solutions—to help you nail that perfect weed-blocking setup.
What’s the best way to secure landscape fabric on slopes or hillsides?
For slopes, use heavy-duty landscape staples or galvanized U-shaped pins to anchor the fabric every 12–18 inches. Pair this with edging stones or bending the fabric into the slope to prevent shifting. Avoid long stakes—they can tear the fabric over time.
Can I install landscape fabric in winter or rainy weather?
While dry, mild weather is ideal, you can install fabric in winter or light rain—just ensure the ground isn’t frozen or muddy. Avoid heavy downpours, as soggy soil can make stakes slip or warp the fabric. If working in cold temps, use rust-resistant stakes to prevent bending.
Are there cheaper alternatives to holding down fabric with stakes?
Yes! Try bricks, pavers, or logs as weights along the edges, or bury the fabric’s edges 6–12 inches deep and pack soil tightly. For large areas, landscape fabric pins (cheaper than stakes) work well. Just avoid leaving fabric exposed—it’ll degrade faster.
How do I fix fabric that’s already lifting or shifting?
First, re-stake the loose sections with additional pins or stakes. If the edges are curling, trim excess fabric and secure with more staples or a heavy border (like rocks). For stubborn areas, spray adhesive (like construction-grade glue) can temporarily hold fabric in place while you re-secure it.
Do I need to cover the fabric with mulch, or can I leave it exposed?
Always cover fabric with 2–4 inches of mulch to protect it from UV rays and extend its life. Leaving it bare speeds up degradation and can create a moisture trap that encourages mold. Use organic mulch (like wood chips) for best results—it also suppresses weeds!
Wrapping up and next steps
Holding down landscape fabric doesn’t have to be a headache—with the right tools and techniques, you can create a long-lasting, weed-free foundation for your garden. Whether you opt for heavy-duty stakes, secure edging, or creative alternatives like bricks or logs, the key is consistency and attention to detail.
A little effort now means fewer weeds and more time enjoying your beautiful outdoor space later!
Ready to take the next step? Grab your materials, roll up your sleeves, and start transforming your yard today! 🌱✨