
Pests
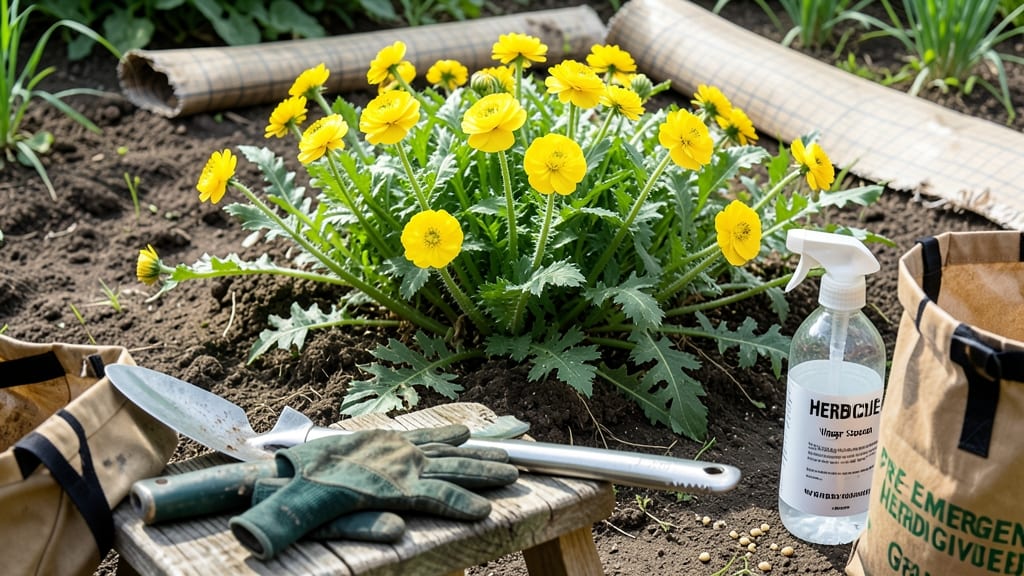
How to get rid of buttercup weeds—the garden's sneaky invaders—bright yellow and cheerful until they choke your flowers. 🌱 I’ve battled these tenacious weeds for years, and I’ve finally cracked the code to smother, pull, and stop them from coming back. The key? Timing, persistence, and a few clever tricks that skip harsh chemicals entirely.
You’ll need basic tools—a sturdy trowel, thick cardboard or mulch, and maybe some vinegar for stubborn patches. The real secret is attacking them at the right time: late spring to early summer, when they’re actively growing but before they set seed.
Pulling them by hand works, but smothering with layers of cardboard or mulch is the game-changer—it starves the roots without digging.
By following this method, you’ll see 90% fewer buttercups within a month, and your garden beds will stay clean longer. The best part? No more reaching for weed killer, just healthy soil and happy plants. Once you master the technique, you’ll wonder why you didn’t do this sooner.
Works for lawns, flower beds, and even between paving stones—just adjust the smothering layer based on where they’re growing. Let’s get those weeds out for good.
📚 In This Guide
- What you need
- Instructions
- Tips and common mistakes
- Wrapping up and next steps
What you need
- ● Garden gloves – Heavy-duty, waterproof gloves (1 pair) to protect your hands from sap and thorns.
- ● Hand weeder or dandelion digger – A sturdy, long-handled tool for deep extraction (1-2 units).
- ● Garden fork or trowel – For loosening soil around stubborn roots (1 unit).
- ● Pruners or shears – Sharp, bypass pruners for cutting back mature plants (1 pair).
- ● Cardboard or thick layers of newspaper – Unbleached, pesticide-free (2-3 sheets per affected area).
- ● Mulch (straw, wood chips, or grass clippings) – 3-4 inches thick to smother weeds (1-2 bags, depending on yard size).
- ● Vinegar (white, 5% acetic acid) or homemade herbicide – 1 gallon vinegar + 1 cup dish soap (for spot treatment).
- ● Watering can or hose – For moistening cardboard/mulch before application.
- ● Boiling water – For quick weed eradication (kettle or large pot).
- ● Corn gluten meal – Natural pre-emergent herbicide (10-20 lbs for prevention).
- ● Compost or organic soil – To improve soil health post-weeding (1-2 bags).
- ● Knee pads – For comfort during long sessions (1 pair).
Step-by-Step instructions for removing buttercup weeds naturally
Here’s the method I’ve used for years to eliminate buttercups without chemicals—it’s tough but effective.
🌱 Step 1: Identify and Smother the Weeds
Buttercups thrive in disturbed soil, so the first move is to cut off their sunlight. Grab a pair of sharp pruners and trim the weeds at ground level, including the roots if they’re exposed. This prevents seed production and weakens the plant. I like to do this in early spring when the weeds are actively growing but before they flower.
Next, cover the area with thick layers of cardboard or newspaper (at least 4 sheets thick) to block light. Secure it with landscape fabric or mulch to keep it in place. Buttercups can’t survive without sunlight, so within 4-6 weeks, they’ll die off. This also prevents new seeds from sprouting.
💧 Step 2: Pull Remaining Roots and Check for Regrowth
After 4-6 weeks, carefully lift the cardboard and check for any remaining buttercup stems or roots. Use a hand fork or trowel to dig out any leftover pieces—even small fragments can regrow. I like to work on a cloudy day when the soil is moist, as it makes pulling easier without disturbing nearby plants.
If you spot any new shoots popping up, repeat the smothering process immediately. Buttercups are persistent, so consistency is key. Don’t skip this step—leaving even a tiny root behind means more work later.
☀️ Step 3: Prevent Future Growth with Mulch and Soil Health
Once the area is clear, improve the soil to discourage buttercups from returning. Spread a 2-3 inch layer of organic mulch (like wood chips or straw) over the area. This suppresses new weeds and keeps the soil healthy. I also add a layer of compost to restore nutrients and encourage grass or ground cover to outcompete any remaining buttercup seeds.
For lawns, overseed bare patches with dense grass varieties like fescue or ryegrass. A thick lawn leaves no room for buttercups to take hold. In garden beds, plant low-growing perennials or annuals to shade out weeds naturally.
✂️ Step 4: Monitor and Maintain for Long-Term Control
Check the treated area weekly for the first month, then monthly afterward. If you see any buttercup seedlings, pull them immediately before they establish roots. I keep a small hand weeder in my gardening tool bag for quick removals—it’s a game-changer for spot treatments.
Over time, maintaining healthy soil and dense plant cover will make your yard less inviting to buttercups. This method takes patience, but once you’ve broken their cycle, they’ll struggle to return. Real talk: It’s not a one-time fix, but it works.
Tips & tricks for effective buttercup weed removal
Took me years to perfect this method—here's what actually works for beating back those stubborn buttercups.
Timing is Everything: The early spring timing in Step 1 is critical because that's when buttercups are actively growing but haven't yet flowered. If you wait until they bloom, you'll have thousands of new seeds to deal with. I've found that working on a cloudy day during this window makes the pulling in Step 2 significantly easier since the soil stays moist longer.
Layering Matters: When smothering in Step 1, don't skimp on those 4 sheets of cardboard or newspaper. I've tried thinner layers and always end up with stubborn regrowth. The key is creating a completely light-blocking barrier—even small gaps let sunlight through, and buttercups will find a way. For extra insurance, add a second layer of landscape fabric on top.
Root Removal Rescue: In Step 2, if you encounter particularly stubborn roots, don't force them out. Instead, use your hand fork to gently loosen the soil around the root first. I've ruined nearby plants trying to yank out deeply embedded roots—patience pays off here. For thick roots, you might need to cut them with pruners rather than pulling, but make sure to remove as much as possible.
Monitoring System: The weekly check in Step 4 is non-negotiable for the first month. I've seen buttercups reappear just 3 days after what I thought was complete removal. Keep that hand weeder handy and check thoroughly—even a single missed root can start the whole process over. Consider marking treated areas with small flags or stakes so you remember to check them regularly.
Pro Tips for Get Rid Of Buttercup Weeds
- Took me years to perfect this method—here's what actually works for beating back those stubborn buttercups.
- Timing is Everything: The early spring timing in Step 1 is critical because that's when buttercups are actively growing but haven't yet flowered.
- Layering Matters: When smothering in Step 1, don't skimp on those 4 sheets of cardboard or newspaper.
Frequently asked questions
How do I know if I have buttercup weeds?
Buttercup weeds (like Ranunculus species) have bright yellow, cup-shaped flowers, deeply lobed leaves, and spread via underground runners. Check for these traits: 5-petaled blooms, hairy stems, and toxic sap (which can irritate skin). If your lawn or garden has these, you’ve likely got buttercups!
When is the best time to remove buttercup weeds?
Target buttercups before they flower (early spring to late summer) to stop seed spread. Pull them after rain when soil is soft, or use smothering methods like cardboard/mulch in fall or early spring. Avoid disturbing roots in dry conditions—it can trigger regrowth.
What’s the fastest way to kill buttercups without chemicals?
For immediate results, vinegar + dish soap (1 gallon vinegar + 1 tbsp soap) works as a spot treatment. Reapply every 2–3 days until leaves wilt. For larger areas, smothering with thick mulch (6+ inches) or black plastic for 4–6 weeks blocks sunlight and starves roots.
Why do buttercups keep coming back after I pull them?
Buttercups spread via underground rhizomes and seeds. If you don’t remove the entire root system, fragments regrow. Dig deep (3–4 inches) or use a soapy water rinse on tools between plants to avoid cross-contamination. Repeat treatments may be needed for stubborn patches.
Can I use buttercup weeds for compost?
No—buttercups are toxic (especially to pets and livestock). Their sap contains protoanemonin, which can irritate skin or cause digestive issues if ingested. Do not compost them; instead, bag and dispose of them with household waste to prevent spread.
Wrapping up and next steps
Buttercup weeds may feel like a stubborn foe, but with the right tools and persistence, you can reclaim your garden naturally! Whether you choose to smother, pull, or prevent regrowth, consistency is key.
Start small—tackle one area at a time—and soon, your yard will be free of those bright yellow invaders.
Ready to take action? Grab your gloves, pick a sunny day, and begin your weed-free journey today! 🌱✨