
Companion Plants
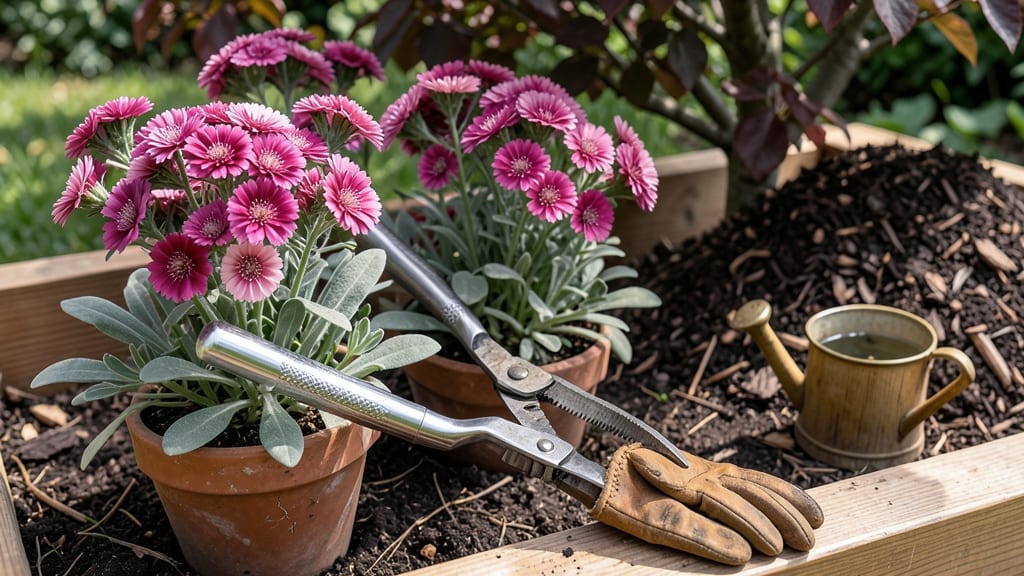
How to divide dianthus plants—your clumps are begging to be split, and thicker blooms and fuller growth are just a few cuts away. 🌸 I’ve divided mine every 3 years, and the difference in vigor is shocking. Overcrowded plants struggle to breathe, but dividing them unlocks a second wind of vibrant pink, purple, or white flowers.
The best time is early spring when new shoots emerge but before summer heat stresses them. You’ll need sharp pruners, a trowel, and a bucket of water—no fancy tools, just precision.
Cut through the center of the clump, ensuring each section has roots and foliage. The goal? 3-5 healthy stems per division for strong regrowth.
After dividing, water deeply and mulch lightly to retain moisture while roots establish. Within 4-6 weeks, you’ll see fresh growth, and by next season, your divided plants will outperform their crowded siblings.
The payoff? More flowers, less competition, and a garden that looks like it belongs in a postcard.
Works for all dianthus types—whether you’ve got cushion, sweet william, or grenadine—and scales from containers to borders. Here’s how to do it without a single limp stem left behind.
📚 In This Guide
- What you need
- Instructions
- Tips and common mistakes
- Wrapping up and next steps
What you need
- ● Sharp bypass pruners or clean, sterilized knife – For clean cuts without damaging the plant.
- ● Garden trowel or small spade – To carefully lift clumps from the soil.
- ○ Gloves (optional but recommended) – Protects your hands from thorns and soil.
- ● Watering can or hose with a gentle spray nozzle – Keeps plants hydrated before and after dividing.
- ● Compost or well-aged manure – 2–3 cups per divided plant to replenish nutrients.
- ○ Mulch (optional but helpful) – Straw, pine needles, or shredded bark to retain moisture.
- ● Rooting hormone (powder or gel) – Speeds up root growth for cuttings if you’re propagating.
- ● Disinfectant (rubbing alcohol or bleach solution) – Sterilizes tools between cuts to prevent disease.
- ● Plant tags or markers – Helps track varieties if you’re experimenting with different types.
- ● Garden twine or stakes – Supports newly divided plants if they’re top-heavy.
Step-by-Step instructions for dividing dianthus plants
Here's how I divide dianthus clumps to get thicker, more abundant blooms—no guesswork, just precision.
🪴 Step 1: Choose the Right Time and Healthy Plants
Divide dianthus in early spring or early fall when the weather is mild but not extreme. This gives roots time to establish before summer heat or winter cold. Pick plants that are at least 3 years old—younger ones haven’t built enough energy reserves for division.
Look for clumps where the center looks tired or bare—this is your signal to divide. Healthy dianthus will have multiple stems radiating outward from a central point. Avoid dividing plants that are already struggling from disease or pests; let them recover first.
✂️ Step 2: Dig Up and Separate the Clump
Water the plant thoroughly 24 hours before dividing to soften the soil and make roots easier to separate. Using a sharp spade, dig around the outer edge of the clump, working 6 inches away from the stems to avoid cutting healthy roots. Lift the entire plant gently from the soil.
Shake off excess dirt to expose the root system. You’ll see a network of fibrous roots and small offshoots. Using clean, sharp pruners or your hands, gently pull apart the clump into 3-5 inch sections, ensuring each piece has at least 3-5 stems and a good portion of roots. If roots resist, don’t force them—cut cleanly with pruners instead.
🌱 Step 3: Prepare and Replant the Divisions
Trim any damaged or mushy roots with sterilized pruners, cutting back to healthy tissue. Remove any yellow or brown leaves from the stems—this prevents disease from spreading to the fresh divisions. Soak the roots of each section in a 1:10 dilution of hydrogen peroxide for 5 minutes to disinfect and encourage root growth.
Dig new holes in well-draining soil, spacing them 12-18 inches apart for full-size plants. The hole should be just deep enough to accommodate the roots without burying the crown (the area where stems meet roots). Gently place each division into its hole, spreading the roots outward to encourage a bushier shape.
💧 Step 4: Water and Mulch for Recovery
Water each newly planted division deeply right after replanting to settle the soil around the roots. Keep the soil consistently moist but not soggy for the first 2-3 weeks—this helps the roots establish without stress. Use a 2-inch layer of mulch around the base (but not touching the stems) to retain moisture and regulate soil temperature.
Here’s the thing—don’t fertilize right away. Newly divided dianthus need to focus on root growth, not foliage. Wait until you see new growth emerging (usually in 4-6 weeks) before applying a balanced, slow-release fertilizer. This ensures your divisions put energy into rebuilding their root systems first.
☀️ Step 5: Monitor and Maintain for Bushier Blooms
Keep divided dianthus in full sun (at least 6-8 hours daily) for the best blooms. If you notice the stems stretching or leaves growing pale, they’re reaching for more light—adjust their position or add a temporary shade cloth if needed.
Deadhead spent blooms regularly to encourage more flowers, but hold off on heavy pruning until the plant is fully established. You’ll know it’s thriving when you see compact, bushy growth with vibrant foliage and abundant blooms by next season. Dividing dianthus this way gives you stronger, more productive plants that last for years.
Tips & tricks for perfect dianthus division
Here's what nobody tells you about dividing dianthus—these tricks will save you time and frustration while ensuring your new plants thrive.
Timing Secret: The 24-hour watering tip in Step 2 is non-negotiable. I learned this the hard way after struggling to separate roots from dry soil. Watering ahead softens the soil, making it easier to separate those fibrous roots cleanly. If your soil is particularly dense, consider watering twice—once 48 hours before and again 24 hours before dividing. This extra step prevents root damage that can stress your plants during recovery.
Root Rescue Strategy: When you're pulling apart those stubborn clumps in Step 2, don't force it! If roots resist, stop and use sterilized pruners to make clean cuts instead of tearing. I've seen gardeners accidentally pull off too many roots, which weakens the divisions. Aim for each section to have at least 3-5 stems and a good portion of roots—this ensures each new plant has enough energy to establish. Think of it like giving each division its own "starter kit" for success.
Disinfection Boost: That 5-minute hydrogen peroxide soak in Step 3 does more than just clean—it primes your divisions for faster root growth. For even better results, follow the soak with a quick dip in a rooting hormone powder (optional but effective). This extra step prevents disease and gives your plants a head start. I've noticed divisions treated this way show new growth about 2 weeks earlier than untreated ones. If you skip this, at least make sure your pruners are sterilized between cuts to prevent cross-contamination.
Pro Tips for Divide Dianthus Plants
- Here's what nobody tells you about dividing dianthus—these tricks will save you time and frustration while ensuring y...
- Timing Secret: The 24-hour watering tip in Step 2 is non-negotiable. I learned this the hard way after struggling to ...
- Root Rescue Strategy: When you're pulling apart those stubborn clumps in Step 2, don't force it! If roots resist, sto...
Frequently asked questions
Got questions about dividing your dianthus? You’re not alone!
Here are answers to the most common concerns—so you can tackle this task with confidence and keep those pretty blooms coming.
When is the best time to divide dianthus plants?
The ideal window is early spring (just as new growth starts) or early fall (before the first frost). Avoid dividing in summer—heat stress can slow recovery. If you must divide later, opt for fall over spring, as cooler temps help roots establish faster.
How do I know if my dianthus is ready to be divided?
Look for these signs:
- Crowded clumps where stems tangle and blooms thin out.
- Floppy centers with fewer leaves or flowers.
- Age—dianthus over 3–4 years old often benefits from division.
Can I divide dianthus from cuttings instead of clumps?
Yes! While dividing clumps is easiest, you can also propagate from healthy stem cuttings (4–6 inches long) in spring or summer. Dip the cut end in rooting hormone, plant in moist sand/perlite, and keep humid until roots form (4–6 weeks). Cuttings work well for variegated or rare varieties you want to multiply.
What if my divided dianthus doesn’t bloom the first year?
Don’t worry—it’s normal! Focus on establishing roots first. Reduce deadheading the first season to conserve energy, and fertilize lightly with low-nitrogen feed (like 5-10-10) in early spring. Most divided dianthus rebound with full blooms by year two.
Should I divide dianthus that’s in a pot vs. the ground?
Potted dianthus can be divided anytime roots circle the container, but wait until spring for best results. For ground-planted varieties, dig up the entire clump carefully—use a shovel or garden fork to loosen roots first. Potted plants may need larger containers (12+ inches deep) post-division to prevent overcrowding.
Wrapping up and next steps
Dividing your dianthus plants is a simple yet rewarding way to boost their health, encourage vibrant blooms, and expand your garden effortlessly. 🌸 By following the right timing, tools, and techniques—like selecting the right clumps, using sharp shears, and giving them proper post-division care—you’ll set your plants up for success.
With patience and a little elbow grease, you’ll enjoy double the beauty in no time!
Ready to get growing? Grab your gloves, pick a sunny day, and start dividing—your garden (and future bouquets!) will thank you. 🌿