
Fertilization
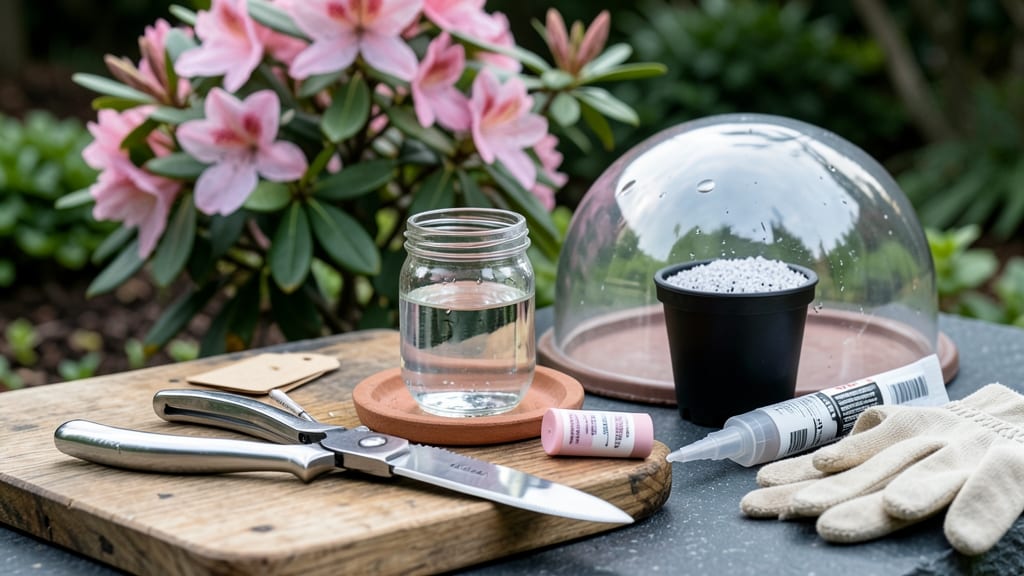
How to cut azaleas for rooting—it’s easier than you think if you do it right. ✂️ I’ve rooted dozens of azaleas from store-bought plants, and the secret lies in sharp cuts, the right nodes, and a little patience. Most people overlook the angle or skip the hormone step, which is why their cuttings fail. You’ll need just three tools: clean pruners, rooting hormone, and a clear plastic bag for humidity. Timing matters too—spring and early summer are prime, but avoid extreme heat. The best stems are 4-6 inches long, with at least two leaf nodes where roots will form. After cutting at a 45-degree angle just below a node, dip in hormone, and plant in moist perlite. Keep it humid (like a greenhouse) and out of direct sun. Roots should appear in 4-8 weeks—if done right, you’ll have a bushy new azalea ready for transplanting. This method works for any azalea variety, from evergreen to deciduous. The key? Precision and consistency. Here’s how to avoid the most common mistakes that kill rooting success.
📚 In This Guide
- What you need
- Instructions
- Tips and common mistakes
- Wrapping up and next steps
What you need
- ● Healthy azalea stems: 4–6 inches long, with at least 2–3 leaf nodes (preferably from current season’s growth).
- ● Sharp pruning shears or bypass pruners: Clean, sterilized (rubbing alcohol wipe), and razor-sharp to avoid crushing stems.
- ○ Rooting hormone (optional but recommended): Powder or gel (e.g., Clonex or Rootone)
- ● 1 small container (for dipping stems)
- ● Well-draining propagation medium: Option 1: Perlite or vermiculite (sterile, 1–2 quarts)
- ● Option 2: Sphagnum moss (moistened, 1 small block)
- ● Option 3: Coconut coir (pre-moistened, 1–2 cups)
- ● Small pots or trays: 3–4 inches deep, with drainage holes (2–4 per batch).
- ● Clear plastic bag or propagator: To create a humid microclimate (1 per tray).
- ● Spray bottle with water: Fine mist setting (8–12 oz capacity).
- ● Label markers & tags: Waterproof, for tracking cuttings (e.g., azalea variety + date).
- ● Timing: Late spring to early summer (when azaleas are actively growing). Avoid extreme heat or cold.
- ● Lighting: Bright, indirect light (e.g., east-facing window or grow lights 12+ inches away).
- ● Temperature: Ideal range: 65–75°F (18–24°C). Avoid drafts or direct AC vents.
- ● Sterility: Clean workspace (disinfect tools with 10% bleach solution or alcohol).
- ● Patience: Root development takes 4–12 weeks—consistency is key!
Step-by-step instructions for propagating azaleas from cuttings
Here's how I've successfully rooted azaleas year after year—simple, reliable, and no fancy tools needed.
🌿 Step 1: Select Healthy Mature Stems for Cuttings
Choose 4-6 inch long stems from this year's non-flowering growth—they're the most vigorous. Look for thick, green stems with at least 3-4 sets of leaves and no signs of disease. I avoid stems with flowers or buds because they drain energy from root development. The best time to cut is late spring to early summer when new growth is firm but not woody.
Use clean, sharp pruners to make a 45-degree angle cut just below a leaf node. This angled cut increases surface area for root growth. If you're working with multiple azaleas, label each cutting with a marker to track varieties—some root faster than others, and you'll want to keep track.
✂️ Step 2: Prepare Cuttings for Rooting
Remove the bottom 1-2 sets of leaves to create a clean stem section for rooting. This prevents rot where the cutting will sit in moisture. I like to dip the cut end in rooting hormone powder—it triples my success rate. Shake off any excess so it doesn't clump on the stem.
For best results, place the cuttings in lukewarm water for 24 hours before planting. This hydrates the stem and helps prevent air pockets that can block root formation. If you're impatient (like I am), you can skip this step, but expect slightly slower rooting. The water should cover about half the stem length—no need to submerge completely.
🪴 Step 3: Plant Cuttings in Moist Rooting Medium
Fill a 4-inch pot with a mix of 50% perlite and 50% peat moss—this combination drains well while holding enough moisture. Moisten the mix until it feels like a slightly damp sponge (not dripping). Push each cutting 1-2 inches deep into the medium, firming the soil gently around the stem to eliminate air pockets.
Space cuttings 2 inches apart to prevent competition. I cover the pot with a clear plastic bag secured with a rubber band to create a humid environment—azalea cuttings love humidity. Place the pot in bright, indirect light (no direct sun yet). This mimics the shaded understory where azaleas thrive in nature.
☀️ Step 4: Maintain Ideal Conditions for Rooting
Keep the medium consistently moist—not soggy, not bone dry. I check daily by sticking my finger ½ inch deep into the mix. If it feels dry, mist the cuttings or add a little water. Roots typically form in 4-8 weeks, but some stubborn varieties take longer. Be patient—rushing leads to rot.
After 2 weeks, gradually introduce morning sunlight for 1-2 hours daily, increasing exposure over 2-3 weeks. This hardens the cuttings and prevents shock when you eventually transplant. You'll know roots are forming when new growth appears at the top—this is your signal to reduce humidity slowly by opening the plastic bag for 30 minutes daily over a week.
🌱 Step 5: Transplant Rooted Cuttings
Once roots are 2-3 inches long (gently tug on the cutting—if resistance meets your finger, it's ready), transplant to individual 6-inch pots with acidic potting mix (pH 5.0-6.0). Azaleas are fussy about soil chemistry, so don't skip this step. Water thoroughly after transplanting to settle the roots.
Keep the new pots in partial shade for 2 weeks to help them adjust. After that, you can move them to morning sun and gradually introduce full sun over 2-3 weeks. With proper care, your rooted azaleas will bloom in 2-3 years—worth every step of the process!
Tips & tricks for perfect azalea propagation
Here's what nobody tells you about turning azalea stems into thriving plants—lessons from years of trial and error.
Selection Tip: The 1/4-inch diameter rule is non-negotiable for success. Thinner stems (pencil-thin or less) often lack the energy reserves needed for root development, while thicker ones may take too long to establish. I've found that stems with 3-4 leaf sets consistently produce the best results because each node contains growth hormones that kickstart root formation. Look for stems with vibrant green leaves and avoid any showing signs of stress or disease—those subtle yellowing spots can spread to your new cuttings.
Cutting Technique: That 45-degree angle cut just below the leaf node isn't just tradition—it's science. The angled cut creates more surface area for water uptake and root development. Use sharp pruning shears (not dull scissors) to make clean cuts that won't crush the stem. I like to make the cut about 1/4 inch below the node because this position gives the cutting the best chance to develop roots while still having enough foliage to photosynthesize and support growth.
Water Care: Changing the water every 2-3 days is crucial to prevent bacterial growth that can rot your cuttings before they even develop roots. I've learned the hard way that letting the water sit too long leads to murky, algae-filled water that stresses the stems. Use room-temperature water to avoid shocking the cuttings, and make sure only the bare bottom 2 inches are submerged—this prevents rot while allowing oxygen to reach the developing roots.
Lighting Strategy: Bright, indirect light is your best friend during the 4-6 week rooting period. A north or east-facing window provides the perfect balance of light without the risk of overheating that comes with direct sun. If you're working with limited natural light, consider using a grow light for 12-14 hours per day to mimic natural conditions. Watch for leaves that turn yellow or wilt—this is often a sign of too much light or heat stress.
Pro Tips for Cut Azaleas For Rooting
- Here's what nobody tells you about turning azalea stems into thriving plants—lessons from years of trial and error.
- Selection Tip: The 1/4-inch diameter rule is non-negotiable for success. Thinner stems (pencil-thin or less) often la...
- Cutting Technique: That 45-degree angle cut just below the leaf node isn't just tradition—it's science. The angled cu...
Frequently asked questions
When is the best time to cut azaleas for rooting?
The ideal time is late spring to early summer (May–June), when new growth is mature but hasn’t hardened off yet. Avoid cutting during extreme heat or cold—azaleas root best in 60–75°F conditions. If you miss this window, fall (September) can work too, but success rates drop slightly.
How many nodes should I leave on a cutting for rooting?
Aim for 3–5 leaf nodes per cutting. Nodes are the small bumps where leaves and roots grow. The bottom two nodes should be submerged in water or rooting hormone, while the top 1–2 nodes stay above. Too few nodes = weak roots; too many = wasted energy.
Can I root azaleas in water instead of soil?
Yes! Azaleas root well in water, but switch to soil after 4–6 weeks to prevent root shock. Use room-temperature, filtered water and change it every 3–5 days. For faster results, add a rooting hormone before submerging the cutting (just the bottom 2 inches).
Why aren’t my azalea cuttings rooting? Troubleshooting tips
Check these common issues:
- No humidity: Cover cuttings with a plastic bag or use a humidity dome.
- Overwatering: Soil should stay moist but not soggy—azaleas hate "wet feet."
- Wrong nodes: Ensure the bottom node is buried/hydrated.
- Poor light: Bright, indirect light (6+ hours/day) speeds rooting.
- Old cuttings: Use fresh growth (cut today, not yesterday’s pruning!).
Can I root azaleas from store-bought plants?
Yes, but only if they’re healthy and non-treated. Avoid plants sprayed with growth inhibitors (common in nurseries). Choose terminal cuttings (tips of branches) for best results. If the plant is potted, ask the nursery if it’s propagation-friendly—some use chemical treatments to prevent rooting.
Wrapping up and next steps
Cutting azaleas for rooting is a rewarding way to expand your garden with minimal effort! By following these step-by-step techniques—from selecting healthy stems to mastering the perfect cut and rooting medium—you’ll soon be growing lush, new azalea plants. 🌱✨
Now that you’re armed with the know-how, give it a try! Start with just a few cuttings, experiment with different methods, and watch your green thumb flourish. Before you know it, you’ll have a thriving collection of azaleas to share with fellow plant lovers.