
Tools
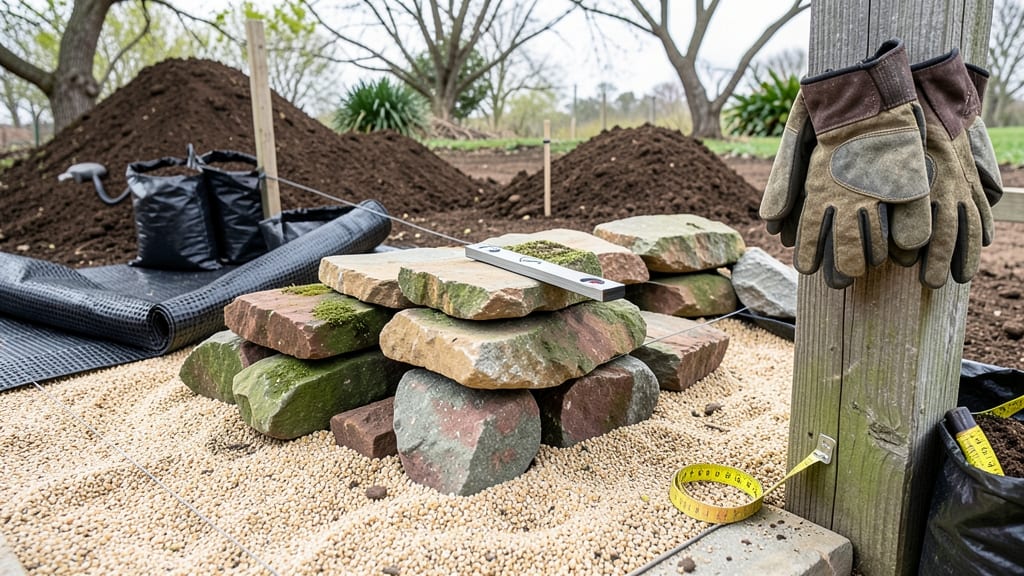
Building a raised stone garden bed transforms your yard into a permanent, drought-resistant growing space that lasts decades. 🌿 I’ve seen these beds outlast wood and metal, their natural edges blending seamlessly into any landscape while keeping soil contained and weeds at bay.
The best part? You can customize the shape, size, and stone type to match your garden’s style—whether rustic fieldstones or sleek river rocks. A well-built stone bed also improves drainage, warms up faster in spring, and stays weed-free with proper construction. No more rot or warping; just solid, functional beauty.
By the end, you’ll have a low-maintenance planter that works for vegetables, flowers, or even a pollinator-friendly meadow. The stones act as a natural barrier, while the raised height makes gardening easier on your back. Plus, it’s a project you’ll admire for years to come.
Ready to skip the seasonal replacements and build something that truly lasts? Let’s get those stones stacked—and your garden elevated.
📚 In This Guide
- What you need
- Instructions
- Tips and common mistakes
- Wrapping up and next steps
What you need
- ● Flat stones or pavers: 12–20 per linear foot (depending on size; aim for 6–12" in diameter/length). Use a mix of fieldstones, flagstones, or concrete pavers for stability.
- ● Gravel (base layer): Crushed stone or landscape gravel (¾" minus), 4–6 inches deep for drainage and leveling.
- ● Landscape fabric: 1 roll (to prevent weed growth and stabilize soil).
- ● Garden soil or compost: 6–12 inches deep (depending on bed height). Mix topsoil with compost for nutrient-rich planting.
- ○ Optional: Retaining wall blocks (for structured edges).
- ● Sand (for leveling between stones).
- ● Edging material (metal, plastic, or wood) to define the bed shape.
- ● Wheelbarrow (for mixing soil and gravel).
- ● Shovel and spade (for digging and layering).
- ● Level (to ensure your bed stays even).
- ● Rubber mallet (for tapping stones into place).
- ● Measuring tape and string (to mark bed dimensions).
- ● Garden gloves and safety glasses (for protection).
- ○ Optional: Plate compactor (for compacting gravel layers).
- ● Choose a sunny or partially shaded spot with easy access to water.
- ● Check local regulations—some areas require permits for raised beds over a certain height.
- ● Plan your bed’s dimensions (standard widths: 3–4 feet for easy reach; height: 6–12 inches for accessibility).
Step-by-Step instructions for building a raised stone garden bed
Here's how I create sturdy, long-lasting beds that blend seamlessly with any landscape.
🪴 Step 1: Choose and Prepare the Location
Select a spot with 6+ hours of sunlight daily and good drainage—water pooling will rot roots and weaken stones over time. I always mark the bed's perimeter with landscape fabric stakes and string to visualize the shape before digging. For a 4-foot by 8-foot bed, clear away grass, weeds, and debris from a 12-inch wide strip around your marked area.
Use a shovel to remove the top 6-8 inches of soil and set it aside for filling the bed later. The deeper you dig, the more stable your base will be. I like to add a 2-inch layer of coarse sand at the bottom to improve drainage—this is especially important for clay-heavy soils. Tamp everything down firmly with a plate compactor or the back of a shovel.
🪴 Step 2: Build the Stone Foundation
Start with the largest, flattest stones along the outer edge to create a solid base. I arrange them in a staggered pattern, interlocking edges like puzzle pieces to prevent shifting. For a 12-inch tall bed, use 3-4 courses of stones, with each layer slightly inset from the one below to create a tapered look. The wider the base, the more stable the structure—aim for a 18-inch base width for a 12-inch tall wall.
Leave a 3-inch gap between stones for drainage and to allow roots to spread into the soil below. Fill these gaps with smaller stones or gravel as you build. I like to use a rubber mallet to gently tap stones into place—this ensures they settle evenly without cracking. If you notice any stones wobbling after placement, remove and replace them before moving to the next layer.
💧 Step 3: Fill and Stabilize the Bed
Backfill the bed with a mix of native soil and 20% compost to create a nutrient-rich planting medium. I fill it to about 2 inches below the top edge of the stones, leaving room for mulch. Water the soil thoroughly to settle it, then add a 1-inch layer of mulch—I prefer hardwood chips or straw—to suppress weeds and retain moisture. This layer also prevents erosion when watering.
For extra stability, especially in windy areas, I weave landscape fabric through the stone gaps before filling. This keeps smaller stones in place and reduces the risk of the wall spreading over time. Press the fabric gently against the inner stone face, then fill the bed as described. The fabric won’t prevent drainage but will help maintain the structure’s integrity for years.
✂️ Step 4: Add Finishing Touches and Plant
Once the bed is filled and stabilized, I like to add a final layer of decorative stones or edging along the top for a polished look. Flat stones create a clean border, while rounded ones soften the bed’s appearance. Plant immediately or wait until the soil settles further—you’ll notice a slight 1-2 inch drop in height after the first heavy watering. This is normal, so don’t overfill initially.
Start with low-growing perennials or annuals along the edges to anchor the soil and prevent erosion. I always plant in a staggered pattern to create a natural, full look. Water deeply after planting to encourage root growth into the prepared soil. Avoid walking on the bed for at least 48 hours to let roots establish without disturbance.
🌱 Step 5: Maintain for Long-Term Durability
Check the stonework annually for loose stones or gaps that may have formed. I top off the mulch layer every spring to maintain 2-3 inches of coverage, which keeps weeds at bay and regulates soil temperature. If you notice stones shifting, remove the mulch, adjust the stones, and refill with gravel or small stones to secure them. This simple maintenance keeps the bed looking sharp for decades.
For beds in high-traffic areas, I recommend adding a 4-inch wide wooden or metal edging** along the top to prevent soil from spilling over the stones. This also gives a cleaner finish and makes weeding easier. With proper care, a stone garden bed will outlast wooden frames by years—sometimes even generations.
Tips & tricks for perfect raised stone garden beds
Here's what I've learned after building multiple beds that still stand strong after years.
Foundation Stability: In Step 1, when you're removing that 6-8 inches of soil, don't rush the tamping process. I use a plate compactor for the first 2 inches, then switch to a shovel handle for the remaining depth. This creates a solid base that prevents future settling. The 2-inch sand layer is non-negotiable for clay soils—it's what keeps your stones from sinking over time.
Stone Selection Strategy: For Step 2, I always source stones from local suppliers rather than big-box stores. Local stones are better suited to your climate and soil conditions. Look for flat, irregular stones with rough edges—they interlock better than smooth river rocks. I sort them by size before building, placing the largest at the bottom and working my way up. This creates a natural taper that looks beautiful and resists erosion.
Drainage and Soil Mix: When you're filling in Step 3 with that native soil and 20% compost mix, consider adding a handful of perlite to the bottom inch. It improves aeration without affecting drainage. For heavy clay soils, I increase the compost to 30%—this prevents compaction over time. The 1-inch mulch layer should be your last step before planting; it's what keeps weeds from competing with your plants.
Long-Term Maintenance Secret: In Step 5, I've found that adding a 1-inch layer of pea gravel between the stones and the landscape fabric creates an extra drainage layer. This simple addition prevents water from pooling against the stones during heavy rains. For the 48-hour waiting period after planting, I mark the bed with stakes to remind myself not to step on fresh soil—this prevents soil compaction that can suffocate young roots.
Pro Tips for Build A Raised Stone Garden Bed
- Here's what I've learned after building multiple beds that still stand strong after years.
- Foundation Stability: In Step 1, when you're removing that 6-8 inches of soil, don't rush the tamping process. I use ...
- Stone Selection Strategy: For Step 2, I always source stones from local suppliers rather than big-box stores. Local s...
Frequently asked questions
Got questions about building a raised stone garden bed? You’re not alone—here are some of the most common concerns and quick answers to help you get started with confidence!
What’s the best type of stone to use for a raised bed?
Opt for locally sourced, flat, and durable stones like flagstone, bluestone, or fieldstone. Avoid soft or crumbly rocks (like limestone) that may break over time. Pro tip: Check for sharp edges—smooth them with a hammer or grinder to prevent injury when handling.
When is the best time to build a raised stone garden bed?
The ideal time is early spring or fall when soil is workable but not frozen. Building in summer can stress plants if you’re planting immediately, while winter construction risks frost damage. Bonus: Start with a bare bed—stones are easier to lay when there’s no vegetation in the way!
Are there budget-friendly alternatives to natural stone?
Yes! Use reclaimed bricks, concrete pavers, or even stacked logs for a rustic look. For a temporary solution, try cinder blocks or landscape timbers, though these may not last as long. Cost-saving tip: Check local demolition sites for free or low-cost stones!
How do I prevent erosion or sinking in my stone bed?
Layer landscape fabric or cardboard under the stones to block weeds, then fill the bed with a mix of topsoil and compost (60/40 ratio). For extra stability, dig a shallow trench (4–6 inches deep) to set the bottom stones before stacking. Troubleshooting: If stones shift, secure them with landscape adhesive or add more soil weight inside.
Can I build a raised stone bed over grass or existing plants?
Not ideal! Remove grass and weeds first—they’ll decompose and rob your soil of nutrients. Smother the area with cardboard or black plastic for 2–4 weeks to kill vegetation before building. Warning: Avoid herbicides near your bed—they can linger in the soil and harm plants.
| Quick Reference | Solution |
|---|---|
| Uneven stones? | Use a rubber mallet to tap them into place or add a thin layer of sand as a base. |
| Weeds popping up? | Apply mulch or landscape fabric between stones to suppress growth. |
| Drainage issues? | Add a 1-inch layer of gravel at the bottom before soil to improve flow. |
Wrapping up and next steps
Building a raised stone garden bed is a rewarding project that adds beauty, functionality, and durability to your outdoor space. With natural stone edges, you’ve created a timeless, low-maintenance garden feature that will thrive for years—perfect for growing everything from veggies to flowers! 🌱
Now that you’re ready to roll up your sleeves, start small—pick a manageable section of your yard, gather your tools, and let your creativity flow.
Whether you’re a seasoned gardener or just beginning, this project is a fantastic way to connect with nature and elevate your gardening game. Happy building! 🛠️✨