
Vegetables
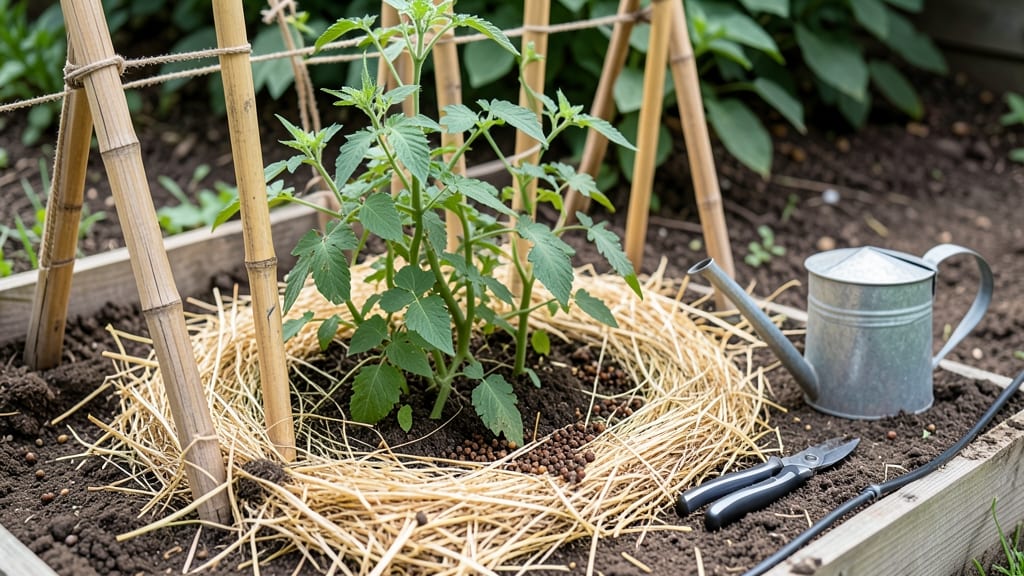
Encouraging tomato growth starts with sunlight, soil, and a little strategic pruning. 🌱 Last summer, my cherry tomatoes doubled their yield just by adjusting my approach—no fancy tools or expensive tricks. The secret lies in mimicking their natural environment while giving them the care they crave.
Most gardeners overlook soil prep, but tomatoes thrive in loose, nutrient-rich dirt with plenty of organic matter. I swear by adding compost at planting time and using a balanced fertilizer every 3-4 weeks. Watering matters too—deep soaks in the morning keep roots happy without inviting disease.
Pruning isn't optional either; removing suckers (those little shoots in the leaf axils) redirects energy to fruit production, not foliage. You'll see the difference within weeks: stronger stems, more flowers, and tomatoes that ripen faster. The plants won't just survive—they'll flourish, producing bushels of fruit instead of a handful.
This method works for both backyard gardens and container growers, adapting to any sunny spot. The best part? These techniques build on each other. Start with soil prep, then focus on watering and pruning, and watch your tomatoes transform from scraggly seedlings into productive powerhouses. Let's get those vines growing!
📚 In This Guide
- What you need
- Instructions
- Tips and common mistakes
- Wrapping up and next steps
What you need
- ● Tomato seeds or seedlings: Choose disease-resistant varieties like Celebrity or Cherry Roma for beginners.
- ● Well-draining potting mix or garden soil: 10-15 lbs (for garden beds) or 2-3 gallons (for containers). Amend with compost for nutrients.
- ● Containers (if not gardening in-ground): 5-gallon pots or larger (tomatoes need space!). Ensure they have drainage holes.
- ● Fertilizer: Balanced 10-10-10 or organic options like compost tea or worm castings.
- ● Mulch: Straw or shredded leaves (2-3 inches) to retain moisture and suppress weeds.
- ● Support structures: Cages (5-6 ft tall), stakes (6-8 ft), or trellises for indeterminate varieties.
- ● Watering can or hose with a gentle spray nozzle: Avoid wetting leaves to prevent disease.
- ● Gloves and knee pads: Protect your hands and knees during planting and pruning.
- ● Pruning shears or sharp scissors: For trimming suckers and dead leaves.
- ● pH test kit: Aim for soil pH 6.0–6.8 (tomatoes love slightly acidic soil!).
- ○ Shade cloth (optional): For seedlings or hot climates (30-50% shade).
- ○ Drip irrigation system (optional): Automates watering for consistent moisture.
- ● Epsom salt (magnesium sulfate): 1 tbsp per plant monthly for blossom boosts.
Step-by-Step instructions for boosting tomato plant growth
Here’s how I transform average tomato plants into vigorous producers using sunlight, pruning, and soil tweaks.
☀️ Step 1: Maximize Sunlight Exposure
Tomatoes crave 6-8 hours of direct sunlight daily. Place your plants where they’ll get morning sun and afternoon light—evenings are less critical. If your garden gets partial shade, rotate plants every 3-4 days so all sides receive equal exposure. You’ll see leaves turn a deeper green within a week, signaling better photosynthesis.
For container growers, move pots to sunnier spots as the sun shifts with the seasons. Watch for yellowing leaves—this means they’re not getting enough light. If you notice this, either relocate the plant or supplement with a grow light 12-14 inches away for 4-6 hours daily.
🌿 Step 2: Prune for Airflow and Energy Focus
Pruning isn’t just about shaping—it’s about directing energy. Remove suckers (the small shoots that grow between the main stem and branches) when they’re 1-2 inches long. Pinch them off with your thumb and forefinger or snip with clean pruners. I do this weekly during the growing season. This prevents disease by improving airflow and ensures fruit gets more nutrients.
Also, trim any leaves touching the soil to reduce humidity and fungal risks. You’ll notice stronger stems and larger fruit as the plant focuses its energy on production rather than maintaining unnecessary foliage.
💧 Step 3: Water Deeply and Consistently
Tomatoes hate inconsistent moisture. Water deeply 1-2 times per week (more in extreme heat) until the soil is damp 12 inches down. Use a moisture meter or stick your finger in—if it feels dry past your first knuckle, it’s time to water. Shallow watering encourages weak roots and splits fruit.
Water in the morning so leaves dry quickly, reducing blight risk. Mulch with 2-3 inches of organic mulch (like straw) to retain moisture and keep roots cool. You’ll see fewer cracked tomatoes and more uniform growth when moisture is steady.
🪴 Step 4: Feed for Stronger Growth
Start with a balanced fertilizer (10-10-10) at planting, then switch to a low-nitrogen, high-phosphorus formula (5-10-10) when flowers appear. I feed every 3-4 weeks during the growing season, always watering first to prevent root burn. Avoid over-fertilizing—too much nitrogen leads to leafy growth at the expense of fruit.
For a natural boost, side-dress with compost or use a liquid seaweed fertilizer every 2 weeks. You’ll notice thicker stems, darker green leaves, and more blossoms within a few feedings.
✂️ Step 5: Support and Train for Optimal Growth
Stake or cage tomatoes at planting—never after they’ve grown tall. Use 5-6 foot stakes or sturdy cages to prevent wind damage. Gently tie the main stem to the support with soft plant ties, adjusting as the plant grows. This keeps stems upright and reduces disease risk from touching the ground.
For indeterminate varieties, prune the top growth after the first flower cluster to encourage bushier growth. You’ll see more fruit and better air circulation, which means fewer pests and diseases.
Tips & tricks for maximizing tomato plant growth
These simple but powerful tricks will help you coax the most out of your tomato plants—no green thumb required.
Lighting Strategy: In Step 1, when positioning your plants for that crucial 6-8 hours of sunlight, pay special attention to the direction of morning sun. East-facing windows or garden spots get the warmest morning light, which helps kickstart photosynthesis early. If you're using grow lights for 4-6 hours daily, position them just 10-12 inches above the plants—the closer they are, the more intense (but potentially damaging) the light becomes. I've found that moving lights slightly higher after the first few weeks prevents leaf burn while maintaining strong growth.
Pruning Precision: When you're removing those 1-2 inch suckers in Step 2, here's what I learned the hard way: don't just yank them off. Use clean pruners or your fingernails to pinch them at the base where they meet the main stem. This prevents tearing and gives you cleaner cuts that heal faster. I also recommend keeping a small spray bottle of rubbing alcohol handy to wipe down your pruners between cuts—this prevents spreading any potential diseases from plant to plant.
Watering Wisdom: For Step 3's deep watering, I've found that the "finger test" works best when you're checking moisture 12 inches down. Press your finger in firmly—if the soil feels like a damp sponge rather than dry sand, it's got enough moisture. The key is consistency: I set a reminder on my phone for every 3-4 days to check, especially during heatwaves. And here's a pro move: if you notice the top inch of soil drying out between waterings, that's actually a good sign—it means the mulch is working to protect those deeper roots.
Fertilizer Timing: When you switch to that 5-10-10 fertilizer in Step 4, here's how I time it perfectly: I feed right after a deep watering session (like your Step 3 routine) and always in the morning. This gives the roots several hours of daylight to absorb nutrients before evening. I've noticed that plants fed in the afternoon sometimes show signs of stress from the sudden nutrient influx when they're winding down for the night.
Pro Tips for Encourage Tomato Growth
- These simple but powerful tricks will help you coax the most out of your tomato plants—no green thumb required.
- Lighting Strategy: In Step 1, when positioning your plants for that crucial 6-8 hours of sunlight, pay special attent...
- Pruning Precision: When you're removing those 1-2 inch suckers in Step 2, here's what I learned the hard way: don't j...
Frequently asked questions
Got questions about growing juicy, vibrant tomatoes?
You’re not alone! Here are answers to the most common queries—so you can troubleshoot, optimize, and enjoy a bountiful harvest.
How often should I water my tomato plants?
Water deeply 1-2 times per week, depending on your climate. Aim for 1-1.5 inches of water per week, ensuring the soil stays consistently moist (but not soggy). Early morning is best to prevent fungal diseases and encourage strong root growth. Mulch helps retain moisture!
When is the best time to prune tomato plants?
Prune regularly during the growing season (every 2-4 weeks) to improve airflow and focus energy on fruit production. Remove suckers (shoots between the stem and branches) when they’re small (2-3 inches). Avoid heavy pruning late in the season—let the plant ripen existing fruit first!
Why are my tomato leaves turning yellow?
Yellow leaves often signal overwatering, underwatering, or nutrient deficiencies. Check the soil moisture and adjust watering. If lower leaves yellow first, it may be blossom end rot (lack of calcium)—add crushed eggshells or lime. Upper leaves yellowing? You might need more nitrogen (try compost tea).
Can I grow tomatoes in containers? What’s the best setup?
Use containers at least 5 gallons for dwarf varieties or 10+ gallons for larger plants. Ensure they have drainage holes and fill with well-draining potting mix. Place in full sun (6+ hours/day) and fertilize every 2-3 weeks. Determinate varieties (bush tomatoes) work best for containers!
What can I do if my tomatoes crack?
Cracking happens when plants get too much water too quickly (especially after dry spells). Keep soil evenly moist (not soggy) and mulch to regulate moisture. For blossom-end rot (cracks near the stem), add calcium (crushed eggshells or calcium nitrate) and maintain consistent watering. Harvest overripe tomatoes promptly!
Wrapping up and next steps
Growing thriving tomato plants is all about patience, consistency, and a little green thumb love! 🌱 By mastering the basics—like sunlight exposure, proper pruning, and nutrient-rich soil—you’ll be well on your way to a bountiful harvest. Remember, every gardener starts somewhere, and even small steps make a big difference.
Now that you’re armed with these tips, roll up your sleeves and get planting! Start with one or two plants, experiment with the techniques that work best for your space, and don’t forget to celebrate your progress. Happy growing—your future tomato sandwiches are waiting! 🍅😋