
Container Gardens
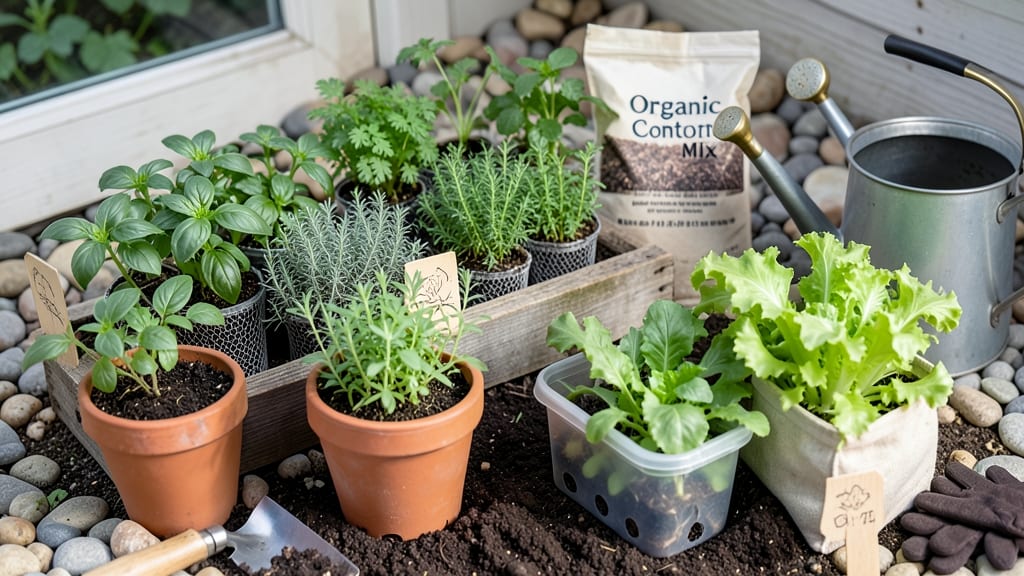
Building a container garden turned my tiny balcony into a thriving oasis. 🌱 The key isn't fancy setups—it's matching plants to pots, sunlight, and your space's quirks. I've filled containers from gallon buckets to decorative planters, and every setup produces more than I expected.
Start with drainage holes (non-negotiable) and lightweight potting mix designed for containers. Your first plants should be easygoing: cherry tomatoes in 5-gallon pots, basil in 1-gallon containers, or leafy greens in wide, shallow trays. These grow fast and forgive beginner mistakes.
By mid-summer, you'll harvest fresh herbs, crisp lettuce, and even full-sized tomatoes—all without bending over. The best part? No weeds, no soil-borne diseases, and you can move everything to follow the sun or protect from storms. Works for patios, fire escapes, or sunny windowsills. Let's get those containers planted!"
📚 In This Guide
- What you need
- Instructions
- Tips and common mistakes
- Wrapping up and next steps
What you need
- ● Containers: 1–5+ containers (depending on size) – 5–10 gallons per plant (e.g., pots, grow bags, or repurposed buckets with drainage holes).
- ● Drainage: Small rocks, broken pottery, or mesh screens (to prevent soil from clogging holes).
- ● Soil: High-quality potting mix (avoid garden soil—it compacts!). Aim for 1–2 bags (1–2 cubic feet each) depending on container size.
- ● Plants: Seedlings or small plants (check container size vs. mature plant width—rule of thumb: 1 plant per 12" of container width).
- ● Basic Tools: Trowel or small shovel (for transplanting).
- ● Gloves (to keep hands clean!).
- ● Measuring tape or ruler (to plan spacing).
- ● Drainage Solutions: Self-watering bases or saucers (to catch runoff).
- ● Fertilizer: Slow-release granules or liquid feed (like fish emulsion or compost tea).
- ● Mulch: Straw or shredded bark (to retain moisture and suppress weeds).
- ● Support Structures: Trellises, stakes, or cages (for vining plants like tomatoes or cucumbers).
- ● Decorative Touches: Paint, labels, or solar-powered lights (for a polished look!).
Step-by-step instructions for building a thriving container garden
Here’s how to create a functional, space-saving container garden that maximizes growth and minimizes wasted space.
🪴 Step 1: Select the Right Containers and Drainage
Choose containers with drainage holes—no exceptions. I recommend terra cotta pots for breathability or plastic containers for lightweight durability. Ensure each pot is at least 6 inches deep for root development, with multiple drainage holes to prevent waterlogging. If your containers lack holes, drill them yourself—two or three per pot will do.
Group containers close together to mimic a garden’s natural ecosystem. This helps regulate temperature and humidity, which is especially important for delicate plants. I like to use casserole dishes or shallow trays beneath pots to catch excess water, keeping my balcony tidy while preventing soil erosion.
🌱 Step 2: Layer Soil for Optimal Drainage and Nutrition
Start with a 2-inch layer of gravel or perlite at the bottom of each container. This creates a reservoir for excess water while preventing root rot. Next, add a high-quality potting mix—never garden soil, as it compacts and suffocates roots. Fill containers to 1 inch below the rim, leaving space for watering.
For larger containers, mix in a slow-release fertilizer or compost to provide nutrients over time. I like to blend one part compost into the potting mix for extra organic matter. Press the soil down lightly to remove air pockets, but don’t compact it—roots need room to breathe and expand.
☀️ Step 3: Arrange Plants by Sunlight and Compatibility
Group plants with similar light requirements together. Place sun-loving herbs like basil and thyme in full sun (6+ hours daily), while shade-tolerant plants like parsley or ferns thrive in partial shade (3-4 hours of indirect light). Rotate containers weekly to ensure even growth and prevent plants from leaning toward the light.
Pair plants with complementary needs—companion planting works in containers too. For example, basil and tomatoes benefit from each other’s presence, while marigolds deter pests naturally. Avoid overcrowding; 3-4 plants per 12-inch container is ideal, depending on their mature size.
💧 Step 4: Water and Maintain for Long-Term Success
Water deeply once a week, ensuring the top 2 inches of soil feel dry before rewatering. Overwatering is the #1 killer of container plants—check soil moisture with your finger rather than sticking to a schedule. In hot climates, you may need to water every 2-3 days, while cooler weather allows for longer intervals.
Fertilize every 4-6 weeks with a balanced liquid fertilizer to replenish nutrients. I like to use fish emulsion for organic options or a slow-release granular fertilizer mixed into the soil at planting. Prune regularly to encourage bushier growth and remove dead or yellowing leaves to prevent disease.
✂️ Step 5: Monitor and Adjust for Seasonal Changes
As seasons shift, adjust your care routine. In summer, increase watering frequency and provide afternoon shade for heat-sensitive plants. In winter, reduce watering and move containers to a protected location if temperatures drop below 40°F. Mulch the soil surface with straw or shredded leaves to retain moisture and regulate temperature.
Watch for pests like aphids or spider mites—they love container gardens. Spray affected plants with neem oil or introduce beneficial insects like ladybugs. If leaves yellow or growth stalls, it’s often a sign of overwatering, underwatering, or nutrient deficiency. Adjust your routine accordingly, and your container garden will thrive year-round.
Tips & tricks for perfect container garden setups
These space-saving secrets will help you create a thriving garden that looks stunning and produces bountiful results.
Container Selection Matters: When choosing containers, prioritize depth based on plant types—root vegetables like carrots need at least 12 inches of soil, while herbs and leafy greens thrive in 6-inch pots. For heavy containers, consider adding wheels to make repositioning easier during seasonal adjustments. I've found that fabric grow bags work exceptionally well for tomatoes and peppers—they allow roots to breathe while preventing overwatering.
Soil Layering Technique: The 2-inch gravel layer at the bottom isn't just for drainage—it also creates an oxygen-rich zone for roots. For containers larger than 12 inches, add a 1-inch layer of coarse sand above the gravel to further improve drainage. When mixing your potting soil, consider adding one part perlite to three parts potting mix to enhance aeration, especially for moisture-sensitive plants like succulents.
Light Rotation Strategy: The weekly rotation mentioned in Step 3 is crucial for preventing leggy growth. I recommend setting a phone reminder every Sunday to rotate your containers. For plants needing partial shade (3-4 hours), position them on the east side of your balcony or patio where they receive gentle morning sunlight without harsh afternoon rays. This simple adjustment can double your harvest for shade-loving plants.
Seasonal Transition Prep: Before summer arrives, move your containers to their permanent locations and let them acclimate for one week before planting. This helps prevent transplant shock. In winter, group containers together to create a microclimate that retains heat. If temperatures drop below 40°F, consider wrapping containers in burlap or frost cloth to protect roots—this is especially important for tropical plants like basil that can't tolerate cold.
Pro Tips for Build A Container Garden
- These space-saving secrets will help you create a thriving garden that looks stunning and produces bountiful results.
- Container Selection Matters: When choosing containers, prioritize depth based on plant types—root vegetables like carrots need at least 12 inches of soil, while herbs and leafy greens thrive in 6-inch pots.
- Soil Layering Technique: The 2-inch gravel layer at the bottom isn't just for drainage—it also creates an oxygen-rich zone for roots.
Frequently asked questions
Got questions about container gardening? You’re not alone! Here are answers to the most common concerns—from beginners to seasoned green thumbs.
What’s the best soil mix for container gardens?
Use a lightweight, well-draining potting mix (not garden soil). Look for blends labeled “container mix” or “all-purpose potting soil.” For extra drainage, add perlite or vermiculite (10% of the mix). Avoid compacted soil—it suffocates roots! Pro tip: Sterilize soil by baking it at 200°F for 30 minutes to kill pests.
When is the best time to start a container garden?
Start indoors 6–8 weeks before your last frost date for cool-season crops (like lettuce or spinach). For warm-season plants (tomatoes, peppers), wait until after the frost and soil temps reach 60°F+. Containers warm up faster than ground soil, so monitor temps closely! Pro tip: Use a soil thermometer for accuracy.
Can I reuse old containers? How do I clean them?
Yes! Clean containers thoroughly to prevent disease. Scrub with a 10% bleach solution (1 part bleach to 9 parts water), rinse well, and let dry in the sun. Drill drainage holes if missing—even “self-watering” containers need them! Pro tip: Avoid reusing pots that held diseased plants (like fungal-infected tomatoes) unless sterilized.
What are the easiest plants for beginners in containers?
Start with low-maintenance picks:
- Herbs: Basil, mint, or thyme (thrive in small pots).
- Vegetables: Cherry tomatoes, lettuce, or radishes (fast-growing).
- Flowers: Marigolds, petunias, or nasturtiums (pest-repellent!).
- Edibles: Green onions or strawberries (great for balconies).
How do I keep pests out of my container garden?
Prevent pests with these tricks:
- Use row covers or mesh screens for flying insects.
- Plant companion plants (e.g., basil near tomatoes to deter whiteflies).
- Inspect leaves daily—catch pests early!
- Avoid overwatering (fungus gnats love soggy soil).
Wrapping up and next steps
Building a container garden is your ticket to lush greenery—even in small spaces! 🌱 Whether you’re growing herbs, veggies, or flowers, the key is planning, quality containers, and consistent care. With the right setup, you’ll enjoy fresh harvests and vibrant blooms year-round.
Ready to dive in? Start small with one or two containers, experiment with plants, and watch your green thumb grow! 🌿 Next step: Sketch your garden layout or pick your first container—your future plants are waiting!