
How To
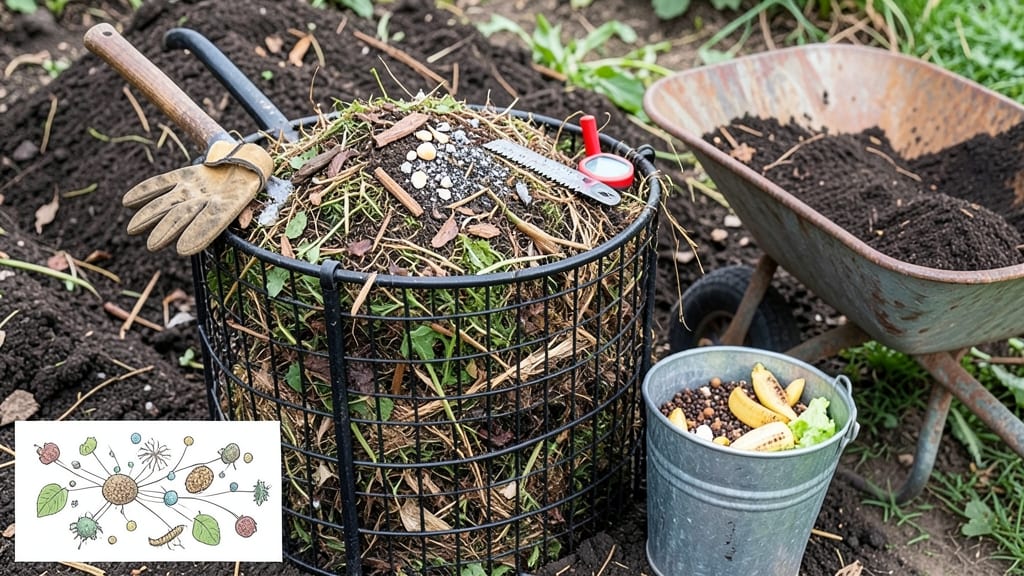
My first garden failed because the soil was lifeless—just sand and clay with nothing to hold moisture or nutrients. 🌱 Increasing organic matter transformed my plot into rich, crumbly earth where plants thrive without constant feeding.
The secret isn't one big compost pile, but a layered approach that mimics nature's own soil-building process.
You'll need three simple ingredients: finished compost, leaf mold or aged manure, and coarse organic material like straw or wood chips. Mix them in equal parts and spread a 2-3 inch layer over your beds, then lightly till into the top 6 inches of soil.
This blend improves drainage, water retention, and microbial activity—everything plants need to grow strong roots.
Within a few weeks, you'll notice soil that holds shape when squeezed but breaks apart easily. Worms return, earthworm castings appear, and plants show better color and vigor.
The best part? This method works for vegetable gardens, flower beds, and even lawns—just adjust the ratios based on your soil's current condition.
For long-term fertility, repeat this process every spring and add a thin layer of compost annually. Over time, your soil will become so rich that you'll barely need additional fertilizers. The key is patience—nature builds soil slowly, but the results are worth it.
📚 In This Guide
- What you need
- Instructions
- Tips and common mistakes
- Wrapping up and next steps
What you need
- ● Browns (Carbon-Rich): Dry leaves – 2-3 gallons (dry, shredded)
- ● Straw or hay – 1-2 gallons (avoid seed-contaminated hay)
- ● Newspaper or cardboard – 1-2 sheets (shredded, ink-free)
- ● Wood chips or sawdust – 1 gallon (untreated, coarse texture)
- ● Greens (Nitrogen-Rich): Fresh grass clippings – 1-2 gallons (lightly moistened)
- ● Vegetable/fruit scraps – 1 gallon (chopped, no meat/dairy)
- ● Coffee grounds – ½ gallon (used, dried)
- ● Fresh manure (cow, horse, or chicken) – 1-2 gallons (well-aged, 3+ months)
- ○ Soil Amendments: Worm castings – ½ gallon (optional but boosts microbes)
- ○ Biochar – ¼ gallon (optional, improves water retention)
- ● Garden fork or pitchfork – for turning layers
- ● Gloves – heavy-duty (to protect from prickly materials)
- ● Watering can or hose – for moisture control
- ● Shovel or trowel – for mixing into soil
- ● Compost bin or pile area – 3’x3’x3’ minimum (or a dedicated corner)
- ○ Thermometer (optional) – to monitor compost heat (130–160°F ideal)
- ○ pH test kit (optional) – to check soil acidity before amending
- ● Balance is key: Aim for a 3:1 ratio of browns to greens by volume.
- ● Chop it up: Smaller pieces decompose faster—use a shredder or scissors for stubborn materials.
- ● Moisture matters: Your pile should feel like a damp sponge (not soggy!). Adjust with water.
- ● Layer like a lasagna: Alternate materials in 6–12” layers for even decomposition.
Step-by-Step instructions for building a layered compost blend
This method transforms your soil into a nutrient-rich foundation that holds moisture and feeds plants for years.
🌱 Step 1: Gather Your Organic Materials
Collect a mix of "greens" (nitrogen-rich) and "browns" (carbon-rich) from your kitchen and yard. Greens include vegetable scraps, coffee grounds, and fresh grass clippings. Browns are dried leaves, straw, shredded newspaper, or cardboard. I like to keep a dedicated bin under my sink for scraps and store browns in a paper bag outside.
Balance is key—aim for roughly three parts browns to one part greens by volume. Too many greens create a smelly, anaerobic mess, while too many browns slow decomposition. You'll know you're close when the pile looks like dark, damp soil rather than a pile of trash.
🌿 Step 2: Build the Layered Compost Pile
Start with a 4-inch layer of coarse browns like twigs or straw at the bottom. This creates airflow and prevents compaction. Add a 2-inch layer of greens, then alternate until you've used all materials. Finish with a 2-inch layer of browns on top to retain heat and deter pests.
Moisten each layer lightly with water—it should feel like a wrung-out sponge, not soggy. I use a hose nozzle on low setting to avoid compacting the pile. Turn the pile with a garden fork or shovel after each layer to mix materials and improve decomposition. This step ensures even breakdown and prevents clumping.
💧 Step 3: Maintain Moisture and Aeration
Check the pile every 3-5 days and water if the center feels dry. A proper compost pile should stay damp like a wrung-out sponge. Too much water creates anaerobic conditions (smelly, slow decomposition), while too little halts the process entirely. I keep a spray bottle nearby to adjust moisture without over-saturating.
Turn the pile every 1-2 weeks using a pitchfork to aerate and redistribute materials. This speeds up decomposition by exposing fresh surfaces to microbes. You'll notice the pile shrink and darken over time—this is the sign of active composting. Avoid adding new materials until the pile is fully broken down to prevent contamination.
☀️ Step 4: Monitor and Harvest When Ready
After 4-6 weeks, the pile should resemble rich, dark soil with no recognizable chunks. If it still looks like a mix of materials, continue turning and checking moisture. I test readiness by grabbing a handful—if it crumbles easily and smells earthy (not like rotten eggs or ammonia), it's ready.
For immediate use, sift the compost through a ¼-inch mesh screen to remove large fragments. Use the finished compost as a top dressing (¼ inch thick) around plants or mix it into garden beds. The remaining coarse material can return to the pile for further breakdown. This layered method ensures you'll always have nutrient-rich compost on hand for long-term soil fertility.
Tips & tricks for building a layered compost blend
Here's what nobody tells you about turning kitchen scraps into garden gold—these tricks make all the difference.
Layering Like a Pro: In Step 2, when building your layers, think "airflow first." That bottom 4-inch layer of coarse browns isn't just for looks—it creates essential air pockets that prevent compaction. I like to add a handful of straw or wood chips to this base layer for extra oxygen flow. This simple step prevents the common problem of waterlogged, smelly piles that never break down.
Moisture Management Secret: The "wrung-out sponge" test in Step 3 is your best friend. Too many beginners either drown their piles or let them dry out completely. I keep a spray bottle filled with water mixed with a little compost tea nearby to make quick adjustments. This liquid boosts microbial activity while preventing the anaerobic conditions that create that dreaded rotten-egg smell.
Speed Up Decomposition: Turn your pile every 1-2 weeks as directed, but here's the game-changer: alternate your turning direction each time. Clockwise one week, counterclockwise the next. This exposes fresh surfaces to oxygen more effectively than just flipping it the same way repeatedly. You'll notice the pile heats up faster and shrinks more dramatically—proof that you're accelerating the process.
Harvesting Hack: When testing readiness in Step 4, grab a handful and squeeze it. If it crumbles easily and smells earthy, it's ready! But here's what I do next: I divide the pile into two portions. One goes straight to the garden, while the other gets sifted again through a finer mesh screen (like ⅛-inch) to create "compost tea" for liquid feeding. This double use maximizes your compost's potential.
Pro Tips for Increase Organic Matter In Soil
- Here's what nobody tells you about turning kitchen scraps into garden gold—these tricks make all the difference.
- Layering Like a Pro: In Step 2, when building your layers, think "airflow first."
- Moisture Management Secret: The "wrung-out sponge" test in Step 3 is your best friend.
Frequently asked questions
Got questions about boosting your soil’s organic matter? You’re not alone! Here are some of the most common concerns—plus straightforward answers to help you get growing.
How long does it take to see improvements in soil organic matter?
With consistent effort, you’ll notice subtle changes in soil texture and moisture retention within 3–6 months. For deeper, long-term benefits (like improved microbial activity and nutrient cycling), aim for 1–2 years of regular compost additions. Patience pays off—think of it like building a bank account for your soil!
Can I add too much organic matter at once?
Yes! Overloading with fresh organic material (like grass clippings or manure) can deplete nitrogen as microbes break it down, robbing nearby plants of nutrients. Rule of thumb: Spread no more than 1–2 inches of compost or mulch at a time, and mix it into the top 6 inches of soil. For large amendments (e.g., composted leaves), layer thinly over time.
What’s a budget-friendly way to increase organic matter without buying compost?
DIY organic matter is your best friend! Start a simple compost bin with kitchen scraps (fruit/veggie peels, coffee grounds), yard waste (leaves, grass clippings), and shredded newspaper. Pro tip: Mix "greens" (nitrogen-rich) with "browns" (carbon-rich) in a 3:1 ratio for faster decomposition. Worm castings (from a vermicompost bin) are another free, nutrient-packed bonus!
Will adding organic matter attract pests like rodents or insects?
Not if you do it right! Fresh, smelly materials (e.g., meat scraps, dairy) can attract pests, but well-composted or properly layered organic matter (like finished compost or wood chips) won’t. To deter critters:
- Use hot composting (turn piles regularly to heat them up).
- Avoid adding pet waste or diseased plants.
- Keep compost bins 6+ inches away from garden edges.
Can I add organic matter in winter, or should I wait for spring?
Winter is a great time to prep your soil! Cold weather slows decomposition, so organic matter will stay put until spring. Spread compost or mulch in late fall (after the first frost) to protect soil from erosion and give microbes a head start. Just avoid adding fresh greens (like grass clippings) in freezing temps—they’ll stay soggy and may attract pests. Use dried leaves or straw instead!
How do I know if my soil already has enough organic matter?
Test it with this quick check:
Signs of Low Organic Matter
Signs of Good Organic Matter
Dry, crumbly soil that repels water
Dark, moist soil that holds shape when squeezed
Few earthworms or insects
Visible worms, beetles, or fungal networks
Plants struggle even with fertilizer
Healthy roots, strong growth, and resilience to drought
Wrapping up and next steps
Boosting organic matter in your soil isn’t just about quick fixes—it’s a sustainable investment in healthier plants and a thriving garden. 🌱 By layering compost blends, mulching, and embracing cover crops, you’re not only enriching your soil but also creating a self-sustaining ecosystem that rewards you with vibrant growth year after year.
Start small, stay consistent, and watch your garden flourish!
Ready to take the next step? Pick one method from this guide—whether it’s building a compost pile, testing your soil, or planting a green manure crop—and give it a try today. Your future plants (and your green thumb!) will thank you.