
Tools
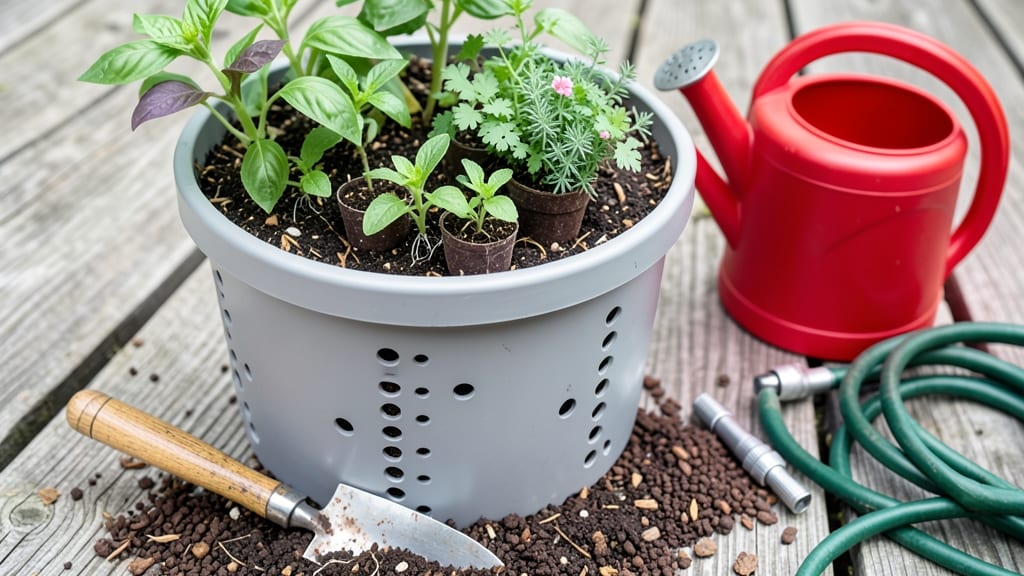
Building a bucket garden turns tiny spaces into thriving herb and veggie patches. 🌱 I started with just five 5-gallon buckets on my fire escape and now grow enough basil, lettuce, and peppers to share with neighbors. The best part? No digging, no weeds, and no wasted space.
You’ll need 5-gallon buckets (cleaned and with drainage holes), high-quality potting mix, and a stacking frame (or sturdy table). The whole setup costs under $50 and fits on balconies, patios, or even kitchen counters.
My first bucket of basil grew so fast, I harvested leaves every week—no store-bought herbs needed. By the end of the season, you’ll have a compact, high-yield garden that’s easier to maintain than traditional beds. The soil stays loose, roots get perfect airflow, and pests have nowhere to hide.
Plus, you can move the whole system if you need to adjust sunlight. Works for any climate, from city apartments to rural backyards. Here’s how to stack, plant, and keep them thriving all season long—no green thumb required.
📚 In This Guide
- What you need
- Instructions
- Tips and common mistakes
- Wrapping up and next steps
What you need
- ● 5-gallon buckets (or larger, depending on plant size): Minimum 3–5 buckets (stackable with holes pre-drilled or ready to drill).
- ● Material: Food-grade plastic (avoid treated wood or metal).
- ○ Optional: Stackable bucket kit (with built-in drainage and risers).
- ● Drill or screwdriver (for creating drainage holes if not pre-drilled).
- ● Drill bits (¼"–½" size for drainage).
- ● Potting mix: High-quality, well-draining mix (avoid garden soil—it compacts!).
- ● Quantity: 1–2 bags (5–10 cubic feet, depending on bucket size).
- ○ Optional: Add perlite or vermiculite (10–20% mix) for extra aeration.
- ● Drainage layer: Pebbles, gravel, or broken pottery (1–2 inches at the bucket’s bottom).
- ○ Optional: Landscape fabric (to prevent soil from clogging drainage).
- ● Container or tray (to catch runoff): Large shallow tray, saucer, or drip pan (bigger than your bucket’s base).
- ○ Optional: Self-watering reservoir (for automated hydration).
- ● Plants or seeds: Choose compact varieties (e.g., cherry tomatoes, basil, lettuce, peppers).
- ● Pro tip: Start with seedlings (faster growth than seeds!).
- ● Watering can or hose with nozzle (with a gentle spray setting).
- ● Fertilizer: Balanced liquid fertilizer (e.g., 10-10-10 or organic options like fish emulsion).
- ○ Optional: Slow-release granules (mix into soil at planting).
- ● Bucket risers or feet (to elevate buckets and improve airflow).
- ● Label markers (to track plants—trust us, you’ll forget!).
- ● Mulch or straw (to retain moisture and suppress weeds).
- ● Grow lights (if indoors or in low-light areas).
- ● Trellis or stakes (for vining plants like cucumbers or beans).
Step-by-Step instructions for building a stackable bucket garden
Here's how to create a sturdy, space-saving vertical garden using just a few simple supplies.
🪴 Step 1: Choose and Prepare Your Buckets
Select 5-gallon buckets with drainage holes (or drill them yourself if needed). I like to use food-grade plastic buckets because they're lightweight and won't crack in freezing temps. Clean them thoroughly with soapy water and rinse well—any leftover detergent can harm plant roots.
For stability, cut 2-inch diameter holes in the bottom of each bucket except the top one. These will let excess water drain while keeping your plants secure. Place a 1-inch layer of gravel in each bucket to improve drainage further. This prevents soggy roots while keeping the soil in place.
💧 Step 2: Add Drainage and Soil Mix
Fill each bucket with a 3:1 ratio of potting mix to perlite or vermiculite. This lightweight combination prevents compaction and improves aeration. I like to mix in a handful of compost for extra nutrients—just enough to give seedlings a strong start without overwhelming them.
Leave about 2 inches of space at the top of each bucket. This prevents soil from spilling when you water, and gives your plants room to grow without crowding. Tap the buckets gently on the ground to settle the soil, then water lightly until the mix feels evenly moist but not soggy.
☀️ Step 3: Plant Your Herbs or Veggies
For a 4-bucket system, plant fast-growing herbs like basil, parsley, and chives in the top buckets where they'll get the most light. Place slower growers like rosemary or thyme in the bottom buckets. Dig holes just deep enough to cover the roots but no deeper—burying too much can rot stems.
Space plants 6 inches apart in each bucket. If using seedlings, gently tease apart crowded roots before planting. Water thoroughly after planting, letting the water run through the drainage holes. This helps settle the soil around roots and washes away any air pockets.
⏰ Step 4: Stack and Position for Optimal Growth
Start with the bottom bucket and stack the remaining buckets on top, nesting them snugly. Secure each bucket to the one below with zip ties or bungee cords to prevent shifting in wind or when you water. Place your stack in a location with at least 6 hours of sunlight daily—a south-facing window or balcony works perfectly.
Rotate the stack a quarter turn weekly so all plants get even light exposure. You'll notice leaves on one side turning pale—that's your cue to move it. Keep the soil consistently moist by watering when the top inch feels dry to the touch, but never let it stay soggy. Overwatering is the fastest way to kill bucket gardens.
🌿 Step 5: Maintain and Harvest Regularly
Fertilize every 4-6 weeks with a balanced liquid fertilizer diluted to half strength. I use a spray bottle to apply it directly to the soil surface—this prevents burning tender new growth. Watch for pests like aphids on the undersides of leaves; a strong spray of water usually knocks them off without chemicals.
Harvest herbs by snipping stems just above a set of leaves. This encourages bushier growth. For vegetables like lettuce or radishes, pick the outer leaves first to keep the plant producing. With proper care, your bucket garden will stay productive for months—perfect for small spaces or urban balconies.
Tips & tricks for perfect bucket garden systems
Here's what nobody tells you about keeping your vertical garden thriving—and how to avoid the most common pitfalls.
Bucket Selection: Food-grade plastic buckets are my go-to because they're lightweight and durable, but if you're using metal buckets, line them with plastic bags to prevent rust and protect roots. I've also found that buckets with handles make stacking and moving your garden much easier—just be sure to secure them tightly to avoid tipping. The 5-gallon size is perfect for herbs and small veggies, but if you're growing larger plants like tomatoes, opt for 7-gallon buckets instead.
Drainage is Non-Negotiable: In Step 1, when you're cutting those 2-inch drainage holes, make sure to smooth any rough edges with sandpaper. Sharp edges can damage delicate roots as they grow. I also recommend placing a piece of hardware cloth over the holes before adding gravel—this keeps soil in while allowing water to flow freely. Without proper drainage, you'll end up with soggy roots and potential root rot, which can kill your plants faster than you think.
Soil Mix Matters: The 3:1 ratio of potting mix to perlite is crucial for aeration, but don't skip the compost—just a handful per bucket makes all the difference. If you're using store-bought potting mix, look for one labeled "organic" or "peat-free" to avoid chemical additives. For containers, I've found that adding a slow-release fertilizer like Osmocote to the soil mix at planting time eliminates the need for frequent fertilizing later on.
Light Rotation Hack: That quarter-turn weekly rotation in Step 4 is key for even growth, but here's a pro tip: mark the cardinal directions on your garden with a small flag or marker. This helps you remember which way you rotated last time. If you notice leaves turning pale on one side, it's definitely time to rotate—uneven light exposure will stunt growth on that side while the sunlit side grows too leggy.
Pro Tips for Build A Bucket Garden
- Here's what nobody tells you about keeping your vertical garden thriving—and how to avoid the most common pitfalls.
- Bucket Selection: Food-grade plastic buckets are my go-to because they're lightweight and durable, but if you're using metal buckets, line them with plastic bags to prevent rust and protect roots.
- Drainage is Non-Negotiable: In Step 1, when you're cutting those 2-inch drainage holes, make sure to smooth any rough edges with sandpaper.
Frequently asked questions
Got questions about bucket gardening? You’re not alone! Here are answers to the most common ones to help you grow confidently—whether you’re a beginner or troubleshooting a tricky spot.
What’s the best time of year to start a bucket garden?
Start your bucket garden in early spring (after the last frost) or late summer for a fall harvest. Containers warm up faster than soil, so you can plant 2–4 weeks earlier than traditional gardens. Just avoid extreme heat—protect seedlings with shade cloth if temps hit 90°F+.
How often should I water my bucket garden?
Check moisture daily—buckets dry out faster than ground soil. Water when the top inch feels dry (usually every 1–2 days). Use self-watering systems (like drip irrigation) or a spray nozzle to avoid over-saturating roots. Pro tip: Add perlite to soil for better drainage!
Can I reuse buckets from food or chemicals?
No!
Only use food-grade buckets (like those from flour, rice, or clean plastic bins). If repurposing, scrub with vinegar + baking soda, rinse thoroughly, and soak in bleach water (1:10 ratio) for 10 minutes. Never reuse buckets that held pesticides, oil, or paint.
How do I keep pests out of my bucket garden?
Prevent pests with physical barriers like fine mesh (for aphids) or row covers. Use neem oil or companion planting (e.g., basil + tomatoes). For slugs, wrap buckets in copper tape or sprinkle diatomaceous earth around the base. Quick fix: Handpick pests early!
What if my plants look sick or stunted?
Yellow leaves? Overwatering or nutrient deficiency—let soil dry slightly between waterings. Wilting? Underwatering or root-bound—check drainage and repot if roots circle the bucket. Slow growth? Add a balanced fertilizer (like 10-10-10) every 4–6 weeks. Pro tip: Rotate buckets weekly for even sunlight!
Wrapping up and next steps
Building a bucket garden is a game-changer for small spaces—it’s simple, space-saving, and packed with potential! 🌱 With just a few supplies and a little creativity, you’ve got a thriving mini-farm ready to grow your favorite herbs and veggies.
Whether you’re a beginner or a seasoned gardener, this system proves that big harvests don’t need big yards.
Now that you’re armed with the know-how, take the next step! Start small with one or two buckets, experiment with plants, and watch your green thumb grow. Happy planting—your future meals (and Instagram-worthy greens) are waiting! 🌿