
Tools
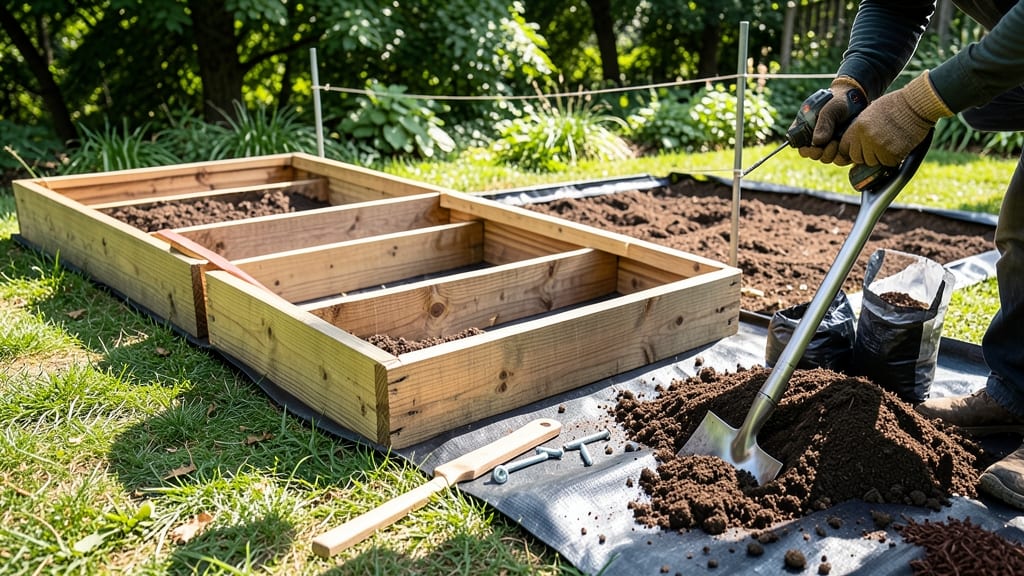
Installing raised beds transforms your yard into a highly productive growing space without backbreaking bending. 🌱 I’ve built five over the years, and the key to longevity isn’t fancy materials—it’s smart prep and sturdy construction that won’t sag or rot after the first season.
Start with a level spot that gets at least 6 hours of sunlight, then gather untreated lumber (cedar lasts longest), screws, and landscape fabric to block weeds. The right soil mix—equal parts topsoil, compost, and perlite—makes all the difference for root health and drainage.
By the end, you’ll have a durable frame that stays upright, warms up faster in spring, and gives you easier access than traditional in-ground beds. Plus, you’ll avoid soil compaction and gopher damage for years to come.
Works for vegetables, flowers, or herbs—and scales from small containers to full-size garden beds. Let’s get those frames built right!
📚 In This Guide
- What you need
- Instructions
- Tips and common mistakes
- Wrapping up and next steps
What you need
- ● Lumber: Pressure-treated or cedar (rot-resistant) – 4x4 posts (4–8 ft long, depending on bed size) and 2x6 or 2x8 boards (quantity varies by design)
- ● Screws: Deck screws or galvanized exterior screws (2.5–3 inches long, ~50–100 screws)
- ○ Corner braces: Metal or wooden (optional but recommended for extra stability)
- ● Landscape fabric: (10–20 sq ft, to block weeds and retain moisture)
- ● Soil: High-quality gardening mix (avoid regular topsoil—~1–2 cubic yards per 4x8 ft bed)
- ● Circular saw or handsaw
- ● Drill/driver
- ● Measuring tape
- ● Level
- ● Staple gun (for landscape fabric)
- ● Work gloves & safety goggles
- ○ Optional: Post hole digger (if setting posts deep) or rubber mallet
- ● Flat, level ground (remove rocks/weeds first!)
- ● Sunlight assessment (6+ hours of sun for most veggies)
- ● Access to water (or a hose for irrigation)
- ● Pro tip: Check local regulations—some areas restrict wood types or bed heights!
Step-by-Step guide for sturdy, long-lasting raised beds
Building raised beds isn’t just about digging holes—it’s about creating a foundation that lasts for years.
🪴 Step 1: Choose and Prepare Your Site
Pick a location with 6+ hours of sunlight daily and easy access to water. I always test drainage by pouring a gallon of water in a potential spot—if it pools for more than an hour, find another place. Avoid low spots where water collects after rain.
Clear the area of grass, weeds, and debris down to bare soil. Use a shovel or sod cutter to remove the topsoil layer—this prevents invasive roots from competing with your plants. Mark the bed’s dimensions with landscape fabric stakes or spray paint for precision.
🌱 Step 2: Build or Assemble the Frame
For wood frames, use rot-resistant lumber like cedar or redwood—it won’t warp or decay as quickly. Cut pieces to your desired dimensions (typically 4x8 feet for standard beds) and pre-drill holes to prevent splitting when assembling. I like to use 3-inch deck screws for extra stability.
If using pre-made kits, follow the manufacturer’s instructions for assembly. For corner connections, I recommend galvanized metal brackets—they hold up better than nails alone. Double-check that all corners are square by measuring diagonally; both measurements should be equal.
⏰ Step 3: Layer the Bed for Optimal Growth
Start with a 2-inch layer of landscape fabric at the bottom to block weeds. Add 4-6 inches of coarse material like gravel or broken bricks for drainage—this prevents waterlogging and root rot. Then layer in 12 inches of compost-rich soil mix (I blend garden soil, compost, and perlite for aeration).
Don’t skimp on the soil depth—shallow beds limit root growth and require more frequent watering. For heavy clay soil, add a 1-inch layer of sand between the fabric and soil to improve drainage. Press each layer lightly as you go to eliminate air pockets.
💧 Step 4: Secure and Stabilize the Frame
Drive 4x4 wooden posts into the ground at each corner of the bed, burying them 12 inches deep for maximum stability. Use a level to ensure the frame sits perfectly flat—uneven beds cause drainage issues and make planting difficult. Screw the frame to the posts securely.
For extra reinforcement, add cross-bracing between posts if your bed is wider than 4 feet. This prevents the frame from bowing under soil weight. Water the bed thoroughly after assembly to help the soil settle and compact naturally.
☀️ Step 5: Mulch and Plant for Long-Term Success
Spread 2-3 inches of organic mulch (straw or wood chips) on top to retain moisture and suppress weeds. Avoid thick mulch layers—they can smother soil and prevent oxygen from reaching roots. Plant your crops according to their spacing needs, leaving 12-18 inches between large plants like tomatoes.
Here’s the thing—raised beds dry out faster than in-ground soil. Water deeply 2-3 times per week (more in hot climates) and always check the top 2 inches of soil** before watering. A drip irrigation system saves time and ensures even moisture distribution.
Tips & tricks for building sturdy raised beds
Between us, these small details make the difference between a raised bed that lasts a decade and one that collapses after a few seasons.
Material Selection: Cedar and redwood are the gold standards for wood frames because their natural oils resist rot and insects, but don't overlook treated lumber if cedar isn't in your budget. Just make sure it's labeled "ground contact" approved. For the 4x4 posts in Step 4, I've found that pressure-treated southern yellow pine buried 12 inches deep lasts even longer than cedar in my climate.
Precision Matters: When checking square corners in Step 2, I use a string line between opposite corners—if the string touches all four corners, you've got perfect alignment. This simple trick saves you from having to disassemble and redo your entire frame later. And trust me on this: pre-drilling those holes for the 3-inch deck screws prevents splitting that can weaken your structure over time.
Soil Layer Strategy: The 12-inch soil depth in Step 3 might seem like overkill, but here's why it works: most vegetable roots grow 12-18 inches deep, and this depth gives them room to establish without hitting compacted native soil. For the 4-6 inches of coarse drainage material, I've had great success with clean, crushed concrete instead of gravel—it's cheaper and drains just as well.
Long-Term Stability: Don't skip the cross-bracing mentioned for beds wider than 4 feet in Step 4. I've seen many beds sag in the middle because builders skipped this step. Use 2x4 lumber for bracing and attach it to the inside of the frame at mid-height—this hidden reinforcement makes all the difference for wider beds.
Pro Tips for Install Raised Beds
- Between us, these small details make the difference between a raised bed that lasts a decade and one that collapses a...
- Material Selection: Cedar and redwood are the gold standards for wood frames because their natural oils resist rot an...
- Precision Matters: When checking square corners in Step 2, I use a string line between opposite corners—if the string...
Frequently asked questions
Got questions about installing raised beds? You’re not alone! Here are answers to the most common concerns—from timing to troubleshooting—to help you build with confidence.
When is the best time to install raised beds?
The ideal time is early spring or fall when soil is workable but not frozen. Installing in spring lets you plant immediately, while fall prep avoids summer heat stress. If you’re in a mild climate, year-round installation is possible—just avoid waterlogged soil.
How deep should raised beds be for vegetables?
Aim for 6–12 inches deep for most vegetables (like lettuce, herbs, or carrots). Root crops (potatoes, beets) need 12+ inches. Deeper beds (18–24 inches) are great for perennials or heavy soil improvement but require more material and labor. Pro tip: Check local frost lines if growing deep-rooted plants!
Can I use untreated wood for raised beds?
Untreated wood (like cedar or redwood) is safe for short-term use (<1–2 years) but can leach chemicals over time. For long-term beds, opt for pressure-treated lumber labeled "ACQ or CA" (avoid older arsenic-treated wood) or composite materials. Cedar naturally resists rot—just seal it annually to extend lifespan.
What’s a budget-friendly alternative to expensive materials?
Skip pricey cedar by using:
- Recycled bricks or pavers (stacked with landscape fabric underneath).
- Salvaged lumber (check local reuse centers or Facebook Marketplace).
- Straw bales (temporary, biodegradable option for quick starts).
- Corrugated metal or plastic (lightweight but less durable; best for small plots).
Pro tip: Line the bottom with cardboard or landscape fabric to block weeds and improve drainage!
Why is my raised bed sinking or leaning?
Sinking often means insufficient support—check for:
- Uneven ground (level the base with gravel or sand).
- Improper corner brackets (use galvanized screws and metal brackets for stability).
- Soil compaction (add a 4-inch gravel layer at the bottom for drainage).
If leaning, disassemble, reinforce corners, and re-level. For heavy beds, bury the bottom 6 inches into the ground or use concrete footings.
Wrapping up and next steps
Installing raised beds is a rewarding project that transforms your gardening game—whether you’re a beginner or a seasoned green thumb. By following these steps, you’ll create a durable, low-maintenance frame that protects your plants, improves soil quality, and even saves your back! 🌱
Now that you’re ready to build, take the next step: fill your beds with nutrient-rich soil and start planting! For extra inspiration, check out our guide on choosing the best plants for raised beds—your future harvest (and bragging rights) await!