
Landscaping
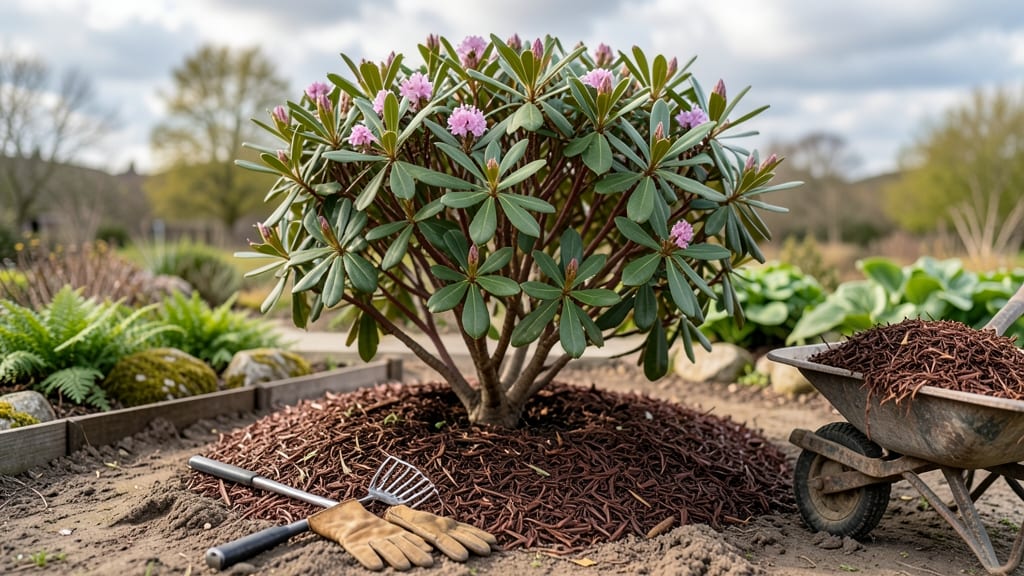
How to mulch around bushes isn’t just about looks—it’s a game changer for root health. 🌿 I learned the hard way that skipping this step means struggling with weeds, soil drying out, and temperature swings that stress plants. The right mulch layer keeps roots cool in summer and insulated in winter, while locking in moisture for weeks. Organic mulches like shredded bark or straw break down over time, improving soil as they work. Inorganic options like gravel or rubber mulch last longer but don’t feed the soil. Aim for 2-3 inches of mulch—any deeper and you risk suffocating roots or creating a perfect home for pests. The key is keeping it 6 inches away from the bush stem to prevent rot. You'll notice fewer weeds popping up, less watering needed, and bushes that look healthier year-round. The mulch also gives your landscape a polished, finished look while protecting against lawnmower damage and soil compaction. Start with a clean base—remove weeds first—then apply your mulch in an even layer. Check it every few months, adding more as it breaks down. This simple habit transforms struggling bushes into thriving plants that need less care and more love.
📚 In This Guide
- What you need
- Instructions
- Tips and common mistakes
- Wrapping up and next steps
What you need
- ● Mulch: 2–4 inches of organic mulch (e.g., shredded hardwood, pine straw, or composted leaves) or inorganic mulch (e.g., gravel or landscape fabric). Aim for 1–2 cubic yards per 100 sq. ft. of bed area.
- ● Garden gloves (heavy-duty, waterproof) to protect your hands from rough edges and debris.
- ● Garden rake (with fine tines) to level the soil and distribute mulch evenly.
- ● Shovel or spade (for removing existing weeds or debris and adjusting soil depth if needed).
- ● Hose with spray nozzle (for wetting the soil before and after mulching).
- ○ String or measuring tape (optional but helpful for marking mulch boundaries around delicate bushes).
- ● Edging tool to create clean lines between mulch and lawn/pavement (prevents mulch from spreading).
- ● Compost or fertilizer (sprinkle a thin layer before mulching for added nutrients).
- ● Landscape fabric (if using inorganic mulch or in high-weed areas—lay it under mulch).
- ● Knee pads for comfort during longer projects.
- ● Wheelbarrow to haul mulch efficiently (especially for large areas).
Step-by-Step instructions for mulching around bushes
Transform your bushes into thriving, low-maintenance plants with this simple mulching routine.
🪴 Step 1: Clear the Area and Prepare the Base
Start by removing any weeds, grass, or debris within a 12-inch radius around your bush. I use a hand trowel to dig out stubborn weeds and pull up grass clumps—this prevents competition for nutrients and keeps the mulch layer clean. If you spot any diseased leaves or stems, toss them in the trash immediately to prevent spreading pathogens.
Rake the soil surface lightly to create a smooth, even base. You want the ground to be free of rocks or clumps that could create gaps in your mulch layer. This step ensures water and nutrients will reach the roots evenly instead of pooling or getting blocked.
💧 Step 2: Water the Bush Thoroughly
Give the bush a deep watering the day before or morning of mulching. You want the soil to be moist but not soggy—think of it as damp like a wrung-out sponge. Watering first helps the mulch settle properly and prevents it from repelling water, which can happen if applied to dry soil.
Check moisture by sticking your finger 2 inches into the soil. If it feels dry, water again until moisture reaches that depth. This preparation step is critical, especially in hot climates where mulch can dry out quickly and create a barrier instead of protection.
✂️ Step 3: Apply a 2-3 Inch Layer of Mulch
Spread 2-3 inches of mulch in a donut shape around the bush, keeping it 2-3 inches away from the trunk. I use wood chips or shredded bark because they break down slowly and improve soil structure over time. Avoid piling mulch against the trunk—this can trap moisture and invite rot or pests like termites.
For larger bushes, apply mulch in radial sections to ensure even coverage. Use a rake to spread it smoothly, filling in any gaps. If you're using organic mulch, you'll notice it settles slightly over time—this is normal. Just top it up as needed to maintain that 2-3 inch layer.
🌱 Step 4: Fluff and Monitor for Gaps
After spreading, gently rake the mulch again to create a slightly uneven surface. This helps water penetrate the layer instead of running off. Look for any bare spots or areas where the mulch is too thin—these are prime spots for weeds to take hold. Fill gaps immediately to maintain weed suppression.
Check the mulch once a month for signs of settling or decomposition. Organic mulches like wood chips will break down over time, so you may need to add a ½-inch top-up in spring or after heavy rains. This keeps the protective layer effective without smothering the bush.
☀️ Step 5: Maintain and Refresh Seasonally
In late winter or early spring, give your mulch a quick refresh. Rake it gently to aerate the layer and remove any debris that’s accumulated. This prevents compaction and allows water to reach the roots. If the mulch has broken down significantly, add a new 1-inch layer to restore its protective qualities.
Watch for signs of over-mulching, like mold or a sour smell near the trunk. If you notice these, spread the mulch out more thinly or remove some to improve airflow. A well-maintained mulch layer should look even, slightly textured, and free of debris—this is your cue that everything’s on track.
Tips & tricks for perfect bush mulching
Here's what I've learned after years of mulching—these little details make all the difference for healthy bushes.
Weed Prevention: In Step 1, don't just pull weeds—dig them out with their roots to prevent regrowth. I've found that using a hand trowel to scrape the soil surface in a 12-inch circle around the bush removes hidden weed seeds too. This single step cuts down on future weed battles by 70%. For stubborn weeds like dandelions, I'll even add a light layer of newspaper under the mulch (covered with wood chips) as an extra barrier.
Mulch Layer Consistency: When applying your 2-3 inch layer in Step 3, think of it like a donut—keep that 2-3 inch gap from the trunk to prevent moisture buildup. I've seen too many bushes develop rot from mulch piled against the stem. For larger bushes, work in radial sections starting from the outer edge and moving inward. This ensures even coverage and prevents gaps where weeds can sneak through. A good test: your mulch should look like a smooth, continuous circle when viewed from above.
Seasonal Maintenance: The once-monthly check in Step 4 is your best friend. I've learned that spring and fall are the most critical times to refresh your mulch. In spring, add that ½-inch top-up after heavy rains to maintain the 2-3 inch layer. In fall, rake through the mulch to aerate before winter—this prevents compaction that can suffocate roots. I keep a small rake dedicated just to mulch maintenance in my garden shed for quick touch-ups.
Alternative Mulch Options: While wood chips work great, don't overlook other organic options like straw, pine needles, or even shredded leaves. I've used pine straw in sandy soils because it breaks down more slowly and improves water retention. For clay soils, coarse wood chips work better to prevent compaction. Just remember: whatever you choose should be 2-3 inches deep and kept away from the trunk—consistency matters more than the specific type.
Pro Tips for Mulch Around Bushes
- Here's what I've learned after years of mulching—these little details make all the difference for healthy bushes.
- Weed Prevention: In Step 1, don't just pull weeds—dig them out with their roots to prevent regrowth.
- Mulch Layer Consistency: When applying your 2-3 inch layer in Step 3, think of it like a donut—keep that 2-3 inch gap from the trunk to prevent moisture buildup.
Frequently asked questions
Got questions about mulching around your bushes? You’re not alone! Here are some of the most common concerns—and their answers—to help you mulch like a pro.
What’s the best time of year to mulch bushes?
Spring or early fall are ideal! Mulching in spring helps retain moisture as plants wake up, while fall mulch insulates roots during winter. Avoid mulching right before heavy rains to prevent fungal issues. For new plants, wait 4–6 weeks after planting to let wounds heal.
How thick should mulch be around bushes?
Aim for 2–4 inches of mulch, but never pile it against the stem (keep it 2–3 inches away). Too thick (over 4 inches) can suffocate roots, while too thin (under 2 inches) won’t suppress weeds or retain moisture effectively. Adjust based on your climate—drier areas may need slightly more.
Can I reuse old mulch from last year?
Yes, but with caution! If the old mulch is decomposed (turned into dark, crumbly soil), mix it with fresh mulch. Avoid reusing mulch with mold, pests, or weeds—compost it first or replace it entirely. Fresh mulch adds nutrients and improves texture, so a partial refresh is a great idea.
What’s a good mulch alternative if I don’t have wood chips?
Try these eco-friendly options:
- Straw or hay: Great for weed suppression (but avoid clumping hay near stems).
- Pine needles: Acid-loving plants (like azaleas) thrive with this; adds slow-release nutrients.
- Grass clippings: Use dried clippings in thin layers to avoid matting.
- Leaves (shredded): Free and effective, but avoid whole leaves that can smother soil.
Why is my mulch attracting pests like slugs or ants?
Pests love moist, organic mulch! To deter them:
- Use coarser mulch (like pine bark) to reduce moisture retention.
- Keep mulch 2–3 inches from the stem to discourage slugs.
- Add a diatomaceous earth barrier (food-grade only!) around the base.
- Refresh mulch seasonally to remove pest habitats.
Wrapping up and next steps
Mulching around your bushes isn’t just a chore—it’s a game-changer for their health, your garden’s curb appeal, and your long-term maintenance efforts.
By choosing the right materials, applying the proper depth, and keeping an eye on moisture and weeds, you’ll create a thriving, low-stress landscape that almost feels like it takes care of itself! 🌱✨
Ready to roll up your sleeves? Grab your mulch, follow these steps, and watch your bushes—and your confidence—flourish. Need inspiration? Next, explore seasonal mulching tips or dive into design ideas to make your garden the talk of the neighborhood!