
Container Gardens
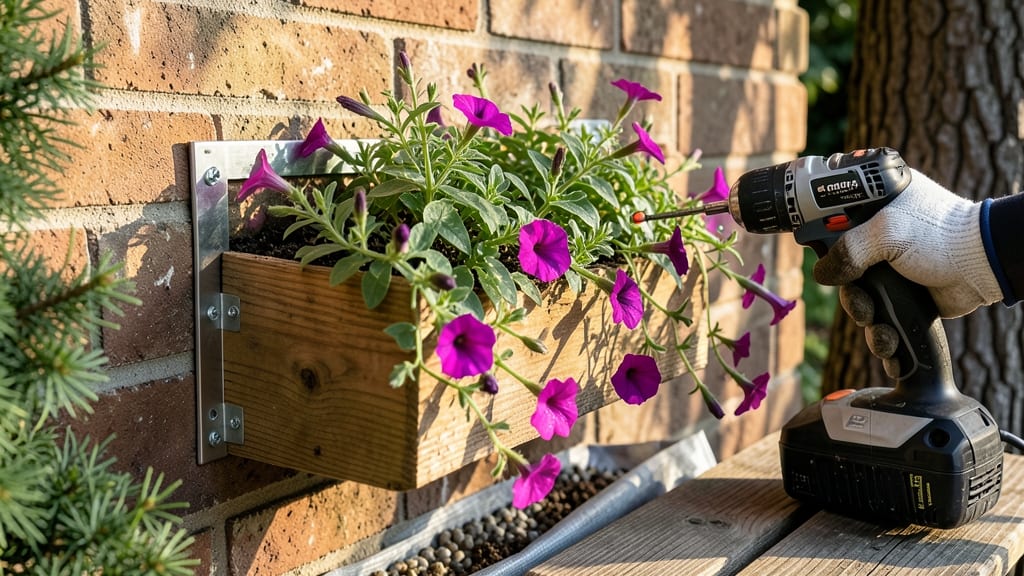
Mounting window boxes on brick walls transforms blank facades into lush, year-round green displays. 🌿 I’ve wrestled with flimsy mounts that sagged under winter snow—until I discovered the heavy-duty method that keeps boxes secure through storms, frost, and heavy blooms. No more wobbling planters or cracked mortar holding you back.
The secret lies in L-shaped brackets and masonry screws designed for brick, not just nails. You’ll need a drill, level, and a little patience to mark studs or use expansion anchors for hollow walls.
Uneven brick? No problem—adjustable brackets let you level boxes perfectly, even on textured surfaces. This isn’t guesswork; it’s a foolproof system that turns any brick wall into a garden-ready canvas.
By the end, you’ll have boxes that stay put through all four seasons, with drainage holes that prevent root rot and weight distribution that handles 20+ pounds of soil and plants.
Imagine thyme spilling over in spring, geraniums blooming in summer, and evergreens adding winter color—without the fear of them crashing down. The best part? You’ll skip the costly contractor calls and do it yourself in under an hour.
Works for any brick wall, whether it’s a historic home’s rough texture or a modern stucco finish. Pro tip: Paint brackets the same color as your boxes for a seamless look. Let’s get those boxes mounted right—permanently.
📚 In This Guide
- What you need
- Instructions
- Tips and common mistakes
- Wrapping up and next steps
What you need
- ● Window boxes: 2–4 (depending on your window size; opt for lightweight but sturdy materials like cedar, redwood, or galvanized metal—they’re weather-resistant!).
- ● L-brackets or heavy-duty window box brackets: 4–8 (stainless steel or galvanized, rated for 50+ lbs per bracket to support soil and plants).
- ● Screws: 16–24 (3-inch deck screws or lag screws for brick anchors).
- ● Brick anchors or masonry screws: 16–24 (1/4-inch diameter, 3-inch long for secure grip).
- ● Waterproof sealant or silicone caulk: 1 tube (for sealing gaps and preventing leaks).
- ● Drill with masonry bit: 1 (for pilot holes in brick).
- ● Level: 1 (to ensure your boxes are perfectly straight).
- ● Measuring tape: 1 (for precise bracket placement).
- ● Pencil: 1 (for marking drill spots).
- ● Safety gear: gloves, goggles, and a dust mask (brick dust isn’t fun!).
- ● Pre-drilled window boxes: Saves time if you’re not into DIY drilling.
- ● Self-tapping masonry screws: No need for pilot holes—just drill and drive!
- ● Drainage fabric: To line the bottom of boxes and prevent soil erosion.
- ● Outdoor-rated paint or stain: For a polished look (choose a non-toxic, weatherproof option).
- ● Drip irrigation kit: For low-maintenance watering (a game-changer for busy gardeners!).
Step-by-step instructions for mounting window boxes on brick
Here’s how to secure window boxes to brick walls like a pro—no wobbles, no leaks, and no regrets.
🪴 Step 1: Measure and Mark Mounting Points
Start by measuring the width of your window box and mark the center of each mounting bracket’s position on the brick. Use a level to ensure the marks are perfectly horizontal—uneven boxes will look sloppy and may sag over time. I like to use a pencil and a carpenter’s level for precision, but even a bubble level works if you’re patient.
Brick walls have mortar joints, so avoid drilling directly into them. Instead, target the solid brick itself, about ½ inch from the edge of each mortar line. This keeps your anchors secure and prevents them from slipping into the softer mortar. Mark at least two points per box end (four total) for stability, especially if your box holds heavy plants like ferns or succulents.
🔨 Step 2: Drill Pilot Holes and Insert Anchors
Using a masonry drill bit (¼ inch for small brackets, ⅜ inch for larger ones), drill pilot holes at your marked points. Keep the drill steady—brick dust flies fast, and a wobbly hole means your anchors won’t grip properly. I wear safety goggles and a dust mask here; brick powder isn’t fun to clean up later.
Once the holes are drilled, tap in masonry anchors (also called sleeve anchors) with a rubber mallet. These expand inside the brick to hold your brackets firmly. If your anchors don’t come with a setting tool, a flathead screwdriver works in a pinch—just tap gently until the anchor sits flush with the wall. No need to overtighten; you’re not installing a bookshelf here.
🪝 Step 3: Attach Brackets and Hang the Box
Screw the mounting brackets into the anchors using stainless steel screws (they resist rust better than regular screws). Tighten them snugly but don’t strip the threads—just enough to hold the bracket steady. Now, carefully lift your window box into place and align it with the brackets. Most boxes have pre-drilled holes for screws, but if yours doesn’t, use a level to ensure it’s straight before marking screw positions.
Here’s the thing—don’t over-tighten the screws when attaching the box. Brick walls can shift slightly with temperature changes, and a box that’s screwed too tight might crack over time. Instead, leave a little wiggle room; the box should sit flush but not feel like it’s being crushed. If it wobbles, adjust the screws incrementally until it’s secure but not rigid.
💧 Step 4: Seal and Weatherproof the Mount
Once the box is hung, apply a silicone caulk bead around the base of each bracket to seal gaps. This keeps rainwater from seeping behind the box and rotting the wood over time. Use a caulk gun with a fine tip for clean lines, and smooth it with a wet finger for a professional finish. Let it cure for 24 hours before adding soil—no rushing this step.
For extra protection, especially in rainy climates, add waterproof flashing tape behind the box where it meets the wall. This acts as a secondary barrier against moisture. I’ve seen too many window boxes rot from the back because of ignored sealing—don’t let that be you. A little preventive work now saves a full redo later.
✂️ Step 5: Test Stability and Plant
Give the box a gentle shake to test its stability. It should feel solid, not loose or rattling. If it moves at all, tighten the screws slightly or add an extra anchor point. Now, fill it with your chosen plants, but don’t overpack the soil. Leave about 1 inch of space at the top for watering without spillage.
Water the plants lightly after filling the box to settle the soil, but avoid soaking it immediately—wet soil can cause the box to shift. If your box has drainage holes, position it so they’re over the brackets (not the wall) to prevent water from pooling behind it. That’s how you keep your greenery thriving and your brackets rust-free for years.
Tips & tricks for heavy-duty window box mounting
These pro tips will ensure your window boxes stay secure and stylish for years—no more sagging or leaks.
Precision Marking: Use painter’s tape to create a temporary guide line where you want the window box to sit. This helps visualize the final position before marking the brick. I’ve found that marking the tape line first prevents mistakes when transferring measurements to the wall, especially when dealing with uneven surfaces. For extra accuracy, snap a chalk line along the tape’s edge before removing it.
Anchor Selection: If your window box is particularly heavy or you’re in a high-wind area, consider using toggle bolts instead of sleeve anchors. Toggle bolts provide more holding power by gripping behind the brick, making them ideal for larger boxes or areas prone to storms. Just be sure to use the correct size for your brick thickness—typically ⅜ inch for standard bricks.
Safety First: When drilling into brick, wear a respirator mask rather than just a dust mask. Brick dust is abrasive and can cause lung irritation over time. I also recommend using a shop vacuum with a brush attachment to clean up debris immediately after drilling—this keeps your workspace tidy and prevents dust from settling on nearby surfaces.
Long-Term Protection: After the 24-hour silicone caulk cure time, apply a clear acrylic sealant over the caulk bead for added weather resistance. This extra layer helps prevent UV damage and extends the life of your seal, especially in sunny climates. I’ve seen unsealed caulk degrade in as little as six months under direct sunlight.
Pro Tips for Mount Window Boxes On Brick
- These pro tips will ensure your window boxes stay secure and stylish for years—no more sagging or leaks.
- Precision Marking: Use painter’s tape to create a temporary guide line where you want the window box to sit.
- Anchor Selection: If your window box is particularly heavy or you’re in a high-wind area, consider using toggle bolts instead of sleeve anchors.
Frequently asked questions
Got questions about mounting window boxes on brick?
Here are some common concerns—plus clear, practical answers—to help you get started with confidence.
What’s the best way to secure window boxes to brick without damaging the wall?
Use masonry screws (not nails!) with plastic wall anchors or toggle bolts for heavy boxes. Pre-drill pilot holes to prevent cracking. For extra security, add L-brackets or heavy-duty straps beneath the box. Avoid adhesive strips—they won’t hold up to weight or weather.
Can I install window boxes on brick in winter or rainy weather?
Ideally, wait for dry, mild weather (50°F+). Cold or wet brick can be brittle, making screws less effective. If you must install in winter, use waterproof sealant around screws and avoid freezing temps. Rainy conditions? Wait until the wall is bone-dry to prevent rust or mold behind the boxes.
What if my brick wall isn’t perfectly flat? Can I still mount window boxes?
Yes! Use adjustable brackets or shims (thin wooden strips) to level the box. For deep gaps, fill with construction adhesive before securing. Uneven walls won’t ruin your project—just add extra support under the heaviest sections. Pro tip: Check for level every 2 feet to avoid water pooling.
Are there cheaper alternatives to heavy-duty brackets for brick mounting?
Skip expensive hardware with these budget fixes:
- PVC pipes: Cut lengths to fit between bricks, screw boxes to the pipes.
- Metal angle brackets from hardware stores (cheaper than specialty mounts).
- Repurposed downspout brackets (often free from contractors).
Just ensure any DIY solution distributes weight evenly!
My window box keeps sagging—what’s the fix?
Sagging usually means insufficient support. Reinforce with:
- Additional L-brackets under the box’s corners.
- A horizontal 2x4 screwed into the wall behind the box.
- Check for rotted or loose wood in the box frame—replace it!
Overfill with soil? Reduce weight by trimming roots or swapping heavy plants for lighter varieties.
Wrapping up and next steps
Mounting window boxes on brick walls is a rewarding project that breathes life into your space with lush greenery—and you’ve got the skills to make it happen! 🌿 Whether you’re using brackets, L-track systems, or through-bolts, the key is patience, precision, and the right tools.
Now that you’re armed with step-by-step guidance, go ahead and transform that bare brick facade into a vibrant, year-round garden oasis.
Ready to take it further? Pick your plants, add a pop of color, and enjoy your handiwork! 🌸