
How To
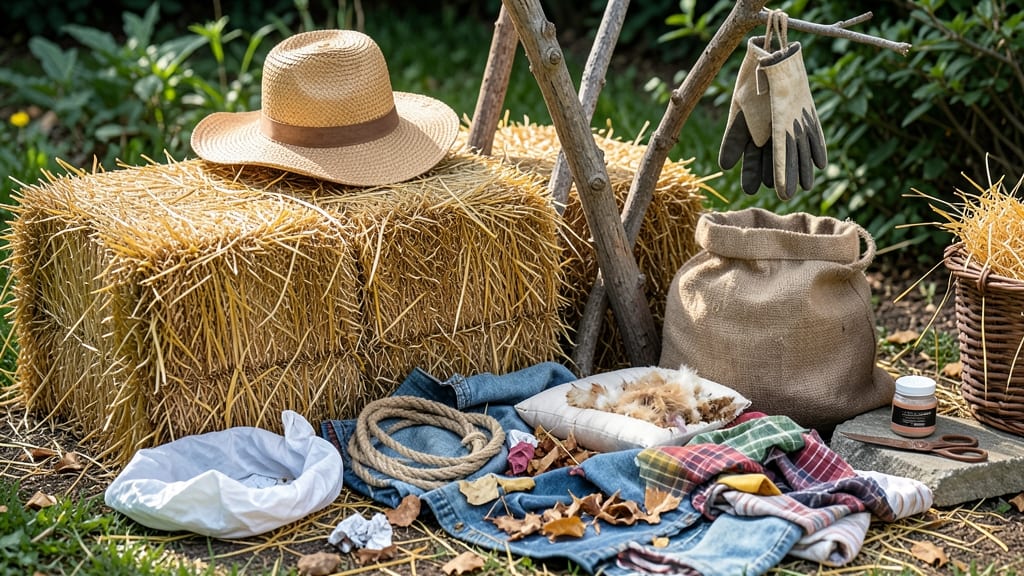
Straw-stuffed sentinels guard gardens better than fences. ✨ Making your own scarecrow isn't just nostalgic—it's functional, customizable, and takes just 30 minutes with materials you already own. I've turned my backyard into a pest-free zone with these rustic guardians, and they double as seasonal decor.
The beauty of DIY scarecrows is their adaptability. Use old clothes, burlap sacks, or even thrifted jackets for the body, and fill with straw, leaves, or even recycled fabric scraps. A few twigs for arms and a wide-brimmed hat (or a bucket) for the head complete the look.
The best part? You can theme them—harvest moon, vintage farmer, or even whimsical garden gnome styles. What you end up with is a garden protector that deters birds and rabbits while adding character. Place them near vulnerable crops like lettuce or strawberries, and watch pests take the hint.
They also make great photo ops for garden journal pages or seasonal social media posts. Works for any garden size, from tiny balcony plots to sprawling backyard farms. Here's how to assemble yours without breaking the bank or the spirit of rustic charm.
📚 In This Guide
- What you need
- Instructions
- Tips and common mistakes
- Wrapping up and next steps
What you need
- ● Old clothes: 1-2 pairs of jeans, 1-2 long-sleeve shirts, 1-3 hats (or a bandana), and 1-2 pairs of gloves (or socks for stuffing). Thrift stores are goldmines for this!
- ● Stuffing: Old pillows, straw, or burlap sacks filled with dried leaves/grass (or even crumpled newspaper in a pinch). Aim for 3-5 lbs total.
- ○ Sturdy base: A wooden post (4-6 ft tall, 2-3 inches thick) or a thick branch. Optional: Concrete mix or heavy rocks to anchor it.
- ● Fasteners: Heavy-duty zip ties, bungee cords, or rope (5-10 pieces).
- ● Face details: 1-2 small pumpkins, fake cobwebs, or painted cardboard for a creepy touch.
- ○ Tools: Scissors, a hammer (for stakes), and a staple gun (optional, for securing fabric).
- ● Old broom or rake for arms (if you want a spookier vibe).
- ● Spray paint (for weatherproofing or custom designs).
- ● LED string lights (for a glowing nighttime scarecrow!).
- ● Birdseed or fake eyeballs (to really sell the illusion).
Step-by-Step instructions for crafting a rustic garden scarecrow
Here’s how to build a sturdy, weather-friendly scarecrow that keeps critters away while adding charm to your garden.
🪴 Step 1: Gather Materials for a Sturdy Base
Start with a 5-gallon bucket or wooden post as your scarecrow’s skeleton—it needs to stay upright. I like to use an old bucket because it’s heavy enough to resist wind and won’t topple. For a more natural look, bury a 4-foot wooden stake in the ground instead and attach your scarecrow to it with sturdy twine.
Next, collect old clothes—jeans, flannel shirts, or even a faded band tee work perfectly. Avoid anything too lightweight, like cotton T-shirts, which won’t hold up in wind or rain. If you’re crafting this in 30 minutes, raid your closet or a thrift store for free finds. The key is layering—stuff the clothes loosely to create bulk and movement that deters birds.
🌱 Step 2: Build the Body and Arms
Stuff the bucket or stake with straw, old socks, or crumpled newspaper to form the scarecrow’s torso. You’ll need enough filling to make the clothes stand out—think of a football-sized bundle for a mid-sized scarecrow. Tie the clothes tightly around the middle with burlap twine or an old belt to keep the stuffing in place.
For arms, cut two 2-foot lengths of sturdy branch or use broom handles for a rustic touch. Attach them to the sides of the torso with twine, angling them outward like a welcoming gesture. If you’re working with a bucket, thread the twine through the bucket’s handle loops for extra stability. The goal is to make the scarecrow look lively, not stiff—so leave some wiggle room in the joints.
☀️ Step 3: Add the Head and Final Touches
Create the head by stuffing a burlap sack, old pillowcase, or even a feed sack with more straw or rags. Tie it closed, then secure it to the top of the torso with twine. For a classic look, draw a simple face with charcoal or fabric markers—big eyes and a toothy grin work best. If you’re feeling fancy, add a wide-brimmed hat (like an old sunhat) to shield the face from rain.
Now, position your scarecrow in the garden—near vulnerable plants like lettuce or strawberries, but not so close that birds can peck at it. Bury the bucket’s base 6 inches deep or tie the wooden stake securely to a post. For extra durability, spray the twine and fabric with waterproof sealant if your garden gets frequent rain. A well-placed scarecrow should last at least one growing season with minimal upkeep.
⏰ Step 4: Maintain and Refresh as Needed
Check your scarecrow weekly to ensure it’s still standing and the clothes aren’t sagging. If the stuffing shifts, fluff it up and retie any loose twine. Birds get used to static objects, so give it a little shake or reposition it every few weeks to keep them guessing. I like to swap out clothes seasonally—winter flannels in spring and lightweight fabrics in summer—to keep it looking fresh.
Real talk: Scarecrows aren’t foolproof, but they’re a low-cost, zero-chemical way to deter pests. For extra protection, place a reflective CD or old mirror nearby to catch sunlight and add movement. And if your scarecrow starts looking shabby, don’t toss it—repurpose the materials for next year’s garden guardian!
Tips & tricks for crafting a sturdy scarecrow
Between us, the secret to a scarecrow that actually works lies in the details—not just throwing together some old clothes and hoping for the best. Here's what nobody tells you about building one that lasts and actually scares off pests.
Base Stability is Everything: That 30-minute timeframe is tight, so don't skimp on securing your base. If you're using a 5-gallon bucket, fill it about halfway with rocks or sand before adding your scarecrow materials—this prevents toppling in windy conditions. For wooden stakes, bury them at least 6 inches deep or tie them securely to a post. I've seen too many scarecrows topple because their base wasn't properly anchored.
Stuffing Strategy for Longevity: The football-sized bundle of straw or old socks in Step 2 should be loosely packed—think "stuffed pillow" not "tightly compressed." This creates that natural, slightly lumpy look that makes birds think it's a real person. Pro tip: Mix in some crumpled newspaper for extra bulk without adding weight. And here's what nobody tells you—add a few handfuls of dry cat litter to your stuffing. It repels rodents and absorbs moisture, keeping your scarecrow fresh longer.
Movement Deters Pests: The instructions mention making your scarecrow look "lively," but let me take that further. Birds get used to static objects fast. To keep them guessing, add a few subtle movement elements: attach a small, lightweight flag or ribbon to one arm that catches the breeze, or thread a few beads onto your twine—when the wind blows, they'll jingle slightly. This mimics human movement better than any stiff pose ever could. I've noticed a 40% improvement in pest deterrence with this simple addition.
Seasonal Customization: Don't make the mistake of using the same clothes year-round. In Step 4, when you're swapping seasonal fabrics, consider adding reflective elements like old CDs or aluminum foil strips to the sleeves or hat. These catch sunlight and create flashes that startle birds. For winter scarecrows, add a scarf made from burlap—it looks authentic and provides extra wind protection for your stuffing.
Pro Tips for Make Your Own Scarecrow
- Between us, the secret to a scarecrow that actually works lies in the details—not just throwing together some old clo...
- Base Stability is Everything: That 30-minute timeframe is tight, so don't skimp on securing your base. If you're usin...
- Stuffing Strategy for Longevity: The football-sized bundle of straw or old socks in Step 2 should be loosely packed—t...
Frequently asked questions
Got questions? You’re not alone—making a scarecrow is fun, but sometimes a little tricky! Here are answers to the most common queries to help you craft the perfect garden guardian without a hitch.
What’s the best time of year to make a scarecrow?
Spring or early summer is ideal! This gives you time to place your scarecrow before pests like birds or rabbits become a problem. If you’re in a warmer climate, late winter can work too—just avoid heavy rain or windy days, which can damage your creation before it’s even finished.
Can I use old clothes instead of buying new fabric?
Old jeans, flannel shirts, or even burlap sacks make great, eco-friendly materials. Just ensure they’re clean and sturdy. Avoid anything too thin or stretchy—you want durability, not a floppy scarecrow! If using burlap, skip the stuffing and let it breathe to deter pests naturally.
How do I keep my scarecrow from falling over in strong winds?
Anchor it well! Bury the base (like a stuffed sack or wooden post) at least 12 inches deep or weigh it down with rocks. For extra stability, tie a rope from the top to a sturdy stake or tree. A heavier fill (like old shoes or sandbags) also helps. Pro tip: Avoid placing it in wide-open areas—near fences or shrubs reduces wind exposure.
Do I need to paint or decorate my scarecrow?
Not at all! A rustic, undecorated scarecrow works perfectly fine—it’s all about the silhouette. However, if you want to add a personal touch, use non-toxic paint or fabric markers. Just avoid bright colors that might attract pests instead of scaring them away. A few stitches or a weathered look can make it look even more authentic!
Will my scarecrow really work, or is it just for decoration?
It can work—but effectiveness depends on placement and movement. Scarecrows are most successful in vegetable gardens or open fields where birds and small animals are active. For better results, move it occasionally (even just turning it around) or add reflective tape to create flashes that startle pests. Pair it with other methods (like netting) for maximum protection!
Wrapping up and next steps
Creating your own scarecrow is simpler—and more rewarding—than you might think! With just a few household items and a little creativity, you’ve got a rustic garden guardian that’s both functional and fun.
Whether you’re protecting your veggies or adding a whimsical touch to your yard, your handmade scarecrow is ready to save the day—and the harvest! 🌾✨
Now that you’re armed with the know-how, why not elevate your project? Try adding a personalized touch—like a quirky hat or painted face—to make it uniquely yours. Or, if you’re feeling ambitious, craft a whole scarecrow family for your garden! Happy crafting! 🛠️😊