
How To
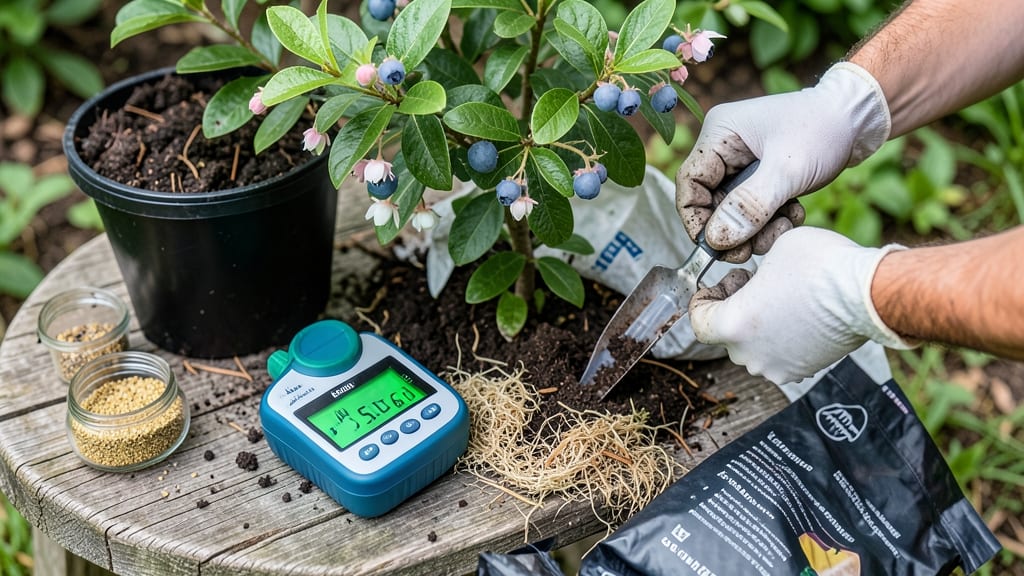
How to make potting soil more acidic—your azaleas are begging for it. 🌿 Acid-loving plants like rhododendrons, blueberries, and citrus need soil pH between 4.5 and 6.0—any higher, and they struggle to absorb nutrients, even if you're watering and fertilizing perfectly. The fix isn't complicated, but it does require patience and testing to avoid overdoing it.
Most garden centers sell pre-mixed acidic potting soil, but DIY blends using pine needles, peat moss, or sulfur give you more control.
I’ve found that a mix of one part pine needles to three parts regular potting soil lowers pH naturally over time, while sulfur works faster but needs careful monitoring. The key is testing before and after—cheap pH meters or soil test kits make this foolproof.
You’ll know it’s working when your plants perk up: deeper green leaves, more frequent blooms, and stronger growth. Over-acidification is rare but noticeable—yellowing leaves, stunted growth, or even leaf burn.
If that happens, mix in some lime (calcium carbonate) to gently raise the pH back up. The goal is balance, not extreme acidity.
This method works for containers, raised beds, or in-ground plantings—just adjust the amounts based on your space. Start small, test often, and your acid-loving plants will thank you with vibrant, healthy growth all season long. Ready to give it a try?
📚 In This Guide
- What you need
- Instructions
- Tips and common mistakes
- Wrapping up and next steps
What you need
- ● Potting soil: 1–2 gallons (or enough to fill your container). Use a well-draining, sterile mix (e.g., 50% peat moss or coconut coir + 50% perlite/vermiculite).
- ● Acidifying agents (pick one or combine): Pine needles: 1–2 cups (fresh or dried). Pro tip: Chop them finely for faster decomposition!
- ● Peat moss: ½–1 cup (sphagnum peat is ideal). Note: Avoid overusing—it’s non-renewable!
- ● Sulfur powder: 1–2 tablespoons (for quick results). ⚠️ Safety: Wear gloves and a mask when handling.
- ● Coffee grounds: ½ cup (used, rinsed). Bonus: Adds nutrients too!
- ● Cotton compost or oak leaves: 1 cup (decomposed).
- ● pH testing kit: Digital or liquid test strips (e.g., LaMotte Soil pH Test Kit). Why? Precision matters—aim for 4.5–6.0 for acid-loving plants.
- ● Watering can or spray bottle: For even distribution.
- ● Garden gloves: Protect your hands from sulfur or rough pine needles.
- ● Pruners/scissors: To chop pine needles or leaves into smaller pieces.
- ● Plastic container: For pre-mixing soil amendments if you’re batch-processing.
- ● Lime (calcium carbonate): Tiny amounts (¼ tsp) if you accidentally over-acidify.
- ● Know your plants’ pH needs (e.g., blueberries = 4.5–5.0; azaleas = 5.0–6.0).
- ● Test your current soil pH—amendments work best when you know your starting point!
- ● Choose a well-draining container with drainage holes (if repotting).
Step-by-Step guide to acidifying potting soil
Here's the straightforward method I use to lower soil pH naturally—no harsh chemicals needed.
🌱 Step 1: Test Your Current Soil pH
Before making changes, grab a soil pH test kit (digital or liquid) to check your starting point. Most acid-loving plants like azaleas, blueberries, and rhododendrons thrive between pH 4.5-5.5. If your soil reads higher than 6.0, it's time to acidify.
For a quick visual check, drop a small sample of moist soil into a clear cup of water. If it stays cloudy or forms clumps, it's likely alkaline. If it dissolves quickly, it's already acidic. I always test a few spots in the pot since pH can vary even within the same container.
🪴 Step 2: Mix in Organic Acidifiers
Start by adding ½ cup of finely ground pine needles per gallon of potting mix. Pine needles release tannic acid slowly as they break down, lowering pH over time. Spread them evenly and mix thoroughly with a small garden fork or trowel.
Next, incorporate ½ cup of peat moss (sphagnum type works best) per gallon. Peat moss is naturally acidic and improves moisture retention. Don't skip this—peat moss also adds organic matter that helps buffer future pH fluctuations. I like to pre-moisten the peat moss slightly before mixing to prevent clumping.
☀️ Step 3: Apply Slow-Release Acidifiers
For an extra boost, sprinkle 1 tablespoon of aluminum sulfate per gallon of mix (follow package instructions carefully—this is potent). Work it in gently to avoid creating hot spots. I always wear gloves when handling this because it can irritate skin.
For a gentler option, mix in ¼ cup of coffee grounds per gallon. Used coffee grounds are slightly acidic and add nitrogen as they decompose. If you're using this method, I recommend composting the grounds first to prevent mold growth in your soil.
💧 Step 4: Water with Acidified Solution
Fill a spray bottle with distilled white vinegar (1 part vinegar to 3 parts water) and mist the soil until evenly damp. This gives an immediate pH drop. Avoid over-saturating—the goal is to moisten, not drench. I like to do this after planting acid-loving plants to give them a head start.
For ongoing maintenance, use rainwater instead of tap water. Rainwater is naturally acidic (pH 5.6) and won't alter your soil chemistry like alkaline tap water might. If you don't have rainwater access, let tap water sit in an open container overnight to allow chlorine to dissipate before using.
⏰ Step 5: Monitor and Adjust Over Time
Re-test your soil pH after 2-4 weeks—this gives the organic materials time to break down and take effect. If the pH hasn't dropped enough, repeat the process with fresh materials. I usually check again after 8 weeks to confirm stability.
For long-term maintenance, top-dress with pine bark fines (¼ inch layer) annually. These break down slowly and keep the soil naturally acidic. Avoid over-amending—too much acidity can harm beneficial microbes and make nutrients like phosphorus unavailable to plants.
Tips & tricks for perfect acidic potting mix
These practical tips will help you get the most out of your soil acidification project—and avoid common pitfalls that can throw off your pH balance.
Test Smart: Don't rely solely on the visual water test in Step 1—it's just a rough guide. For accurate results, use a digital pH meter (they're affordable and more precise). I test three different spots in each container since pH can vary by just a few inches. If your readings differ by more than 0.5 points, you'll need to adjust each area separately. This attention to detail makes all the difference when planting finicky acid-loving plants like blueberries.
Prep Your Acidifiers: Before mixing in Step 2, grind your pine needles finely—almost like sawdust. Coarse needles take much longer to break down and release their acidifying properties. For the peat moss, I recommend pre-moistening it slightly (just damp, not soggy) before adding to your mix. This prevents clumping and helps distribute it more evenly throughout the soil. Trust me, skipping this step leads to uneven pH adjustment.
Safety First with Chemicals: When using aluminum sulfate in Step 3, I can't stress enough how important it is to wear gloves—this chemical can cause skin irritation. Also, measure carefully: that 1 tablespoon per gallon is precise. Too much will make your soil dangerously acidic, while too little won't have the desired effect. For the coffee grounds, I compost them first to kill any potential mold spores that could harm your plants.
Monitor Like a Pro: The 2-4 week testing window in Step 5 is crucial, but don't just test once. I check my soil again at 6 weeks and again at 8 weeks to confirm stability. Keep a small notebook by your potting bench to track your readings—this helps you spot trends over time. If your pH drops too fast, you've over-acidified, which can actually harm your plants by locking out essential nutrients.
Pro Tips for Make Potting Soil More Acidic
- These practical tips will help you get the most out of your soil acidification project—and avoid common pitfalls that can throw off your pH balance.
- Test Smart: Don't rely solely on the visual water test in Step 1—it's just a rough guide.
- Prep Your Acidifiers: Before mixing in Step 2, grind your pine needles finely—almost like sawdust.
Frequently asked questions
Got questions about lowering your potting soil’s pH? You’re not alone! Here are some of the most common concerns—and straightforward answers—to help you acidify your soil with confidence.
How do I know if my potting soil is too alkaline?
Test your soil’s pH using a soil pH meter or test kit (available at garden centers). Most acid-loving plants (like azaleas, blueberries, or hydrangeas) thrive in soil with a pH of 4.5–6.0. If your reading is above 7.0, it’s time to acidify!
How long does it take for potting soil to become more acidic?
Results vary based on the method. Organic amendments like pine needles or peat moss take 2–4 weeks to adjust pH, while sulfur or vinegar can show changes in 1–2 weeks. Monitor with a pH test kit and reapply as needed.
Can I over-acidify potting soil? What are the signs?
Yes! Soil that’s too acidic (below 4.0) can harm plants by locking out essential nutrients like calcium, magnesium, and phosphorus. Signs include yellowing leaves, stunted growth, or root damage. Balance with lime or wood ash if needed.
Are there natural alternatives to sulfur or vinegar?
Try these plant-safe options:
- Pine needles or bark: Slow-release acidity (great for long-term projects).
- Coffee grounds: Add a thin layer (¼ inch) to pots—rich in organic acids.
- Composted leaves: Break down to lower pH over time.
- Aluminum sulfate: Fast-acting but use sparingly (follow package rates).
Will acidifying soil harm my houseplants or veggies?
It depends on the plant! Most houseplants (like ferns or calatheas) prefer slightly acidic soil, but veggies like tomatoes or peppers thrive in neutral to slightly acidic soil (6.0–7.0). Always check your plant’s needs—over-acidifying can stress roots.
How often should I check and adjust pH?
For container plants, test pH every 3–6 months or when you notice growth issues. Outdoor garden beds may need annual checks. Adjust gradually—small changes (like adding a handful of pine needles) work better than drastic shifts!
Wrapping up and next steps
Making your potting soil more acidic doesn’t have to be complicated—just follow these simple steps using natural materials like pine needles or peat moss. 🌱 Whether you’re nurturing acid-loving plants like azaleas or blueberries, a little adjustment can make a big difference in their growth and health.
Now that you’re equipped with the know-how, grab your gloves and get ready to give your plants the perfect home!
Ready to see the results? Start small—test your soil’s pH first, then gradually tweak it while monitoring your plants’ progress. Happy gardening! 🌿