
Planting
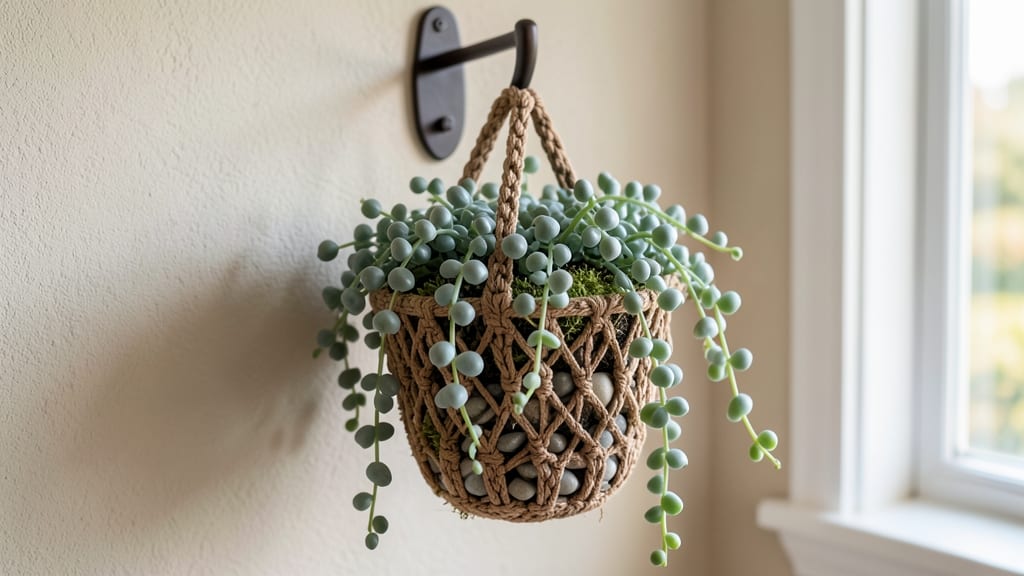
That first hanging plant holder transformed my tiny balcony into a lush jungle. 🌿 The right design supports plants while adding style—whether you go for boho macramé or sturdy wooden slats, it’s your chance to turn empty wall space into a thriving vertical garden.
You’ll need just 5 basic supplies—rope, wood, or even repurposed materials—and about 30 minutes to create something that holds 10+ pounds of plants. The best part? It works for herbs, succulents, or trailing flowers, giving you instant greenery without taking up floor space.
By the end, you’ll have a custom holder that’s both functional and decorative, with options to paint, stain, or weave patterns. Whether you hang it from a balcony railing or a tree branch, it’s the perfect way to maximize small spaces.
For extra durability, reinforce knots or slats, and always check weight limits. I’ve seen these holders last years with proper care—now let’s get crafting!
📚 In This Guide
- What you need
- Instructions
- Tips and common mistakes
- Wrapping up and next steps
What you need
- ● 3mm or 5mm cotton rope: 10–15 feet (depending on size)
- ● Wooden dowel or ring: 1–2 inches in diameter (for the base)
- ● Scissors: Sharp fabric scissors for clean cuts
- ● Measuring tape: For precise knot spacing
- ○ Optional: Beads, tassels, or dye for customization
- ● Wooden slats: 2–4 pieces (1–2 inches wide, 12–18 inches long)
- ● Sandpaper: 120–220 grit (to smooth edges)
- ● Wood glue or screws: For assembly
- ● Drill & bits: To create drainage holes
- ● Sturdy rope or chain: 3–6 feet (for hanging)
- ○ Optional: Stain/paint, decorative nails, or moss for texture
Step-by-Step instructions for crafting hanging plant holders
Here’s how to create stylish, sturdy plant hangers using two simple methods—each perfect for adding greenery to walls or ceilings.
🪴 Step 1: Gather Materials and Tools for Your Style
For macramé hangers, you’ll need 3-4 feet of ¼-inch thick cotton rope, a wooden dowel (about 6-8 inches long), and scissors. The rope’s thickness determines durability—thicker rope holds heavier pots better. For wooden slat hangers, grab two 12-inch wooden slats (½-inch thick), a drill, 1-2 eye screws or heavy-duty hooks, and sandpaper to smooth rough edges.
I like to pre-cut rope into 4 equal lengths (about 3 feet each) for macramé to simplify knots later. For wooden slats, sand them until smooth—rough edges can snag plant tendrils or damage pots. Label your materials to avoid mixing them up mid-project.
🪴 Step 2: Assemble the Macramé Hanger
Tie the 4 rope lengths together at one end, creating a loop for hanging. Space them evenly around the dowel—this keeps tension balanced. Slide the dowel through the center, then tie a square knot (like a granny knot) every 2-3 inches along the dowel’s length. The knots should be snug but not overly tight to avoid crushing the rope.
After tying 4-5 knots, flip the dowel and repeat on the opposite side. This creates a symmetrical, stable base for your plant pot. Test the hanger by gently tugging—if it wobbles, add one more knot for reinforcement. For heavier plants, double the rope thickness or use ½-inch rope instead.
✂️ Step 3: Build the Wooden Slat Hanger
Drill two pilot holes near the top of each slat, about 1 inch from the edge, to prevent splitting. Insert eye screws or hooks and tighten securely. Space the slats 3-4 inches apart—this gives your pot room to sit without tipping. For extra stability, screw a small wooden block between the slats at the bottom to act as a base.
Sand any rough spots where the screws meet the wood, then test the hanger by placing a lightweight pot on the slats. If it feels unstable, add a third slat in the middle or use L-brackets instead of screws for added support. Wooden hangers work best for small to medium pots—avoid overloading them.
💧 Step 4: Finish and Hang Your Plant Holder
For macramé, trim any frayed rope ends with scissors and tuck them neatly into knots. Add a decorative tassel by cutting an extra rope length, folding it in half, and tying it to the bottom loop. For wooden slats, paint or stain them to match your decor—just let them dry 24 hours before hanging to avoid warping.
Hang your hanger using a sturdy hook or ceiling-mounted bracket rated for the plant’s weight. I like to test the hook’s strength by hanging a 5-pound weight for 10 minutes before adding plants. Adjust the rope or slat length so the pot sits 1-2 inches above the ground—this prevents soil from spilling onto floors.
Tips & tricks for perfect hanging plant holders
Here's what nobody tells you about building sturdy, stylish plant hangers that actually hold your greenery.
Knot Tension Matters: When tying square knots around the dowel in Step 2, pull each knot just tight enough to hold the rope in place but leave a little give. Too tight and you'll crush the rope fibers, making it weaker over time. I learned this the hard way after my first macramé hanger unraveled after just two weeks. For extra security, add a final knot at the very end of each rope section before trimming.
Wooden Slat Stability: In Step 3, if you're working with heavier pots, consider using L-brackets instead of eye screws for the wooden slat hangers. These provide a wider, more secure attachment point that distributes weight better. Also, when spacing your slats 3-4 inches apart, measure from the inside edge of each slat—not the outer edge—to ensure your pot has proper support without wobbling.
Drying Time is Non-Negotiable: That 24-hour drying period for painted or stained wooden slats isn't just a suggestion—it's crucial. I once rushed this step and ended up with warped hangers that couldn't support my plants. Use a fan to speed up drying in a well-ventilated area, but don't skip the full time. For macramé, let the rope sit for at least 10 minutes after trimming frayed ends to prevent unraveling when you handle it.
Weight Testing Saves Headaches: Before hanging your actual plants, that 5-pound weight test for 10 minutes in Step 4 is your friend. I've seen too many hangers fail under the weight of soil and water. For macramé, test with a pot that's 20% heavier** than your actual plant to account for water absorption. For wooden slats, test with the heaviest pot you plan to use—there's no coming back from a snapped slat once your plant is in there.
Pro Tips for Make Hanging Plant Holder
- Here's what nobody tells you about building sturdy, stylish plant hangers that actually hold your greenery.
- Knot Tension Matters: When tying square knots around the dowel in Step 2, pull each knot just tight enough to hold th...
- Wooden Slat Stability: In Step 3, if you're working with heavier pots, consider using L-brackets instead of eye screw...
Frequently asked questions
Got questions about crafting your own hanging plant holder? Here are some of the most common ones—and their answers—to help you get started with confidence!
What’s the best material for a beginner-friendly hanging plant holder?
If you’re new to DIY, macramé is the easiest option—it requires just rope, a wooden dowel, and basic knots. For a sturdier look, wooden slats (like cedar or pine) are great but need more tools (saw, drill, sandpaper). Start with macramé for a forgiving, stylish project!
How long does it take to make a hanging plant holder?
Time depends on your skill level and design:
- Macramé: 30–90 minutes (beginner-friendly knots take longer).
- Wooden slat: 1–3 hours (includes cutting, sanding, and assembling).
Can I use these holders for heavy plants like monsteras or ferns?
It depends! Macramé holders are best for lightweight plants (like pothos or string of pearls). For heavier foliage, opt for wooden slats with reinforced straps or add a metal hook to distribute weight. Always check the ceiling/wall anchor’s weight limit!
What tools do I really need? Can I skip any?
For macramé, you only need:
- Rope (3mm–5mm thickness).
- A wooden dowel or branch.
- Scissors.
My macramé holder keeps unraveling—how do I fix it?
Loose knots are the culprit! Retighten knots by gently pulling the ends and securing them with a double fisherman’s knot. If fraying happens, wrap the ends with electrical tape or a second layer of rope. For wooden holders, reinforce screws with wood glue for extra stability.
How can I make my hanging planter look more decorative?
Add personality with:
- Paint or stain (seal with varnish for durability).
- Beaded tassels or embroidery floss accents on macramé.
- Moss or dried flowers tucked into the design.
Wrapping up and next steps
You’ve got everything you need to bring your vertical garden to life! Whether you chose the boho-chic macramé style or the rustic wooden slat design, your hanging plant holder is a creative and functional way to elevate your space—and it’s easier than you think. 🌿✨
Now that you’re inspired, why not take the next step? Grab your supplies, experiment with colors or textures, and start growing! Share your masterpiece with us—we’d love to see your green thumb in action. Happy crafting!