
Tools
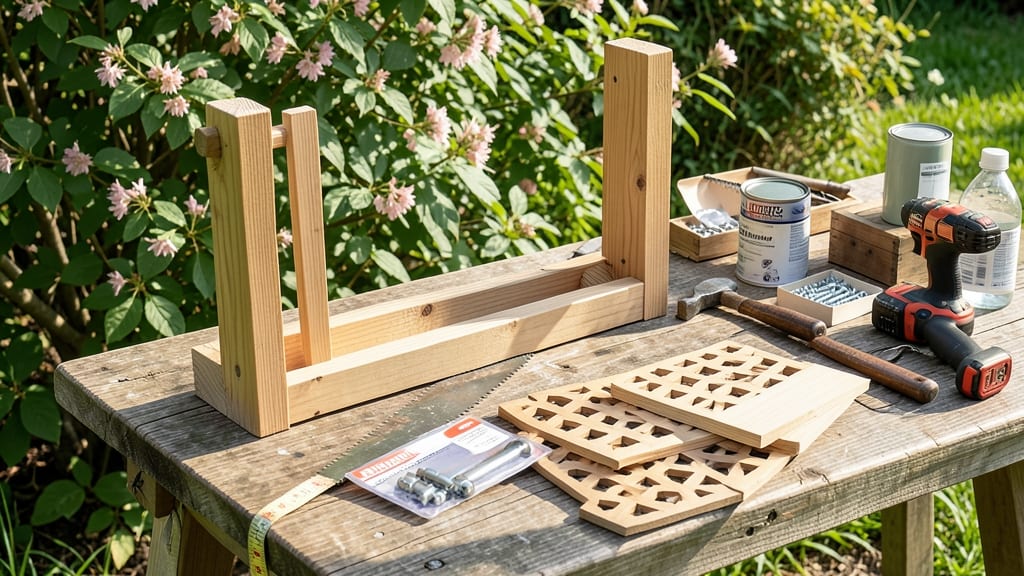
This simple garden gate transforms a plain opening into a sturdy, stylish entry. ✨ I built mine last spring using scrap wood and a few metal hinges—now it’s the first thing visitors notice when they walk up my path.
The beauty of this design is its flexibility: you can match it to your fence or let it stand out with bold colors. For durability, I used pressure-treated lumber and galvanized hardware, but even basic materials work if you’re on a budget.
The whole project takes 4 hours or less, and the results look far more expensive than they cost. You’ll end up with a gate that’s both functional and decorative—strong enough to keep pets in or tools out, while adding character to your garden’s entrance.
The hinges I chose allow for easy opening, and the simple latch keeps everything secure without looking like a fortress. Works for any garden style, from rustic to modern, and adapts to different sizes. Let’s get building!
📚 In This Guide
- What you need
- Instructions
- Tips and common mistakes
- Wrapping up and next steps
What you need
- ● Wood: 2x 4x4 pressure-treated lumber posts (8 ft long) – for gate pillars
- ● 2x 2x4 lumber (8 ft long) – for horizontal support beams (2 pieces)
- ● 2x 1x6 or 2x6 lumber (8 ft long) – for gate panels (adjust width as needed)
- ● Metal: 1x heavy-duty hinge (3–4 inches, rated for outdoor use)
- ○ 1x latch or hook (optional but recommended for security)
- ● 1x 1/4" or 3/8" exterior-grade bolts (with washers and nuts, ~10–12 pieces)
- ○ Hardware & Finishes: Outdoor wood stain or paint (optional but recommended for longevity)
- ● Wood screws (deck screws, 2.5–3 inches, ~20 pieces)
- ● Concrete or gravel (for anchoring posts, ~1–2 bags)
- ● Tape measure
- ● Circular saw or handsaw
- ● Drill/driver (with drill bits and driver bits)
- ● Level (4 ft)
- ● Post hole digger or shovel
- ● Wrench (for hinge/bolt installation)
- ● Safety gear (gloves, goggles, ear protection)
- ● Pre-made gate hardware kit (hinges + latch combo)
- ● Stainbrush or paint roller
- ● Chalk line (for marking straight cuts)
- ● Cinder blocks or metal plates (for post anchors)
Step-by-step instructions for building a sturdy garden gate
Here's how I build a simple, functional gate that lasts—no fancy tools or carpentry experience required.
🪴 Step 1: Gather Materials and Prep the Frame
Start with a 2x4-inch pressure-treated lumber for the frame—cut two pieces to 8 feet long for the top and bottom rails, and two pieces to 3 feet long for the vertical supports. Sand all edges to prevent splinters, which is especially important if kids or pets will use the gate. I like to pre-drill holes for screws to avoid splitting the wood later.
Assemble the frame by attaching the vertical supports to the rails using 3-inch deck screws. Space the supports 12 inches apart for stability. Double-check the corners are square using a carpenter’s square—this ensures your gate hangs straight. A 4x4-inch post at each corner adds extra reinforcement if your garden path is heavily trafficked.
✂️ Step 2: Add Horizontal Slats for Structure
Cut 1x4-inch boards to 3 feet long for the horizontal slats—you’ll need about six of them. Space them 2 inches apart vertically, attaching them to the frame with 2-inch screws. Leave a ½-inch gap between each slat for drainage and to prevent debris buildup. I like to alternate the direction of the screws on opposite sides of each slat for added strength.
Use a level to ensure the frame stays plumb as you work. If the slats feel wobbly, add a third vertical support in the center of the frame. This is where most gates fail—skipping reinforcement here leads to sagging over time. Test the frame by lifting it; it should feel solid, not flimsy.
🔧 Step 3: Attach Hardware for Hinges and Latch
Mark the hinge placement on the frame and the post—hinges should be 6 inches from the top and bottom of the frame. Use a 3-inch hinge for durability, and pre-drill holes to avoid cracking the wood. Secure the hinges with ½-inch exterior screws, then attach the frame to the post. I always use a stainless steel latch for the handle, mounted 3 feet from the ground for easy access.
Test the gate by opening and closing it a few times. If it sticks, sand the edges or adjust the hinge screws slightly. A rubber gasket on the latch side prevents the gate from scraping the post. This is the moment that matters: if it doesn’t swing smoothly now, it won’t later. Real talk—skipping this step leads to frustration down the road.
☀️ Step 4: Finish and Weatherproof
Apply a waterproof sealant to all wood surfaces to protect against moisture and pests. I use a clear polyurethane for a natural look, but you can stain it if you prefer. Let it dry completely—usually 24 hours—before handling the gate. This step keeps your gate looking fresh and prevents rot, especially in rainy climates.
Finally, add a metal handle for extra grip and a decorative touch. I like to wrap the top rail with wire mesh if the gate borders a vegetable garden to keep out rabbits. Step back and admire your work—you’ve just built a gate that’ll last for years with minimal effort.
Tips & tricks for building a sturdy garden gate
Building a gate that lasts isn't rocket science—it's about attention to detail. Here's how to avoid common pitfalls and make your project even stronger.
Precision Cuts Save Time: Measure twice, cut once—this old carpenter's saying holds true. Use a 4-foot level to mark your 8-foot rails and 3-foot vertical supports before cutting. I like to draw arrows on the wood with a pencil to indicate which end goes where, saving me from flipping pieces later. This simple step prevents the frustration of mismatched parts halfway through assembly.
The Reinforcement That Matters: In Step 2, when adding those 1x4-inch slats, don't skip the third vertical support if your frame feels wobbly. I've seen gates sag within months when this step is overlooked. For extra stability, use 2.5-inch deck screws instead of 2-inch ones—the extra length creates a stronger hold. The ½-inch gaps between slats aren't just for looks; they prevent water pooling that leads to rot.
Hinge Placement Is Critical: When marking hinge placement in Step 3, use a square to ensure those 6-inch measurements are perfect from both the top and bottom. I've learned the hard way that crooked hinges make gates bind or swing unevenly. Pro tip: Place a scrap piece of wood behind the hinge when screwing it in—this prevents the screw from pulling through the soft wood. The 3-foot handle height is perfect for adults, but add a lower latch if kids will use the gate.
Sealant Secrets: That 24-hour drying time for your sealant is non-negotiable. I've rushed this step and ended up with sticky gates that attracted dirt. Work in dry conditions—humidity slows drying—and apply a second coat if you're in a rainy climate. For extra protection, brush on sealant before attaching the final handle. This keeps moisture from wicking up through the wood where the metal meets the frame.
Pro Tips for Make A Simple Garden Gate
- Building a gate that lasts isn't rocket science—it's about attention to detail. Here's how to avoid common pitfalls a...
- Precision Cuts Save Time: Measure twice, cut once—this old carpenter's saying holds true. Use a 4-foot level to mark ...
- The Reinforcement That Matters: In Step 2, when adding those 1x4-inch slats, don't skip the third vertical support if...
Frequently asked questions
Got questions about building your own garden gate? You’re not alone—here are some common concerns to help you get started with confidence!
What’s the cheapest way to make a simple garden gate?
Use reclaimed wood (like old pallets or fencing) and scrap metal for hinges and latches. Skip fancy hardware—basic screws, nails, and a bolt latch will work. Check local salvage yards or Facebook Marketplace for deals!
Can I build a garden gate in a weekend?
This project is designed to take 4 hours if you prep ahead. Measure twice, pre-cut materials, and gather tools first. Work in good light, and you’ll finish strong by evening.
What if I don’t have power tools?
No problem! Use a handsaw, drill (with a hand drill or battery-powered one), and a hammer. A sturdy workbench and clamps will help too. Just plan for extra time—precision matters for safety and durability.
How do I keep my gate from sagging over time?
Reinforce the hinges with heavy-duty screws (3”+ length) and add a stabilizer bar (a metal rod or thick dowel) between the gate and post. Check alignment every few months and tighten loose screws.
What’s the best alternative if wood rots easily?
Try vinyl-coated metal gates (like those for chain-link fences) or powder-coated aluminum. For wood, seal it with outdoor varnish or use cedar/redwood—naturally rot-resistant. If moisture is a big issue, add a drip edge at the top.
How do I secure my gate so pets/kids can’t open it?
Install a latch with a thumb screw or add a secondary hook latch at kid/pet height. For extra security, use a padlock on the latch or a magnetic catch. Test it often to ensure it’s snug!
Wrapping up and next steps
Building a simple garden gate doesn’t have to be overwhelming—with the right materials and a little patience, you’ve got a functional, sturdy entrance in no time! 🌿 Whether you’re protecting your garden or adding charm to your yard, this project is a rewarding way to flex your DIY skills.
Now that you’re armed with the knowledge, why not personalize it further?
Next, consider adding decorative touches like painted designs, hanging plants, or even a charming sign. Or, if you’re feeling ambitious, try experimenting with different materials—like wrought iron or reclaimed wood—to match your outdoor aesthetic. Your garden gate is just the beginning! 🚪✨