
Tools
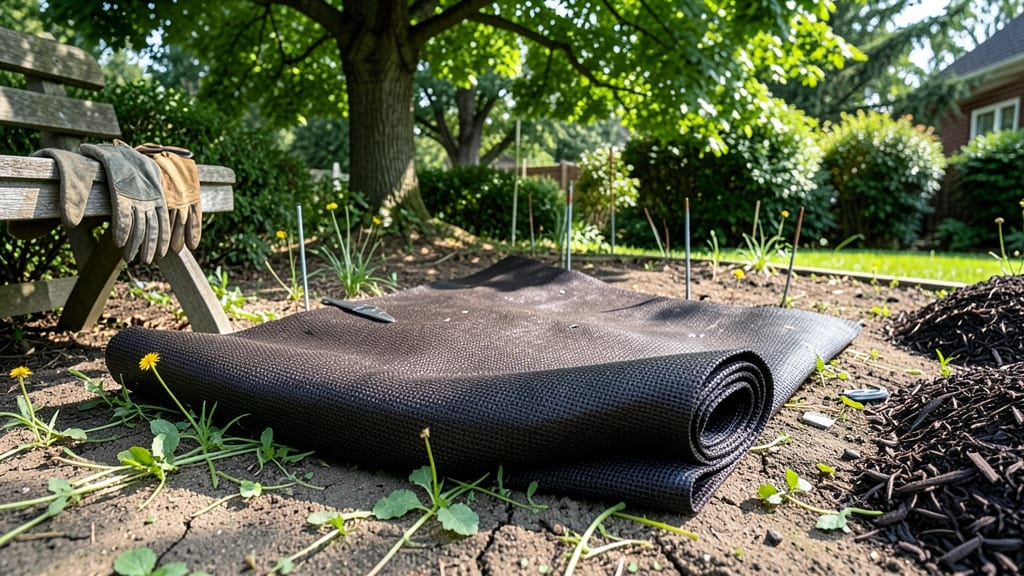
How to lay garden fabric is the game-changer for weed-free beds—it’s saved me hours of backbreaking work. 🌱 I’ve used it to transform my overgrown beds into tidy, low-maintenance spaces in under an hour. The key? Proper prep and installation. Skip these steps, and weeds still find a way through.
Start by clearing debris and measuring your bed—garden fabric needs to fit snugly but not stretch. Overlap seams by 6 inches and anchor edges with landscape staples or rocks. This prevents shifting and keeps weeds trapped below. Most people mess up the edges, so don’t skip this.
Once laid, cover with 2-3 inches of mulch to block light completely. Now you can plant directly through slits in the fabric—no more digging or weeding. My beds stay clean for months, and the soil stays moist longer. Perfect for pathways or under shrubs too.
Pro tip: Use fabric under perennial beds where you don’t want to disturb roots. Just avoid using it under annuals if you plan to move plants later—roots get tangled. Now go reclaim your garden!
📚 In This Guide
- What you need
- Instructions
- Tips and common mistakes
- Wrapping up and next steps
What you need
Before you roll up your sleeves and get started, gather these essential materials and tools to make your garden fabric project a breeze! Whether you're a DIY pro or a newbie, having everything ready will save you time and frustration. Here’s your
Step-by-Step instructions for creating weed-free garden beds
Here's my foolproof method for laying garden fabric that keeps weeds at bay while letting plants thrive.
🪴 Step 1: Clear and Level the Garden Area
Start by removing all existing plants, rocks, and debris from your chosen bed. I like to use a garden fork to loosen the soil and then rake it smooth. The key here is creating an even surface—any bumps will make the fabric wrinkle and trap moisture, which can rot the fabric over time. Aim for a level area where water will drain properly away from your plants.
Mark the edges of your bed with landscape stakes and string if needed. This helps you visualize the space and ensures your fabric fits neatly. I always step back and check from different angles—this prevents crooked lines later. Once satisfied, give the area one final pass with the rake to remove any remaining debris.
🌱 Step 2: Lay Out the Garden Fabric
Unroll your garden fabric over the prepared bed, allowing it to extend at least 6 inches beyond the edges all around. This extra fabric creates a clean border that prevents weeds from creeping in along the edges. Smooth out any wrinkles by gently pulling the fabric taut, but don't stretch it—this can tear the material over time.
For larger areas, I like to overlap sections by 4-6 inches rather than sewing them together. The overlap creates a thicker barrier that weeds can't penetrate. If you're using a fabric with built-in UV protection, make sure the printed side faces up—this extends its lifespan significantly in sunny climates.
☀️ Step 3: Secure the Edges and Prevent Weed Creep
Use landscape staples or galvanized nails to secure the fabric edges to the soil. I space these about 12 inches apart along the perimeter, driving them in at a slight angle to hold the fabric firmly. This keeps it from shifting when you add mulch or plants later. For a more decorative look, you can also use landscape edging to hold everything in place.
Pay special attention to corners where fabric tends to pull. A small piece of plastic edging or a few extra staples here prevents fabric from bunching up. I've seen many gardeners skip this step, only to have weeds grow right up through the fabric at the edges—don't make that mistake.
💧 Step 4: Add Mulch and Plant Your Garden
Spread a 2-3 inch layer of mulch over the fabric to protect it from UV rays and suppress any remaining weeds. I prefer organic mulch like wood chips or straw, but inorganic options like gravel work too. Keep the mulch away from plant stems to prevent rot. This layer also helps regulate soil temperature and retain moisture—perfect for drought-prone areas.
When planting, cut small X-shaped slits in the fabric where each plant will go. This prevents damaging roots while still keeping weeds contained. Water thoroughly after planting, and you'll see how the fabric helps keep the soil consistently moist while blocking weed seeds from germinating.
✂️ Step 5: Maintain Your Weed-Free Garden
Check the fabric edges periodically and add more staples if you notice any lifting. Over time, UV exposure will degrade the fabric, so plan to replace it every 3-5 years depending on sunlight exposure. I like to mark the calendar when I first install it—this prevents surprises when weeds suddenly appear.
For perennial beds, you might want to add a fresh layer of fabric every few years rather than replacing the entire sheet. Just peel back the old fabric, remove any weeds that have grown underneath, and lay down new fabric over top. This keeps your garden looking pristine with minimal effort.
Tips & tricks for perfect weed-free garden beds
These small details make all the difference between a temporary weed solution and long-term garden success.
Prep Like a Pro: In Step 1, don't rush the clearing process—take time to remove even the smallest rocks or roots. I've found that buried roots can poke through fabric over time, creating weak spots where weeds will grow. Use a garden fork to loosen stubborn roots without tearing the fabric later. For rocky soil, consider laying a thin layer of landscape fabric under your main layer to create an extra barrier.
Fabric Placement: When you extend that 6-inch border in Step 2, tuck the excess under the mulch rather than leaving it exposed. This creates an invisible barrier that keeps weeds from sneaking in along the edges. For fabrics with UV protection, remember the printed side should face up—this isn't just about aesthetics, it's about extending the fabric's lifespan by up to 2 years in sunny climates.
Corner Strategy: Corners are where fabric always pulls, so in Step 3, I recommend cutting small triangular flaps at each corner before securing. Fold these flaps inward and staple them down—this creates a neat, professional finish that won't bunch up. For especially large beds, consider using corner anchors designed for landscape fabric to eliminate this problem entirely.
Mulch Depth Matters: That 2-3 inch mulch layer in Step 4 isn't just about looks—it's about creating the right environment. Too little mulch leaves fabric exposed to UV damage, while too much can suffocate plant roots. I like to use a rake to create gentle mounds around plants, keeping the mulch depth consistent while still allowing water to reach roots.
Pro Tips for Lay Garden Fabric
- These small details make all the difference between a temporary weed solution and long-term garden success.
- Prep Like a Pro: In Step 1, don't rush the clearing process—take time to remove even the smallest rocks or roots. I'v...
- Fabric Placement: When you extend that 6-inch border in Step 2, tuck the excess under the mulch rather than leaving i...
Frequently asked questions
When is the best time of year to lay garden fabric?
The ideal time to install garden fabric is in early spring or fall when the soil is workable but weeds aren’t aggressively growing. Avoid laying it in winter (frost can damage it) or peak summer (heat may stress plants). For new beds, spring lets you prep soil and plant right after installation!
Can I lay garden fabric directly over grass without removing it first?
Yes! Garden fabric works best under grass or weeds—it smothers them over time. However, for long-term success, consider killing the grass first with vinegar or a solarization sheet (6+ weeks). Otherwise, grass roots may still grow through the fabric, requiring more frequent maintenance.
What’s the difference between garden fabric and landscape fabric?
They’re essentially the same, but garden fabric is lighter (often 3–5 oz/sq ft) and designed for planting through (e.g., strawberries, herbs). Landscape fabric is heavier (6+ oz/sq ft) for hardscaping (paths, driveways) or weed barriers under mulch. Check the label for permeability!
Why are weeds still growing through my garden fabric?
Weeds sprout through fabric if it’s punctured, too thin, or not properly secured. Double-check overlaps (6+ inches) and edges (bury 3–6 inches deep). For stubborn weeds, add a pre-emergent herbicide (like corn gluten) or switch to thicker fabric (10 oz/sq ft) for high-traffic areas.
Is garden fabric reusable, or should I replace it after a few years?
Garden fabric lasts 5–10 years if intact, but it degrades from UV exposure and foot traffic. Replace it if you see holes, fraying, or mold. For longevity, cover edges with soil or mulch and avoid walking on it. Pro tip: Use black fabric for weed suppression and brown for heat retention under plants!
Wrapping up and next steps
Laying garden fabric is your secret weapon against weeds—simple, effective, and a game-changer for low-maintenance gardens! 🌱
Now that you’re ready to roll out the fabric, why not take the next step? Plan your dream garden layout or explore complementary tips for mulching or edging to elevate your outdoor space even further!