
Companion Plants
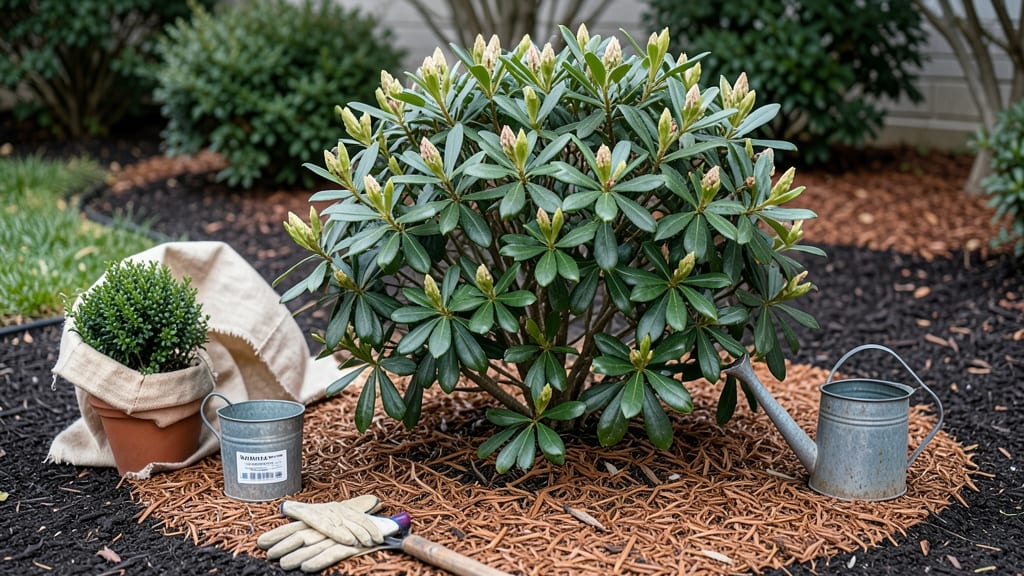
How to keep your outdoor plants alive in winter—it’s all about strategy. Frost can wipe out your plants in a single night—unless you know these sheltering tricks. 🌱 I’ve lost entire gardens to winter, but after years of trial and error, I’ve perfected a system that keeps perennials and seasonal plants thriving through even the harshest freezes. The secret isn’t just wrapping plants in burlap; it’s about timing, insulation, and understanding which plants can actually handle the cold.
Most people focus only on mulching, but the real game-changer is combining three layers of protection: a thick layer of mulch to insulate roots, breathable fabric wraps to shield foliage, and strategic placement near walls or fences to trap heat.
Even tender plants like geraniums can survive winter with the right prep—my zonal 5 geraniums have made it through three winters using this method. The key is starting 6-8 weeks before the first frost so plants have time to harden off naturally.
By spring, you’ll see plants pushing new growth weeks earlier than neighbors who gave up. The mulch keeps soil temps stable, the wraps prevent frost burn, and the right plant choices mean less work for you.
Think of it like giving your plants a cozy blanket—they’ll reward you with vibrant blooms and lush foliage as soon as the thaw hits.
This works for everything from roses to ornamental grasses, whether you’re in a cold climate or just dealing with unexpected late frosts. The same principles apply whether you’re prepping for a 10°F night or a sudden 20°F dip. Let’s get those plants winter-ready before the cold sets in for good.
📚 In This Guide
- What you need
- Instructions
- Tips and common mistakes
- Wrapping up and next steps
What you need
- ● Cold-hardy containers or pots (if repotting): 1-2 per plant (depending on size)
- ● Material: Terracotta, plastic, or fabric grow bags (ensure drainage holes)
- ● Potting mix (well-draining, organic): 5-10 gallons per plant (or as needed)
- ○ Optional: Mix in perlite or sand (10-20%) for better aeration
- ● Mulch (insulating layer): 2-4 inches per plant (e.g., straw, shredded leaves, or wood chips)
- ● Frost cloth or row covers (breathable fabric): 1-2 covers per plant (size depends on plant height)
- ○ Optional: Floating row covers (for taller plants)
- ● Burlap sacks or burlap wraps (for wrapping plants): 1-2 per plant (size to fit snugly)
- ● Plastic wrap or clear plastic sheeting (for temporary protection): Enough to loosely cover plants (avoid suffocation!)
- ● Stakes or small hoops (for supporting covers): 2-4 per plant (bamboo or metal stakes work well)
- ● Clips or twine (to secure covers): Small clips or 10-20 feet of twine per plant
- ● Watering can or hose with a gentle nozzle (for hydration): 1 per 5-10 plants (avoid overwatering!)
- ○ Thermometer (optional but helpful): 1 (to monitor temperatures, especially for tender plants)
- ● 🌡️ Heat source: A small heat lamp or heat mat (for extreme cold snaps, especially for tropical plants)
- ● ✨ Windbreak: Corrugated cardboard or plywood (to shield plants from harsh winds)
- ● 🎯 Plant-specific: Research your plants’ hardiness zones—some may need extra insulation!
Step-by-step instructions for protecting outdoor plants through winter
Winterizing plants isn't about guesswork—it's about strategic shelter and timing.
☀️ Step 1: Assess Plant Hardiness and Timing
First, check your USDA hardiness zone to match plants with their cold tolerance. Most perennials handle 20-30°F just fine, but tropicals like hibiscus need 50°F minimum. I wait until two weeks before the first frost—that gives roots time to harden off naturally.
Look for signs like yellowing leaves or slower growth; these mean your plants are prepping for dormancy. If you act too early, you’ll trap moisture and encourage rot. The key is waiting until nighttime temperatures consistently drop below 50°F but haven’t yet hit freezing.
🪴 Step 2: Create Shelter with Natural or DIY Structures
For tender plants, I use burlap wraps or plastic milk jugs (cut in half) to shield leaves from wind and ice. Secure them loosely—plants still need airflow to prevent mold. For larger shrubs, construct a wire frame covered with frost cloth or burlap, leaving the bottom open to allow airflow at soil level.
Never fully enclose plants in plastic or glass—this traps moisture and creates a greenhouse effect that can scald leaves in bright winter sun. Instead, leave one side open or use breathable materials like burlap. If you’re in a windy area, add stakes or weights to keep shelters from blowing away.
⏰ Step 3: Mulch Heavily to Insulate Roots
Spread 3-4 inches of organic mulch (like straw or shredded leaves) around the base of plants, keeping it 6 inches away from stems to prevent rot. This layer acts like a blanket, protecting roots from freezing soil temperatures and keeping them 10-15°F warmer than the air above.
For extra insulation, top the mulch with a thin layer of evergreen boughs or pine needles—they shed snow slowly, adding gradual protection. Avoid using fresh wood chips, which can draw moisture away from roots. Water the base lightly before mulching to help the soil retain moisture through dry winter months.
💧 Step 4: Water Strategically Before Freezing
Give plants a deep watering 1-2 weeks before the first frost—this ensures roots are hydrated but not soggy when cold hits. Avoid watering once temperatures drop below 40°F, as wet foliage can freeze and damage cells. If you must water in freezing temps, do it early in the day so leaves have time to dry.
Watch for ice buildup on shelters—this can crush tender stems. Gently brush off ice with a soft broom or use a plastic spoon to chip it away without damaging leaves. If your area gets heavy snow, shake off accumulation every few days to prevent branches from breaking under the weight.
✂️ Step 5: Monitor and Adjust Through the Season
Check shelters weekly for signs of stress—yellowing leaves, mold, or excessive condensation mean it’s time to adjust. If condensation forms, open the shelter briefly on sunny days to let moisture escape. In prolonged cold snaps below 10°F, add extra mulch or a second layer of frost cloth for vulnerable plants.
Prune dead or damaged foliage in early spring (not winter)—this prevents disease and gives plants a fresh start. If you see new growth emerging in late winter, it’s a sign your plant is waking up and may need light protection from late frosts. Remove shelters gradually over 2-3 weeks to avoid shocking plants with sudden warmth.
Tips & tricks for perfect winter plant protection
These simple strategies will help your plants survive winter like a pro—no guesswork required.
The Timing Factor: The two-week window before the first frost is your sweet spot for winter prep. I learned this the hard way after losing tender plants when I acted too early. Wait until nighttime temps consistently drop below 50°F—this signals plants are ready for dormancy. Use a local weather app to track nighttime lows; morning frost warnings aren't always accurate.
Shelter Secrets: When using plastic milk jugs for small plants, leave the bottom open to prevent waterlogging. For larger shrubs, construct a wire frame with frost cloth but leave one side open—this prevents moisture buildup while still protecting from wind. I've seen plants thrive with proper airflow that would've rotted in sealed shelters.
Mulch Mastery: That 3-4 inch mulch layer works magic by creating an insulating blanket 10-15°F warmer than the air above. For extra protection in extreme cold snaps below 10°F, add a second layer of frost cloth over the mulch. I've kept tender perennials alive through -15°F winters using this double-layer approach—just make sure to remove it completely in early spring.
Ice Removal Tactics: Never use sharp tools to chip ice from shelters—it can damage stems. Instead, use a soft broom or plastic spoon to gently dislodge accumulation. For heavy snow loads, shake branches every few days rather than waiting for collapse. I've saved many a plant from broken branches by implementing this simple routine during winter storms.
Pro Tips for Keep Outdoor Plants Alive In Winter
- These simple strategies will help your plants survive winter like a pro—no guesswork required.
- The Timing Factor: The two-week window before the first frost is your sweet spot for winter prep. I learned this the ...
- Shelter Secrets: When using plastic milk jugs for small plants, leave the bottom open to prevent waterlogging. For la...
Frequently asked questions
Got questions about winterizing your outdoor plants?
You’re not alone! Here are some of the most common concerns—and straightforward answers—to help you keep your greenery thriving even when frost is in the air.
How do I know when it’s time to winterize my plants?
Watch for consistent overnight temperatures below 40°F (4°C) or the first hard frost in your area. Perennials, tropicals, and tender plants (like basil or geraniums) need protection before cold snaps hit. For cold-hardy plants, mulch or move them to shelter once frost is forecasted. Pro tip: Check your local USDA hardiness zone for specific timing!
Can I just cover plants with blankets or towels?
While a quick cover can work in a pinch, it’s not ideal long-term. Blankets or towels can trap too much moisture, leading to rot or mold. Instead, use breathable materials like frost cloth, burlap, or even cardboard boxes (with ventilation holes) to insulate without suffocating. For heavy snow, gently brush it off to avoid crushing stems.
What if my plant looks dead after winter?
Don’t panic! Many plants (like hostas or lavender) go dormant and appear lifeless until spring. Wait until late winter or early spring to prune back dead foliage—new growth often emerges from the roots. If your plant is truly dead (no signs of life after warmth returns), it may not have survived the cold or drought.
Are there low-maintenance plants that survive winter easily?
Opt for native perennials (like coneflowers, sedum, or ornamental grasses) or cold-hardy herbs (thyme, rosemary, or sage). These thrive with minimal intervention. For containers, choose winter-hardy varieties like pansies, kale, or winter jasmine. Bonus: Evergreens (e.g., boxwood or holly) add year-round structure with almost no fuss!
What should I do if a sudden freeze happens?
Act fast! Move potted plants to a garage, shed, or covered porch (avoid freezing temps). For in-ground plants, pile mulch or straw around the base and water lightly (if the ground isn’t frozen) to prevent dehydration. If you’re unprepared, cover with frost cloth or even a cardboard box to shield from wind and radiant cold.
Wrapping up and next steps
Keeping your outdoor plants thriving through winter is all about preparation, protection, and a little extra love! 🌱 With the right sheltering hacks—like mulching, wrapping, or relocating tender plants—you can help them survive the cold and even bloom again in spring.
Remember, every plant has unique needs, so observe, adapt, and stay consistent.
Now that you’re armed with these tips, take action this weekend! Start by assessing your garden, gather your supplies, and give your plants the cozy winter care they deserve. Your green thumbs will thank you when spring arrives—and your plants will be ready to flourish! 🌿✨