
How To
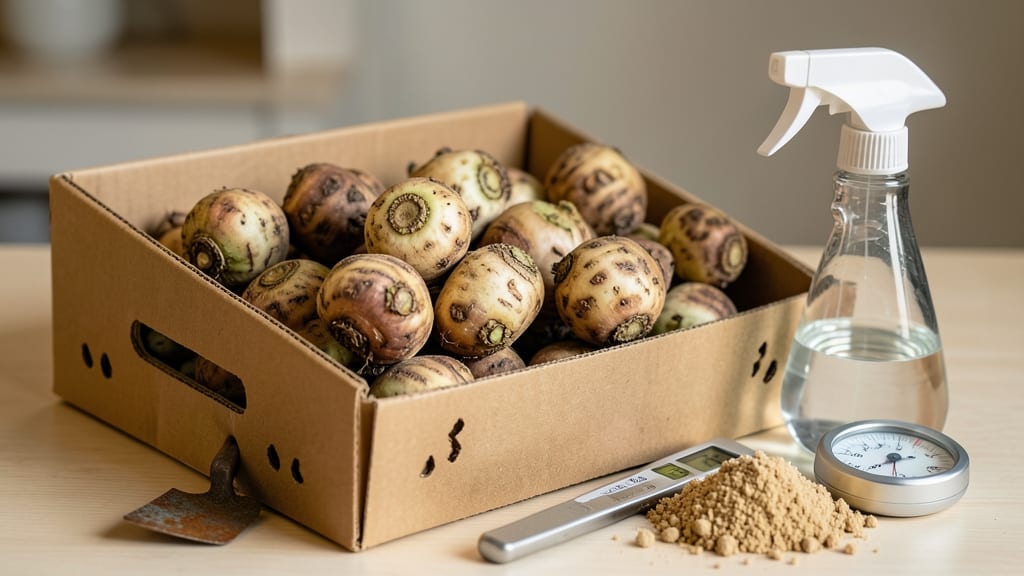
How to keep dahlia bulbs over winter without losing a single tuber—even in brutal freezes. 🌱 I’ve lost entire collections to winter’s chill until I discovered this foolproof storage trick that’s saved every tuber for five seasons now. The secret isn’t complicated, but timing and conditions make all the difference.
You’ll need a dry, cool spot (around 40-50°F), breathable containers (like cardboard boxes or mesh bags), and a little patience. Most gardeners dig too late or store too wet—both lead to rot.
I’ll show you exactly when to lift those tubers and how to prep them for dormancy without the guesswork.
By spring, you’ll replant tubers that look almost as good as new, ready to burst into vibrant blooms by midsummer. The key is keeping them dry, cool, and undisturbed until you’re ready to wake them up. No more black thumb moments—just reliable, showstopping dahlias year after year.
Works for Zone 3-10, whether you’re in a frost-free coastal area or a deep-freeze Midwest winter. Let’s get those tubers through the cold season unscathed!
📚 In This Guide
- What you need
- Instructions
- Tips and common mistakes
- Wrapping up and next steps
What you need
- ● Dahlia tubers: Freshly dug, cleaned, and dried bulbs (no soil or debris!)
- ● Storage container: Plastic bins (with lids) – 1–2 bins (10–20 gallons each, depending on quantity)
- ● Cardboard boxes – Large, sturdy boxes (if preferring a breathable option)
- ● Moisture control: Cat litter (kiln-dried) – 1–2 inches (for cushioning and absorption)
- ○ Vermiculite or perlite – 1–2 bags (optional alternative to litter)
- ● Labeling supplies: Masking tape or labels – To mark varieties (e.g., "Pink Dinner Plate")
- ● Permanent marker – For writing names on containers
- ● Cooling space: Garage, shed, or basement – Consistent temps between 35–50°F (2–10°C)
- ● Refrigerator (last resort) – Only if temps are stable (e.g., 38–40°F / 3–4°C)
- ● Humidity packs: 1–2 silica gel packets (to prevent mold if storing in dry areas)
- ● Newspaper or shredded paper: For extra cushioning around tubers
- ● Thermometer/hygrometer: To monitor temps and humidity (aim for 40–50% humidity)
- ● Disinfectant spray: (e.g., 10% bleach solution) – For sanitizing containers before use
- ● Gloves: To protect hands while handling tubers or litter
Step-by-Step instructions for storing dahlia tubers through winter
Here’s the foolproof method I’ve used for years—no more shriveled tubers or moldy surprises.
🌱 Step 1: Dig Up Tubers After First Frost
Wait until the first hard frost has blackened the foliage—this signals the plant has fully withdrawn nutrients into the tubers. Use a garden fork to loosen the soil around the base, then lift the entire clump carefully. Shake off excess dirt, but don’t wash the tubers yet. The residual soil acts as a natural protective layer.
Cut back the stems to 2-3 inches above the tubers with clean, sharp shears. This reduces moisture loss and prevents rot during storage. Lay the tubers on a flat surface to air-dry for 24-48 hours in a shady, well-ventilated spot. You’ll know they’re ready when the cut ends feel slightly leathery to the touch.
🪴 Step 2: Cure and Separate Tubers
Once dry, gently separate the tubers by hand—no tools needed. Look for eyes (small bumps where new growth will emerge) and roots. Discard any tubers that are soft, mushy, or show signs of rot. Healthy tubers should feel firm and slightly papery.
Place the tubers in a single layer on a mesh screen or cardboard box in a cool, dry place (around 50-60°F) for 1-2 weeks. This curing process toughens the skin and prepares them for dormancy. Avoid direct sunlight or heat sources—this is where tubers often rot if stored too warm.
⏰ Step 3: Prepare Storage Containers
Choose a shallow, breathable container like a cardboard box with holes punched in the sides or a mesh bag. Line the bottom with dry peat moss, vermiculite, or shredded newspaper—never plastic or damp materials. These materials absorb excess moisture while allowing airflow.
Dust the tubers lightly with fungicide (like sulfur or cinnamon) to prevent mold. Arrange them in a single layer, ensuring no two tubers touch. If stacking is unavoidable, place a sheet of newspaper between layers to prevent contact rot. Label the container with the variety and storage date—memory fades after months of dormancy.
💧 Step 4: Store in a Cool, Dark Place
Move the container to a location with consistent temperatures between 35-45°F—a garage, basement, or unheated shed works best. Avoid refrigerators or areas prone to freezing, as temperatures below 32°F will kill the tubers. Check them monthly for soft spots, mold, or signs of sprouting.
If you notice any tubers beginning to sprout too early (before spring), move the container to a slightly warmer spot (50-55°F) to delay growth. The goal is to keep them dormant until late winter, when you’ll see firm, plump tubers ready for replanting.
☀️ Step 5: Prepare for Spring Planting
In late winter, inspect the tubers for signs of life—small green shoots or swollen buds indicate it’s time to wake them up. Soak the tubers in lukewarm water for 1-2 hours to rehydrate, then plant them in pots filled with moist potting mix (not garden soil). Place the pots in a bright, indirect light spot and keep the soil lightly moist.
Watch for new growth within 2-4 weeks—this is your cue that the tubers are ready for the garden. Harden them off by gradually exposing them to outdoor conditions for 1-2 weeks before transplanting after the last frost. With this method, you’ll have vibrant, healthy dahlias every season.
Tips & tricks for perfect dahlia tuber storage
These essential strategies will help you preserve your dahlias like a seasoned gardener—no more wasted tubers or disappointing spring blooms.
Timing is Everything: Don't rush to dig up your dahlias after the first frost—wait until the foliage has completely blackened. This ensures all nutrients have fully retreated into the tubers. I've learned the hard way that digging too early means softer, less hardy tubers that won't store well. The 24-48 hour drying period in Step 1 is crucial too; tubers should feel leathery at the cut ends before moving forward. This prevents rot during storage.
Curing Creates Resilience: The 1-2 week curing period at 50-60°F isn't just about drying—it's about toughening the tuber skins. I've noticed that tubers cured properly develop thicker skins that resist mold and rot during the long winter storage. Place them in a single layer with good airflow; crowding creates humidity pockets that lead to rot. If your space is particularly warm, consider using a fan on low setting to maintain that 50-60°F range.
Container Selection Matters: Never store dahlias in airtight containers or plastic bags—this creates the perfect environment for mold growth. The breathable containers mentioned in Step 3 are non-negotiable. I've had success with both cardboard boxes with punched holes and mesh produce bags. The key is maintaining airflow while preventing physical contact between tubers. If you're short on space, consider using wooden crates with ventilation holes drilled in the sides.
Temperature Troubleshooting: The 35-45°F storage range is ideal, but every storage space has its quirks. If you notice tubers starting to sprout before spring, move them to the slightly warmer 50-55°F range to delay growth. Conversely, if your space dips below 32°F, consider adding insulation around the storage area or moving containers closer to interior walls where temperatures are more stable. A simple thermometer in your storage space will become your best friend.
Pro Tips for Keep Dahlia Bulbs Over Winter
- These essential strategies will help you preserve your dahlias like a seasoned gardener—no more wasted tubers or disa...
- Timing is Everything: Don't rush to dig up your dahlias after the first frost—wait until the foliage has completely b...
- Curing Creates Resilience: The 1-2 week curing period at 50-60°F isn't just about drying—it's about toughening the tu...
Frequently asked questions
Got questions about overwintering dahlia bulbs?
You’re not alone! Here are answers to the most common concerns—from timing to troubleshooting—so you can keep your tubers happy and healthy until spring.
When is the best time to dig up dahlia bulbs for winter storage?
Dig up dahlia bulbs after the first hard frost (when foliage turns black or dies back). Aim for late fall, typically October to November, depending on your climate zone. Waiting too long risks rot, while digging too early can stress the tubers. Pro tip: Use a fork to lift them gently—don’t yank!
Can I store dahlia bulbs in the fridge or freezer?
Nope! Dahlias need dry, cool (not freezing) conditions—think 40–50°F (4–10°C). A fridge’s humidity or freezer’s extreme cold can damage them. Instead, store bulbs in a well-ventilated cardboard box or mesh bag in a garage, basement, or unheated shed. Bonus: Add a handful of peat moss to keep them snug!
How long can dahlia bulbs stay in storage before planting?
Healthy bulbs can last 3–5 months in ideal conditions, but don’t push it! After January, check for soft spots or mold—signs it’s time to plant. If stored perfectly, some tubers even survive 6+ months, but spring is prime time for replanting.
What do I do if my dahlia bulbs smell bad or have mold in storage?
Ugh, moldy bulbs? Act fast! Remove affected tubers immediately to prevent spread. Trim off moldy spots with a sterilized knife, dust with fungicide, and store the rest in a new, dry container. If rot spreads, compost the bulbs—don’t risk replanting them. Prevent it: Avoid overcrowding and use perlite or vermiculite for airflow!
Can I leave dahlia bulbs in the ground over winter where I live?
Maybe! If you’re in USDA Zones 8–10 (mild winters), mulch heavily (6+ inches) with straw or leaves to insulate bulbs. In colder zones (Zone 7 or below), digging is safer—frozen ground can crack tubers. Test it: Bury a thermometer near bulbs; temps below 20°F (-7°C) mean dig ‘em up!
Wrapping up and next steps
Keeping your dahlia bulbs alive through winter is easier than you think—just follow these steps! With the right chilling, drying, and storage techniques, your tubers will be ready to bloom again next spring. Don’t let winter defeat your gardening dreams; a little prep work now means stunning flowers later!
Ready to put your plan into action? Start now—dig up those bulbs before the first frost, and you’ll be well on your way to a vibrant garden. Happy gardening! 🌱✨