
Size
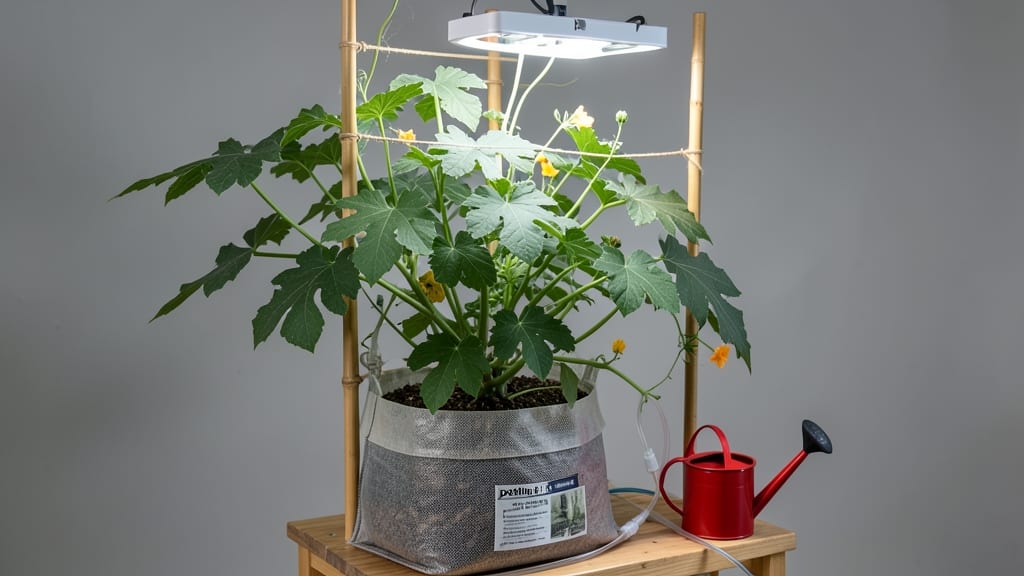
How to grow watermelon inside isn't just possible—it's shockingly lush when you pick the right varieties. 🌱 I've grown sweet, mini watermelons on my balcony for three summers now, and the key starts with choosing compact vines that thrive in containers. The first time I tasted that first bite of homegrown watermelon in July, I knew I'd never buy store-bought again.
You'll need 5-gallon containers (one per plant), a sunny spot with 6+ hours of light daily, and either a grow light or south-facing window. Start with seed varieties like 'Sugar Baby' or 'Tiny Tim'—they stay under 3 feet and produce 2-3 pound melons perfect for snacking.
The soil should be well-draining but moisture-retentive, and you'll want to fertilize lightly every two weeks once vines start climbing.
By mid-summer, you'll be harvesting ripened melons that taste sweeter than anything from the grocery store. The vines might need pruning to control growth, and you'll have to hand-pollinate flowers with a small paintbrush (more on that later).
With the right setup, you can grow enough for 4-6 servings from just one plant—imagine that on your tiny balcony!
This method works best in zones 3-10 during warm months, but with grow lights, you can extend the season. The biggest challenges are humidity control and space management, but the payoff—juicy, vine-ripened watermelon—makes it worth every effort. Let's get those seeds started!
📚 In This Guide
- What you need
- Instructions
- Tips and common mistakes
- Wrapping up and next steps
What you need
- ● Watermelon seeds: Choose compact, bush-type varieties like 'Sugar Baby' or 'Tiny Tim' (3–5 seeds per pot).
- ● Containers: Large pots (5+ gallons each) or fabric grow bags with drainage holes (1 per plant).
- ● Potting mix: Well-draining, nutrient-rich soil (avoid garden soil—it’s too dense!).
- ● Fertilizer: Balanced liquid fertilizer (10-10-10) or organic compost tea for feeding.
- ● Grow lights: Full-spectrum LED lights (12–16 hours/day) or a sunny south-facing window.
- ● Support structures: Trellis, stakes, or cages (for vining varieties).
- ● Spray bottle (for misting seedlings).
- ● pH test kit (to keep soil between 6.0–6.8).
- ● Pruning shears (for trimming excess vines).
- ● Thermometer/hygrometer (to monitor temperature/humidity).
- ● Self-watering system (to keep soil consistently moist).
Step-by-Step instructions for growing watermelon indoors
Here's how to coax sweet, compact watermelons from your living space—no greenhouse needed.
🪴 Step 1: Choose the Right Container and Growing Medium
Watermelons need room to stretch their roots, so grab a 5-gallon container (or larger) with drainage holes—think 10-12 inches deep for each plant. I use fabric grow bags because they prevent root circling and wick away excess moisture. Fill the bottom third with perlite or coarse sand for drainage, then add 3-4 inches of high-quality potting mix (never garden soil—it compacts and suffocates roots).
Tap the container gently to settle the mix, then moisten it until water runs freely from the drainage holes. You'll know it's ready when the surface feels damp but not soggy. Watermelons hate soggy feet—this layering ensures excess water drains away while keeping roots hydrated.
🌱 Step 2: Select Compact Varieties and Plant Seeds
Skip the giant outdoor varieties—opt for 'Sugar Baby', 'Tiny Tim', or 'Crimson Sweet' (all bred for containers). Plant 2-3 seeds per pot (they germinate unevenly) about 1 inch deep, spacing them 3 inches apart. Use your finger to make small holes, drop in the seeds, then cover lightly—don’t bury them deeper, or they’ll struggle to surface.
Place the pots in a warm spot (75-85°F)—a seedling heat mat speeds things up if your home runs cooler. Mist the soil surface with water until evenly damp, then cover the pot with plastic wrap to trap humidity. Check daily for condensation; once you see tiny sprouts in 7-10 days, remove the plastic immediately to prevent fungal rot.
☀️ Step 3: Provide Light and Train Vines Early
Watermelons need 12-14 hours of bright light daily—a south-facing window won’t cut it. Supplement with a full-spectrum LED grow light mounted 6-12 inches above the plants. You’ll notice leggy growth if the light’s too far; adjust until stems stay thick and dark green, not stretched and pale.
As vines emerge, guide them along a trellis or sturdy wire frame (installed now prevents tangled messes later). Prune side shoots to 3-4 main vines—this directs energy to fruit production. When flowers appear, gently hand-pollinate by brushing stamens with a paintbrush (indoor air circulation is poor, so melons often need help setting fruit).
💧 Step 4: Water and Fertilize for Sweetness
Keep soil evenly moist but never waterlogged—watermelons need 1-2 inches of water weekly, but adjust for your humidity. I use a moisture meter to check the top 2 inches of soil before watering; wilting leaves mean you waited too long. Fertilize every 2 weeks with a balanced liquid fertilizer (10-10-10) diluted to half-strength—too much nitrogen makes vines leafy but fruitless.
When small fruits form, reduce nitrogen and switch to a low-nitrogen, high-potassium fertilizer (like 5-10-10) to boost sweetness. Watch for yellowing leaves—this often signals overwatering or nutrient burn. If it happens, flush the soil with plain water to reset the mix.
⏰ Step 5: Harvest and Extend the Season
Watermelons are ready when the underneath turns cream-colored and the stem near the vine dries and darkens. For indoor varieties, this usually takes 70-85 days from seed. Cut the fruit with 2 inches of stem attached—this prevents rot. Store at room temperature for up to 2 weeks (they won’t last as long as outdoor-grown, but they’ll still be delicious).
After harvest, clean pots thoroughly and compost spent vines. If you loved the results, start a second batch 8-10 weeks later—indoor watermelons are a year-round treat when you nail the light and training. Just remember: patience is key. These little vines need time to bulk up before they’ll produce fruit worth singing about.
Tips & tricks for growing compact indoor watermelons
Don't let limited space stop you from growing watermelons—these tricks will help you maximize your indoor harvest.
Container Depth Matters: The 10-12 inch depth requirement in Step 1 is non-negotiable for healthy roots. I've tried shallower containers, and the vines become stunted. If you're working with limited space, choose a fabric grow bag—it's more forgiving with root growth and prevents that dreaded root circling that chokes plants. For extra insurance, add a 2-inch layer of perlite at the very bottom to create additional rooting space.
Light Positioning is Everything: Those 12-14 hours of light need to be intense and consistent. Place your grow light on a timer to automate the process—this prevents the common mistake of inconsistent light exposure. I've found that positioning the light slightly off-center creates more even coverage across the vines. Watch for yellowing leaves on the underside of vines; this is your first sign the light isn't reaching all parts of the plant.
Pollination Hack: Indoor air circulation is poor, so melons often need help setting fruit. Beyond the paintbrush method in Step 3, I've had success using a small handheld fan on low setting near the flowers for 5 minutes each morning. This mimics outdoor wind patterns and dramatically increases fruit set. Just be gentle—you don't want to damage delicate blossoms.
Fertilizer Transition: The switch from 10-10-10 to 5-10-10 fertilizer in Step 4 is crucial for sweetness. I make this transition when I see the first tiny fruit forming, not before. Too much nitrogen too late can actually reduce sweetness. For an extra boost, I add a teaspoon of Epsom salt to the water every 4 weeks once fruits appear—this magnesium boost helps prevent blossom end rot in developing melons.
Pro Tips for Grow Watermelon Inside
- Don't let limited space stop you from growing watermelons—these tricks will help you maximize your indoor harvest.
- Container Depth Matters: The 10-12 inch depth requirement in Step 1 is non-negotiable for healthy roots. I've tried s...
- Light Positioning is Everything: Those 12-14 hours of light need to be intense and consistent. Place your grow light ...
Frequently asked questions
Got questions about growing watermelons indoors?
You’re not alone—this method is still new to many! Below, we tackle the most common concerns to help you crush your indoor watermelon harvest.
Can I grow watermelons indoors year-round?
Yes, but with caveats! Watermelons thrive in warm weather (70–90°F), so you’ll need supplemental grow lights (12–16 hours/day) and a heat mat if your space dips below 60°F. Winter? Possible, but expect slower growth. Use compact varieties like ‘Sugar Baby’ or ‘Tiny Tim’ for best results.
How long does it take for indoor watermelons to ripen?
Indoor watermelons take 70–90 days to mature—longer than outdoor vines! Patience is key: monitor tendrils (they’ll curl when ripe) and check the underside for a creamy yellow patch. Pro tip: Use a food-safe spray to track growth stages if needed.
What’s the best container size for indoor watermelon vines?
Minimum 5-gallon pots per plant (bigger = happier vines!), but vines can sprawl 6–10 feet. Opt for a large fabric grow bag or a vertical trellis system to save space. Add 3–4 inches of drainage material (like pebbles) to prevent root rot.
Why aren’t my indoor watermelons fruiting?
Common culprits:
- Lack of pollination—hand-pollinate with a paintbrush if bees aren’t visiting.
- Insufficient light—move closer to a full-spectrum LED grow light (or supplement with sunlight).
- Temperature stress—keep nights above 65°F and days near 85°F.
Are there smaller watermelon varieties that work better indoors?
Skip giant outdoor types and try these space-saving picks:
- ‘Sugar Baby’ (3–4 lbs, 75 days)
- ‘Tiny Tim’ (2–3 lbs, 70 days)
- ‘Crimson Sweet’ (smaller indoor-adapted strains)
Wrapping up and next steps
Growing watermelons indoors isn’t just possible—it’s a rewarding way to enjoy fresh, homegrown sweetness year-round! With the right compact varieties, proper lighting, and a little patience, you’ll be savoring juicy slices straight from your balcony or windowsill.
Start small, stay consistent, and don’t forget to celebrate every milestone—like those first tendrils or the moment your vine begins to bloom.
Ready to take the next step? Experiment with flavors by trying different varieties, or share your progress with fellow indoor gardeners for tips and inspiration. Your future self (and taste buds) will thank you! 🍉✨