
Size
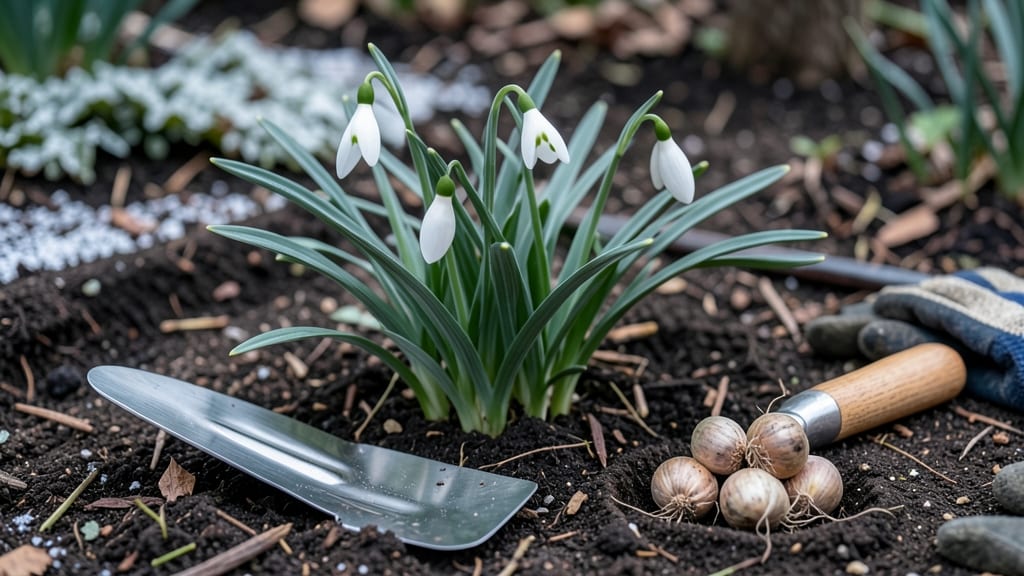
How to grow snowdrops: Tiny bulbs that punch above winter's grip. ✨ Snowdrops (Galanthus) are the unsung heroes of early spring, pushing through snow to deliver delicate white blooms when little else is alive. I've grown them for years, and they've never failed to deliver that first burst of color—even in my shadiest corner where nothing else thrives.
The secret isn't complicated: plant the bulbs 3-4 inches deep in well-draining soil in fall (September-October), and let nature do the rest. They love partial shade and moist but not soggy soil—think of them as the low-maintenance divas of the garden.
Most people overthink watering, but snowdrops are drought-tolerant once established.
By late winter, you'll see those signature drooping blooms appear, often before the snow melts. The plants multiply over time, creating naturalizing patches that spread like secrets—tell a friend, and they'll want some too. They're deer-resistant, pest-proof, and bloom reliably for decades with minimal care.
Perfect for woodland gardens, under trees, or along north-facing foundations. Here's how to get started without the overwhelm—because even winter can't stop these little survivors.
📚 In This Guide
- What you need
- Instructions
- Tips and common mistakes
- Wrapping up and next steps
What you need
- ● Snowdrop bulbs: Choose healthy, firm bulbs (1–2 inches in diameter) from a reputable nursery. Pro tip: 💡 Look for varieties like Galanthus nivalis (common snowdrop) or Galanthus elwesii (giant snowdrop).
- ● Well-draining potting mix: A blend of 50% peat or coconut coir, 30% perlite or coarse sand, and 20% compost (sterilized). Avoid heavy clay soil.
- ○ Containers (optional for indoor/early planting): 6–8 inch terracotta or plastic pots with drainage holes (1–2 bulbs per pot).
- ● Mesh bags or fabric pots (for natural drainage and bulb expansion).
- ● Garden soil (for outdoor planting): Amend with compost or well-rotted manure (1–2 inches mixed in) to improve fertility.
- ● Mulch: Shredded bark, straw, or leaf mold (2–3 inches) to protect bulbs in winter.
- ● Garden trowel or bulb planter (for digging holes).
- ● Gloves (to protect hands from sharp bulb edges).
- ● Watering can or hose with a gentle spray nozzle (avoid soaking bulbs).
- ○ pH test kit (optional): Snowdrops thrive in slightly acidic to neutral soil (pH 6.0–7.0).
- ○ Fertilizer (optional): A low-nitrogen, balanced fertilizer (5-10-10) applied in early spring.
- ● Location: Partial to full shade (dappled sunlight is ideal). Avoid hot, dry spots.
- ● Climate: Hardy in USDA Zones 3–8. Bulbs need a cold winter (40°F/4°C or lower) to bloom.
- ● Timing: Plant bulbs in fall (September–November) for spring blooms.
Step-by-step instructions for growing snowdrops
Here's how I transform delicate snowdrop bulbs into a winter garden showstopper.
🌱 Step 1: Choose and Prepare Planting Sites
Snowdrops thrive in partial shade with dappled sunlight—think under deciduous trees or along north-facing foundations. They tolerate full shade but flower best with 3-4 hours of morning sun. Avoid heavy clay soils; they prefer well-draining, slightly acidic soil with a pH between 6.0 and 7.0. If your soil is compacted, amend it with compost before planting.
Timing matters: Plant bulbs in early fall, ideally 6-8 weeks before the ground freezes. This gives roots time to establish before winter. For spring planting (less ideal), wait until late fall when soil temperatures drop below 50°F. I dig holes 3-4 inches deep—about twice the bulb's height—and space them 3-4 inches apart for a natural, woodland look.
🪴 Step 2: Plant Bulbs Correctly for Winter Resilience
Place each bulb pointy side up (the root plate should face downward). Snowdrops grow in clusters, so I plant 3-5 bulbs per hole to encourage natural grouping. Cover them with 2 inches of soil, then gently firm it around the bulbs to eliminate air pockets. Mulch lightly with 1-2 inches of shredded bark or leaf mold to insulate roots during cold snaps.
Water thoroughly after planting—this settles the soil and removes air gaps. You won’t water again until spring, when shoots appear. Overwatering now risks rot, so let the soil dry slightly between waterings. If planting in containers, use a terracotta pot with drainage holes and fill with 50% potting mix and 50% perlite for aeration.
⏰ Step 3: Winter Care and Early Spring Maintenance
Snowdrops are extremely hardy (USDA zones 3-9), but they need no winter protection beyond natural mulch. In harsh winters (below 0°F), a thin layer of straw over the mulch prevents heaving. Avoid disturbing the area—even if snow covers the site, bulbs remain dormant until late winter when soil temps reach 40°F.
When green shoots break through snow or mulch (usually February-March), remove any remaining mulch to prevent rot. Water lightly once a week if rainfall is scarce, but never let soil soggy. Fertilize once in early spring with a balanced 10-10-10 fertilizer at half strength. This encourages strong foliage without overstimulating the bulb.
🌿 Step 4: Encourage Reblooming and Long-Term Growth
After flowering, leave foliage intact until it yellows naturally (usually 6-8 weeks post-bloom). This stores energy for next year’s flowers. I deadhead spent blooms only if they’re unsightly—seed pods can self-sow, creating natural drifts. In late summer, apply a 2-inch layer of compost around plants to replenish nutrients.
Snowdrops multiply over time. Dig up and divide overcrowded clumps every 3-4 years in early fall. Separate offsets carefully—each should have at least one healthy root and a bud. Replant immediately or store in a cool, dark place until planting season. This keeps blooms vigorous and prevents decline.
☀️ Step 5: Extend the Season With Strategic Planting
For earlier blooms, plant early-flowering varieties like Galanthus nivalis (common snowdrop) in September. Late varieties like Galanthus elwesii (giant snowdrop) can wait until October. In mild climates, you’ll see flowers as early as December; in colder zones, expect February-March. Group plants by bloom time for a staggered display.
To prolong flowering, interplant with winter aconites or heathers—these companions thrive in the same conditions and extend the season. Avoid spring-blooming bulbs (like daffodils) nearby; they compete for nutrients. Instead, pair snowdrops with ferns, hellebores, or pulmonarias for a low-maintenance, evergreen look.
Tips & tricks for perfect snowdrop planting
Took me a while to figure these out, so here goes—these tips will help you avoid the most common pitfalls when growing snowdrops.
Soil Test Tip: Before planting, conduct a simple soil test by squeezing a handful of soil—it should crumble when dry but not feel powdery. If your soil feels sticky or compacted, mix in 2-3 inches of compost or sand to improve drainage, which is critical for preventing bulb rot. I’ve seen snowdrops thrive in soil that mimics their woodland habitat, where moisture drains away quickly but remains available to roots.
Timing Secret: Planting in early fall (September-October) when soil temperatures drop below 60°F gives roots time to establish before winter. This timing also helps bulbs develop strong root systems before the first hard freeze. If you miss this window, spring planting still works in milder climates, but bulbs may take an extra year to bloom.
Mulching Wisdom: Apply 1-2 inches of shredded leaves or bark as mulch after planting—this creates a protective barrier that insulates roots during winter and suppresses weeds. I’ve found that mulching also helps retain moisture without smothering the bulbs, which is especially helpful during dry spells in early spring when leaves first emerge.
Visual Cue for Healthy Growth: After planting, watch for leaves emerging in early spring as your signal that the bulbs are happy and have successfully overwintered. This is your confirmation that the 3-4 inch depth and proper soil conditions are working. If leaves appear weak or yellow, check for overwatering or poor drainage—these are the most common reasons snowdrops struggle.
Pro Tips for Grow Snowdrops
- Took me a while to figure these out, so here goes—these tips will help you avoid the most common pitfalls when growin...
- Soil Test Tip: Before planting, conduct a simple soil test by squeezing a handful of soil—it should crumble when dry ...
- Timing Secret: Planting in early fall (September-October) when soil temperatures drop below 60°F gives roots time to ...
Frequently asked questions
Got questions about growing snowdrops?
You’re not alone! Here are answers to the most common concerns—from timing to troubleshooting—so you can cultivate these cheerful early bloomers with confidence.
When is the best time to plant snowdrop bulbs?
Plant snowdrop bulbs in fall (September–November), ideally 2–3 months before your region’s first hard frost. This gives roots time to establish before winter dormancy. For container growing, plant in early fall too—just ensure pots have drainage holes to prevent soggy soil. Pro tip: If you miss fall, wait until late winter or early spring, but blooms may be delayed.
How long does it take for snowdrops to bloom after planting?
Patience is key! Most snowdrops bloom 1–2 years after planting, though some varieties (like Galanthus nivalis) may take up to 3 years. Once established, they’ll return year after year, often popping up in late winter or early spring (February–March). Fun fact: Older bulbs (3+ years) produce more flowers—so hang in there!
What pests or diseases should I watch for with snowdrops?
Snowdrops are generally low-maintenance, but keep an eye out for squirrels or rodents digging up bulbs (bury them deeper or use wire mesh). Slugs and snails may munch on leaves or flowers—handpick them or use organic barriers like copper tape. Fungal issues like gray mold can occur in wet conditions; improve airflow by spacing plants 4–6 inches apart.
Can I grow snowdrops in containers, or do they need garden beds?
Snowdrops thrive in containers if you mimic their natural conditions: use a well-draining mix (like 60% potting soil + 30% compost + 10% perlite). Plant 3–5 bulbs per 6-inch pot, and place containers in partial shade. Just
Why aren’t my snowdrops blooming this year?
No blooms? Don’t panic! Snowdrops often skip flowering in their first year or after a hot, dry summer. Check these fixes:
- Light: Too much shade? Move to partial shade (they tolerate full shade but may bloom less).
- Soil: Amend heavy clay with compost for better drainage.
- Bulb age: Young bulbs focus on root growth—wait and watch!
- Overcrowding: Divide clumps every 3–4 years to refresh growth.
If the issue persists, your snowdrops might be hybrids (like Galanthus × valentinei), which sometimes bloom erratically. Patience pays off!
Wrapping up and next steps
Growing snowdrops is a rewarding journey that brings early spring color to your garden with minimal fuss! 🌱 Whether you’re dividing bulbs, planting seeds, or nurturing them in containers, these hardy plants thrive with patience and the right care.
Start small—even a handful of bulbs can create a stunning display—and soon, you’ll enjoy their delicate blooms year after year.
Ready to dive in? Pick your favorite snowdrop variety and get planting—your garden will thank you! For even more tips, check out our guide on maintaining snowdrops for long-term beauty.