
Size
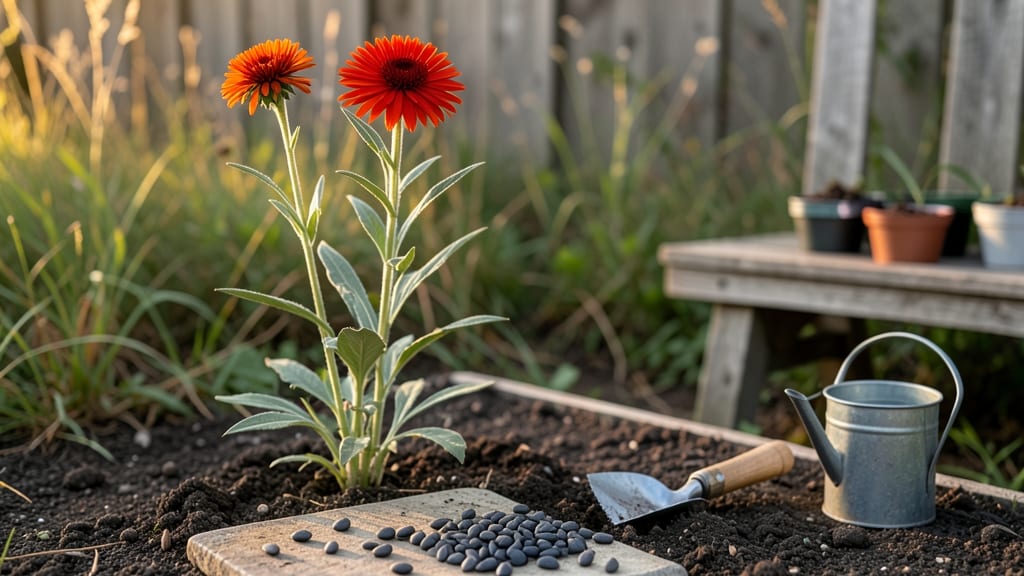
How to grow safflower feels like cultivating sunshine in a stem. 🌻 These bold orange blooms thrive where other flowers struggle, turning even the driest corners into a cheerful display—plus, they produce oil-rich seeds that gardeners and chefs adore. My first batch surprised me with how easy they were to grow once I nailed the spacing and sunlight. The secret lies in their sun worshipping nature: plant them where they’ll bask in 6+ hours of direct sun daily, and they’ll reward you with 3-4 foot tall stems that stay sturdy even in summer breezes. Skip the fancy soil—just ensure it drains well, and you’re golden. Water lightly after planting, then let nature take over; safflowers hate soggy roots. By midsummer, you’ll harvest golden seeds for oil or let the flowers dry for striking arrangements. The best part? They self-seed like crazy, meaning future gardens practically plant themselves. Just watch for aphids—they love the new growth—and give stems room to breathe. Perfect for beginner-friendly gardens, drought-tolerant landscapes, or even container edges. Once you grow one, you’ll wonder why you didn’t try them sooner—they’re the foolproof annual that does it all.
📚 In This Guide
- What you need
- Instructions
- Tips and common mistakes
- Wrapping up and next steps
What you need
- ● Safflower seeds: 1–2 lbs (or ~1,000–2,000 seeds) for a small garden patch. Choose Carthamus tinctorius varieties like ‘Benihime’ or ‘Gila’ for best results.
- ● Well-draining soil: A mix of garden soil, compost (1 part), and sand or perlite (1 part) to prevent waterlogging. Aim for a pH of 6.0–7.5.
- ● Sunlight: A full-sun location (6+ hours of direct sunlight daily). Safflowers are sun-hungry!
- ● Water: Moderate watering (1–1.5 inches per week). Drought-tolerant once established, but keep soil moist during germination.
- ○ Fertilizer (optional but helpful): Balanced 10-10-10 fertilizer at planting (1 tbsp per plant).
- ● Low-nitrogen 5-10-10 fertilizer when buds form (1 tbsp per plant).
- ● Spacing: Sow seeds 12–18 inches apart in rows spaced 2–3 feet apart for optimal airflow.
- ● Garden trowel or seed planter for precision planting.
- ● Mulch (straw or wood chips) to retain moisture and suppress weeds.
- ● Pruners or shears to trim dead blooms and encourage reblooming.
- ● Pest control: Neem oil or insecticidal soap (if aphids or spider mites appear).
- ● Harvesting tools: Sharp scissors or a knife to cut stems when blooms are fully open.
Step-by-Step instructions for growing safflower from seed
Here's the straightforward method I've used to grow safflower's striking orange blooms reliably, even in hotter climates.
🌱 Step 1: Select the Right Variety and Planting Time
Safflower thrives in warm seasons, so plant seeds outdoors 2-4 weeks after your last frost date when soil temperatures reach 60°F or warmer. I prefer the 'Compass' variety because it matures quickly (80-90 days) and produces abundant blooms. Direct sowing works best—safflower dislikes transplanting and often bolts if disturbed.
Choose a location with full sun exposure (6+ hours daily). Safflower stems grow tall and top-heavy, so plant in areas with some wind protection or stake heavily. I like to space seeds 12-18 inches apart in rows 2 feet apart to allow for air circulation and prevent fungal issues.
💧 Step 2: Prepare Soil and Sow Seeds Properly
Work the top 6 inches of soil to break up compaction, then mix in 1-2 inches of compost for improved drainage. Safflower roots are sensitive to soggy conditions, so avoid heavy clay soils unless amended. I add a handful of coarse sand to the planting hole if my soil drains slowly.
Press seeds ½ inch deep—deeper planting delays germination. Water gently after sowing to settle the soil but avoid creating a muddy surface. Safflower seeds germinate best in warm, moist conditions, so keep the soil consistently damp until sprouts appear (7-14 days). Once seedlings emerge, reduce watering frequency to prevent stem rot.
☀️ Step 3: Maintain Optimal Growing Conditions
Safflower requires minimal care once established. Water at the base of plants 1-2 times per week, providing 1 inch of water total. Let the top inch of soil dry between waterings to encourage strong root development. Overwatering leads to weak stems that snap under the weight of blooms.
Fertilize lightly with a balanced 10-10-10 formula at planting and again when plants reach 12 inches tall. Too much nitrogen produces lush foliage but fewer flowers. Watch for aphids on new growth—spray with neem oil if you notice sticky residue on leaves. I also remove spent blooms to encourage continuous flowering.
✂️ Step 4: Harvest and Prepare for Seed Collection
Cut entire stems when 50% of flower heads have turned brown and hung downward. Bundle stems and hang upside down in a dry, well-ventilated area for 2-3 weeks to fully dry. The seed heads will rattle when mature. I use a clean paper bag to collect the seeds once they're completely dry—this prevents moisture absorption.
Store seeds in a cool, dark place for up to 3 years. Safflower is self-seeding in warm climates, so you might find volunteers popping up the following year. If you want to prevent reseeding, cut back plants before seeds mature. The dried blooms also make excellent cut flowers that last 7-10 days in a vase.
Tips & tricks for perfect safflower cultivation
These sun-loving plants reward patience with stunning blooms—here's how to give them the best shot at success.
Sunlight Strategy: While safflowers tolerate partial shade, the 6-8 hours of direct sunlight mentioned in Step 1 is non-negotiable for those signature orange blooms. I've seen firsthand how plants in even slightly shaded areas produce smaller, paler flowers. Position them where they'll receive morning sun and afternoon light—this gives them the energy boost they need for vibrant blooms. If your garden has limited full-sun spots, consider using reflective surfaces like light-colored walls or mulch to maximize light exposure.
Soil Science: The instructions mention well-draining soil, but I can't stress enough how critical this is for safflowers. Their long taproots need oxygen—if your soil feels compact when squeezed, you're on the right track. For heavy clay soils, my go-to fix is mixing in 1-2 inches of coarse sand or perlite per planting hole as suggested, but I also add a handful of perlite to the backfill soil when planting. This creates tiny air pockets that prevent waterlogging, which can cause root rot. Think of it as giving your safflowers' roots a spa treatment—they'll thank you with stronger stems and more abundant blooms.
Germination Guard: Those 7-14 days until germination can feel like an eternity, but consistency is key. I've found that using a simple plastic dome or even a clear plastic bottle with the bottom cut off creates a mini greenhouse effect that speeds up germination by 2-3 days. Just remove it once you see those first true leaves—this prevents fungal issues while keeping moisture levels perfect. And here's a pro move: water with room-temperature water rather than cold. Cold water can shock the seeds and delay germination.
Pruning Precision: When it comes to pinching back those first few blooms in Step 4, timing matters. I wait until the buds are about 1 inch in diameter before removing them—this gives the plant enough energy to establish itself while still allowing time to develop stronger stems. Use clean, sharp scissors or pruners and make your cuts just above a leaf node at a 45-degree angle. This technique isn't just about aesthetics; it encourages the plant to put its energy into developing the main stem rather than creating multiple weak stems. Think of it as redirecting the plant's focus toward creating showstopper blooms.
Pro Tips for Grow Safflower
- These sun-loving plants reward patience with stunning blooms—here's how to give them the best shot at success.
- Sunlight Strategy: While safflowers tolerate partial shade, the 6-8 hours of direct sunlight mentioned in Step 1 is non-negotiable for those signature orange blooms.
- Soil Science: The instructions mention well-draining soil, but I can't stress enough how critical this is for safflowers.
Frequently asked questions
Got questions about growing safflower? You’re not alone! Here are answers to the most common queries—from planting to harvest—so you can grow these striking orange blooms with confidence.
How long does it take for safflower to grow from seed to flower?
Safflower typically takes 70–100 days to mature from seed to full bloom, depending on the variety and growing conditions. Early-maturing types (like Safflower ‘Golden’) may flower in as little as 60 days, while taller varieties take closer to 100 days. Plant in spring after the last frost for the best results!
Can I grow safflower in containers or do I need a garden bed?
Yes! Safflower thrives in containers if they’re at least 12–18 inches deep and 12 inches wide. Use well-draining soil and place pots in full sun. Just ensure the container has drainage holes to prevent root rot. Pro tip: Dwarf varieties (like ‘Safflower ‘Sunray’) are ideal for pots!
What pests or diseases should I watch for when growing safflower?
Safflower is generally pest-resistant, but keep an eye out for aphids, spider mites, or thrips, which can stress plants. For diseases, powdery mildew may appear in humid conditions. Improve airflow, avoid overhead watering, and use neem oil if needed. Fun fact: Birds often love the seeds—so enjoy the extra wildlife!
Can I save safflower seeds for next year’s planting?
Let some flower heads dry completely on the plant, then harvest the seeds by rubbing them into a paper bag. Store them in a cool, dry place for up to 3–4 years. For best germination, plant fresh seeds within 1–2 years. Bonus: Safflower seeds are also edible and nutritious!
What can I do if my safflower plants aren’t flowering?
Non-flowering safflower is often due to overcrowding, poor light, or excessive nitrogen. Space plants 12–18 inches apart, ensure they get 6+ hours of sun daily, and use a balanced fertilizer (like 10-10-10). If plants are leggy, prune back to encourage bushier growth. Patience pays off!
Wrapping up and next steps
Growing safflower is a rewarding journey that brings vibrant color and versatility to your garden! With the right sunny spot, well-draining soil, and a few simple steps, you’ll soon enjoy their striking blooms—whether for ornamental beauty, culinary oil, or even natural dyes.
Start small, experiment with varieties, and don’t hesitate to share your harvest with fellow gardening enthusiasts.
Ready to dive in? Plant your first seeds this season and watch your garden transform with these sun-loving stars! 🌻✨