
Size
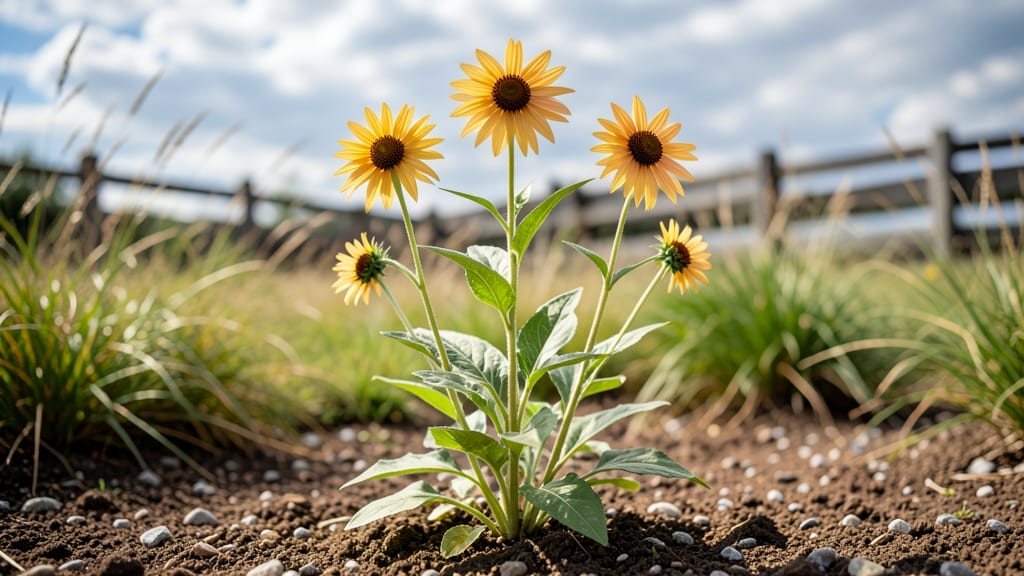
How to grow rudbeckia is easy—these golden daisies thrive where others struggle in full sun, tough soil, and zero fuss. 🌻 I’ve grown these for years, and they’ve never failed to deliver bold, long-lasting blooms that keep coming back season after season. The secret? Plant them once, and they’ll reward you with vibrant color for a decade or more.
You’ll need well-draining soil, a spot with at least 6 hours of sunlight, and patience—these perennials spread slowly but steadily. Start with divided roots in early spring or fall, and water them in well. Once established, they’re drought-tolerant and practically maintenance-free.
By midsummer, you’ll see cheerful yellow or orange blooms that attract pollinators and last until frost. The more you deadhead spent flowers, the longer they’ll keep producing. My rudbeckia clumps have grown from one small plant to a sunny border that never needs replanting.
Perfect for wildflower gardens, cottage-style beds, or pollinator-friendly spaces. They handle heat, humidity, and even poor soil—making them the ultimate low-maintenance perennial. Let’s get those roots in the ground!
📚 In This Guide
- What you need
- Instructions
- Tips and common mistakes
- Wrapping up and next steps
What you need
- ● Rudbeckia seeds or nursery-grown plants: Seeds: 1–2 oz (approx. 100–200 seeds, depending on variety)
- ● Transplants: 3–5 healthy plants (spaced 12–18 inches apart)
- ○ Well-draining potting mix or garden soil: 1 bag (50 lb) of organic compost (optional but recommended for nutrient boost)
- ● 1–2 cups of perlite or sand (if amending heavy clay soil)
- ● Fertilizer: Balanced 10-10-10 or 5-10-10 granular fertilizer (1 lb per 100 sq ft)
- ● Slow-release organic fertilizer (e.g., bone meal or fish emulsion, 1 tbsp per plant)
- ● Watering supplies: Watering can or hose with a gentle spray nozzle
- ○ Drip irrigation kit (optional, for consistent moisture)
- ● Gardening tools: Trowel or hand shovel (for transplanting)
- ● Garden gloves (to protect your hands)
- ● Pruners or sharp scissors (for deadheading and trimming)
- ● Containers (if growing in pots): 5–10-inch diameter pots (1 plant per container)
- ● Drainage holes (non-negotiable!)
- ○ Mulch (optional but helpful): 2–3 inches of straw, wood chips, or shredded leaves (to retain moisture)
- ● A sunny spot with at least 6–8 hours of direct sunlight daily.
- ● Soil with a pH of 6.0–7.0 (test with a soil kit if unsure).
- ● Patience! Rudbeckia thrives when not overcrowded—give it space to shine.
Step-by-Step instructions for growing rudbeckia
Here’s my foolproof method for cultivating these cheerful, drought-tolerant perennials that bloom from midsummer to frost.
🌱 Step 1: Choose the Perfect Planting Location
Rudbeckia thrives in full sun—at least 6 hours daily—but tolerates light shade in hot climates. I always scout the site first: look for areas where other sun-lovers like coneflowers already flourish. The soil should drain well; rudbeckia roots rot quickly in soggy conditions.
Test drainage by digging a 6-inch deep hole and filling it with water. If it drains within 30 minutes, the spot’s perfect. Amend heavy clay with 2-3 inches of compost to improve structure. I mark the site with a stake to avoid accidentally planting elsewhere.
🌱 Step 2: Plant at the Right Time and Depth
For best results, plant in early spring (after last frost) or early fall—never in summer heat. Dig a hole twice as wide as the root ball but only as deep as the container height. Pressing roots into the hole helps them establish faster.
Space plants 18-24 inches apart for full, bushy growth. I always loosen the root ball gently if it looks compacted, then backfill with native soil mixed with a handful of compost. Water deeply right after planting to settle the soil around roots—you’ll see the surface settle about 1 inch.
☀️ Step 3: Water Deeply and Establish a Routine
Keep soil consistently moist for the first 2-3 weeks—water when the top 2 inches feel dry. Overwatering now causes crown rot, but underwatering stresses young plants. After establishment, rudbeckia handles drought beautifully; I water only when leaves start curling.
Mulch with 2-3 inches of organic mulch (like shredded leaves or bark) to retain moisture and suppress weeds. Keep mulch 2 inches away from stems to prevent rot. You’ll notice new leaves emerging within 3-4 weeks—that’s your cue to taper watering.
✂️ Step 4: Deadhead and Prune for Longer Blooms
Remove spent blooms by snipping stems 1 inch below the faded flower head—this encourages more flowers and prevents self-seeding (unless you want volunteer plants). I deadhead weekly during peak bloom to keep the plant producing.
In early spring, cut back last year’s stems to 6 inches tall to promote fresh growth. Avoid heavy pruning mid-season; rudbeckia blooms on new growth, so late cuts delay flowering. You’ll see fresh shoots emerge within 2-3 weeks after pruning.
🌿 Step 5: Divide and Maintain for Longevity
Every 3-4 years, divide clumps in early spring to rejuvenate plants. Dig up the entire clump, then separate into sections with 3-5 stems each. Replant divisions immediately in the same conditions. I always water divisions deeply right after replanting.
Fertilize lightly in early spring with a balanced 10-10-10 fertilizer—too much nitrogen reduces blooms. Watch for powdery mildew in humid climates; space plants properly and avoid overhead watering to prevent it. With minimal care, rudbeckia rewards you with years of effortless color.
Tips & tricks for perfect rudbeckia cultivation
These insider techniques will help you avoid common pitfalls and maximize your rudbeckia's vibrant, long-lasting blooms.
Soil Preparation Insight: The 2-3 inches of compost mentioned in Step 1 is non-negotiable for heavy clay soils. I've seen rudbeckia plants struggle in compacted soil where roots can't breathe—this amendment improves drainage and aeration. For sandy soils, mix in 1 inch of organic matter instead to help retain moisture during those critical first 2-3 weeks of establishment.
Planting Depth Technique: When planting, the "as deep as the container height" rule is crucial—this prevents stem rot while allowing roots to spread naturally. I always check by comparing the container's height to the hole depth with a ruler. For container-grown plants, gently tease the roots outward before placing them in the hole to encourage faster establishment.
Watering Strategy: The 2-inch soil dryness test in Step 3 is your best friend. I use a wooden skewer to check moisture—when it comes out clean, it's time to water. For container-grown rudbeckia, you'll need to water more frequently, sometimes daily during hot spells, as pots dry out faster than garden beds.
Seasonal Pruning Timing: That 6-inch spring pruning in Step 4 is your secret weapon for bushier plants. I always do this right after the last frost but before new growth appears. Mid-season pruning is risky—it can delay flowering since rudbeckia produces blooms on new growth, and late cuts may not have time to develop before frost.
Pro Tips for Grow Rudbeckia
- These insider techniques will help you avoid common pitfalls and maximize your rudbeckia's vibrant, long-lasting blooms.
- Soil Preparation Insight: The 2-3 inches of compost mentioned in Step 1 is non-negotiable for heavy clay soils. I've ...
- Planting Depth Technique: When planting, the "as deep as the container height" rule is crucial—this prevents stem rot...
Frequently asked questions
Got questions about growing rudbeckia? You’re not alone—this cheerful perennial has a few quirks! Here are answers to the most common queries to help you cultivate bold, long-lasting blooms with confidence.
How do I encourage rudbeckia to bloom more?
To maximize flowers, deadhead spent blooms regularly () and fertilize lightly in early spring with a balanced 10-10-10 formula. Overcrowded plants may produce fewer blooms—thin seedlings or divide mature clumps every 3–4 years for better airflow and vigor.
When is the best time to plant rudbeckia?
Plant in early spring (as soon as soil is workable) or early fall (6–8 weeks before frost). This gives roots time to establish before extreme heat or cold. Avoid transplanting when soil is soggy—wait for it to dry slightly for smoother transitions.
What pests or diseases should I watch for?
Rudbeckia is generally low-maintenance, but keep an eye out for Japanese beetles (they love the petals!) and powdery mildew in humid climates. Handpick beetles or use neem oil. For mildew, improve airflow and water at the base (not overhead).
Can rudbeckia grow in containers?
Dwarf varieties like ‘Goldsturm’ thrive in containers (12–18" wide) with well-draining soil. Use a mix of potting soil and perlite, and place pots in full sun. Water consistently—containers dry out faster than garden beds.
How do I overwinter rudbeckia in cold climates?
Rudbeckia is hardy to USDA Zone 3, but young plants may need winter protection. Mulch heavily (3–4 inches) with straw or shredded leaves after the first frost. Cut back dead foliage in early spring—new growth will emerge once temps rise above 50°F.
Pro Tip:
For continuous blooms, stagger plantings! Sow seeds in early spring and late summer—this ensures fresh flowers from early summer through frost.
Wrapping up and next steps
Growing rudbeckia is a rewarding way to add vibrant, low-maintenance color to your garden year after year! With the right sunny spot, well-draining soil, and a little patience, these cheerful blooms will thrive and return bigger and bolder each season. 🌻
Now that you’re armed with the know-how, why not take the next step? Grab your gardening gloves, pick a sunny patch, and plant your rudbeckia seeds or transplants—your future garden will thank you!