
Container Gardens
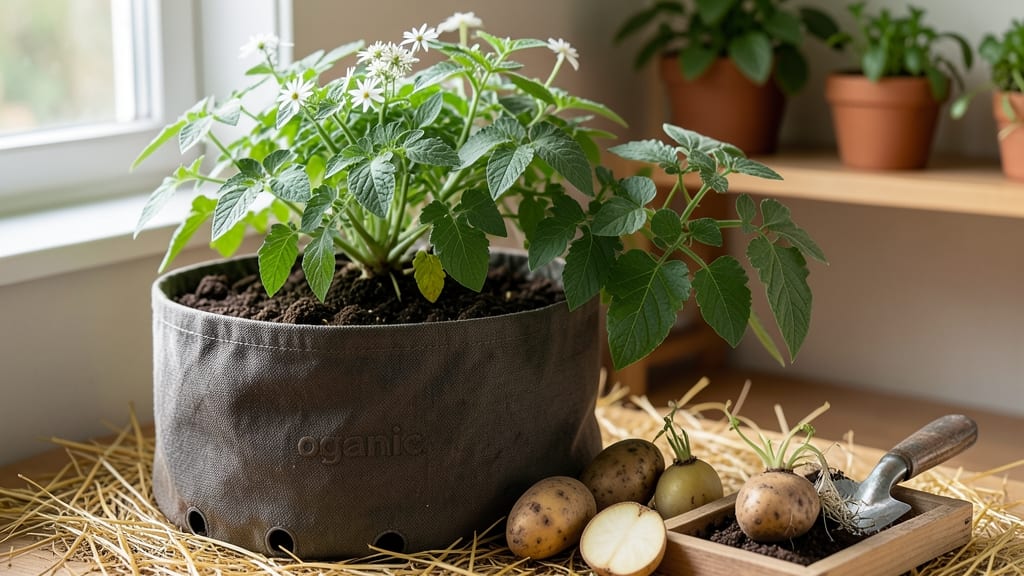
Growing potatoes indoors feels like magic—a stackable harvest from a single container. 🌱 I’ve turned my sunroom into a potato factory using nothing but a five-gallon bucket, store-bought seed potatoes, and a basic LED grow light. No dirt, no bugs, no backbreaking digging—just fresh spuds in 8-12 weeks.
The trick is layered planting: cut seed potatoes into chunks (each with an "eye"), nestle them in a deep container, and add soil as they sprout.
You’ll watch vines tangle upward while roots plump below, all without stealing your yard. Grow lights replace sunlight, and a simple watering schedule keeps things simple—no hydroponic degree required.
By harvest time, you’ll pull out 3-5 pounds of potatoes from one container, enough for mashed potatoes, roasted wedges, or even homegrown fries. The best part? You can grow them year-round, no matter how small your space.
This method works for any apartment, balcony, or basement corner—just grab a container, some seed potatoes, and a sunny spot. Let’s get those tubers growing!
📚 In This Guide
- What you need
- Instructions
- Tips and common mistakes
- Wrapping up and next steps
What you need
- ● Container(s): 5–10 gallon pots (or deeper) with drainage holes. Pro tip: Stackable containers (like fabric grow bags or plastic bins) save space!
- ● Potato seeds: Certified disease-free seed potatoes (not grocery-store spuds!). Choose early-maturing varieties like Yukon Gold or Red Pontiac for faster results.
- ● Potting mix: Lightweight, well-draining soil blend (avoid garden soil—it compacts!). Add perlite or vermiculite for aeration.
- ○ Grow lights (optional but helpful): Full-spectrum LED lights (12–16 hours/day) if natural light is <12 hours/day.
- ● Watering can or spray bottle: Gentle watering prevents soil erosion.
- ● Fertilizer: Balanced organic fertilizer (5-5-5 or 10-10-10) or compost tea for nutrient boosts.
- ● Drip irrigation kit: Automates watering for consistent moisture.
- ● Thermometer/hygrometer: Monitors soil temp (ideal: 50–60°F for sprouting).
- ● Epsom salt: Adds magnesium for greener foliage (1 tbsp per gallon of water, monthly).
- ● Container labels: Track planting dates and varieties.
Step-by-step instructions for growing potatoes in containers indoors
Here's how to coax a full potato harvest from a tiny indoor space using simple supplies and patience.
🪴 Step 1: Choose Your Containers and Prep the Growing System
Use a 5-gallon bucket or stackable fabric grow bags (at least 12 inches deep) for each plant—potatoes need room to expand. Drill drainage holes in the bottom if using rigid containers. I line mine with cardboard first to prevent soil from escaping through the holes while still allowing water drainage.
For a stackable system, start with one container and add more as the plant grows. Place a 1-inch layer of coarse gravel at the bottom to improve drainage. This prevents waterlogging, which causes rot. Fill the container halfway with lightweight potting mix—avoid garden soil, which compacts too much in containers.
🌱 Step 2: Plant Certified Seed Potatoes
Use certified seed potatoes (not grocery store potatoes—they’re treated to prevent sprouting). Cut larger seed potatoes into 2-ounce pieces, ensuring each has at least one "eye" (the tiny buds). Let the cut pieces dry for 24 hours to prevent rot—this is critical. Plant one piece per container, placing it 2 inches deep in the soil.
Cover the seed potato with 2 inches of soil, leaving the top 1 inch exposed. This prevents the potato from rotting while still allowing it to sprout. Water gently until the soil feels moist but not soggy. Place the container in a spot with bright, indirect light—a south-facing window works best, but avoid direct midday sun, which can scorch young sprouts.
☀️ Step 3: Maintain Light and Water for Strong Growth
As the sprouts reach 4-6 inches tall, add 2 more inches of soil around the stem, burying it up to the leaves. Repeat this every 2-3 weeks until the container is full or the plant flowers. This encourages more tuber formation underground. You’ll see new growth emerge from the soil after each addition—this is your cue to add more soil.
Water when the top inch of soil feels dry—potatoes hate soggy conditions. I use a watering can with a narrow spout to avoid disturbing the soil around the stems. Keep the temperature between 60-70°F for best growth. If your home runs cooler, a grow light on a 14-hour cycle will help compensate.
⏰ Step 4: Harvest When Leaves Begin to Yellow
When the top leaves turn yellow and die back (usually 10-12 weeks after planting), it’s time to harvest. Gently empty the container and sift through the soil to find potatoes. You’ll find small "new potatoes" near the top and larger tubers deeper down. Brush off excess soil with your hands—don’t wash them yet, as moisture speeds up spoilage.
For a second harvest, leave the largest potatoes in the container and add 2 more inches of soil. Water lightly and return to indirect light. New tubers will form on the remaining stems, giving you a second crop in 4-6 weeks. Store harvested potatoes in a cool, dark place (like a pantry) for 2-3 weeks to cure their skins before eating.
🌿 Step 5: Troubleshoot Common Issues
If your sprouts turn yellow and wilt, it’s usually overwatering or poor drainage. Let the soil dry slightly between waterings and check for mold on the soil surface—this means the container needs better airflow. If pests like aphids appear, spray with neem oil or soapy water (1 tsp dish soap per quart of water).
For blossoms that don’t set fruit, your plant may need more light or warmth. Move it closer to a grow light or a sunny window. If the soil smells sour, flush it with clean water to prevent root rot. With the right care, you’ll get 4-6 pounds of potatoes per container—enough for meals and sharing!
Tips & tricks for perfect container-grown potatoes
Real talk: Growing potatoes indoors isn't just about throwing dirt in a bucket—it's about creating the right conditions for those tubers to thrive. Here's what nobody tells you about making this work like a pro.
Container Depth Matters: That 12-inch minimum depth isn't arbitrary—it gives potatoes room to form properly without crowding. If you're using shallower containers, you'll end up with stunted, misshapen potatoes. I've tried 8-inch pots, and while they'll produce small harvests, you'll sacrifice both quantity and quality. For best results, stick to the 12-inch minimum and consider stacking as your plants grow, which is exactly what the instructions recommend. This vertical approach maximizes your small space while preventing root competition.
The 24-Hour Drying Rule: That critical 24-hour drying period for cut seed potatoes is non-negotiable. I learned this the hard way after losing three batches to rot. The drying creates a protective callus that prevents moisture from seeping into the cut edges, which would otherwise invite fungal infections. Place your cut pieces on a paper towel-lined tray in a warm, dry spot. You'll know they're ready when the cut surfaces look slightly wrinkled and the edges feel firm to the touch.
Light is Everything: While bright indirect light is ideal, don't assume your south-facing window will provide enough intensity. Potatoes need consistent light to develop properly—weak light leads to leggy, spindly plants that produce fewer tubers. If your sprouts start stretching toward the light source with long stems and small leaves, it's time to supplement with a grow light. Place it about 6-12 inches above the plants and keep it on for 14 hours daily, just as mentioned in the instructions. This mimics natural daylight cycles and prevents the plants from becoming "light-starved."
Soil Layering Strategy: When adding those 2-inch soil increments every 2-3 weeks, don't just dump soil around the stem—create a gentle mound that slopes upward from the base. This encourages the plant to grow straight while also creating more surface area for tuber formation. I like to use a small hand trowel to create pockets in the soil where new tubers can develop. Think of it like building a mini hill around your plant rather than just piling soil randomly. This technique, combined with the stackable system from Step 1, gives you that professional-looking harvest without needing a garden.
Pro Tips for Grow Potatoes In A Container Indoors
- Real talk: Growing potatoes indoors isn't just about throwing dirt in a bucket—it's about creating the right conditio...
- Container Depth Matters: That 12-inch minimum depth isn't arbitrary—it gives potatoes room to form properly without c...
- The 24-Hour Drying Rule: That critical 24-hour drying period for cut seed potatoes is non-negotiable. I learned this ...
Frequently asked questions
Can I grow potatoes indoors year-round?
Yes! Since indoor growing isn’t limited by seasons, you can plant potatoes anytime. However, they thrive best with 12–16 hours of light daily. Use grow lights if natural sunlight is weak, especially in winter. Just keep the temperature between 55–75°F (13–24°C) for optimal growth.
How long does it take for container-grown potatoes to harvest?
With proper care, you can harvest baby potatoes in as little as 8–10 weeks, while full-sized spuds take 12–16 weeks. Check for readiness by gently digging near the plant—if tubers are golf-ball sized, they’re ready! For larger harvests, wait until the plant flowers or foliage yellows.
Why are my potato plants turning yellow or dying?
Yellowing leaves often mean overwatering, underwatering, or nutrient deficiency. Ensure your container has drainage holes and water only when the top inch of soil feels dry. If leaves wilt or droop, reduce watering. For nutrients, use a balanced fertilizer every 4–6 weeks or switch to compost tea for a natural boost.
What’s the best potato variety for indoor containers?
Choose compact, early-maturing varieties like ‘Yukon Gold,’ ‘Red Pontiac,’ or ‘Fingerling’ potatoes—they adapt well to containers. Avoid large, late-maturing types (e.g., Russets), as they need more space and time. Seed potatoes (not grocery-store spuds) work best for indoor growing!
Can I reuse the same container for another potato harvest?
After harvesting, sterilize the container with a 10% bleach solution (1 part bleach to 9 parts water) to kill pests/diseases. Refresh the soil with a mix of potting soil and compost, and you’re ready for another round. Just rotate crops to prevent soil depletion.
Wrapping up and next steps
Growing potatoes indoors in containers is a rewarding way to enjoy fresh, homegrown produce—no matter how small your space! With the right setup, a little patience, and these simple steps, you’ll soon be harvesting crisp, flavorful spuds straight from your kitchen or balcony. 🌱
Ready to take the next step? Start with just a few seed potatoes, and soon you’ll be experimenting with different varieties or even sharing your harvest with friends. Happy growing—and enjoy those delicious, homegrown results! 🥔✨