
Size
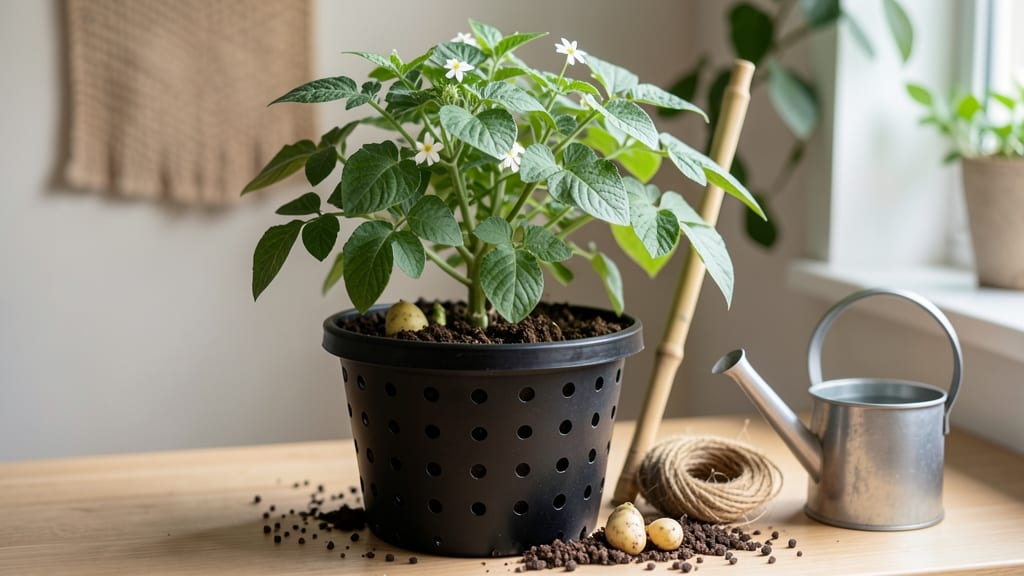
How to grow potatoes in a bucket indoors saves space while delivering a harvest that rivals garden plots. 🌱 I’ve turned my balcony into a potato patch—no yard required—using just a 5-gallon bucket, some soil, and a sunny windowsill. The secret? Choosing the right variety and mimicking the earth’s natural growing conditions in a confined space.
You’ll need a 5-gallon bucket (with drainage holes), moist potting mix, and seed potatoes (like Yukon Gold or Red Pontiac). Cut larger potatoes into chunks with at least one "eye" per piece, let them dry for a day, then plant them 2 inches deep.
As the stems grow, add more soil to encourage tuber formation—no digging required. This method works year-round, even in apartments.
Keep the soil consistently moist (not soggy) and place the bucket where it gets 6-8 hours of sunlight daily. A grow light works if natural light is limited. In about 3 months, you’ll harvest 1-2 pounds of potatoes per bucket—enough for meals or sharing.
The best part? No weeds, no pests, and no need to bend over.
Troubleshooting is simple: if the soil dries out too fast, add a layer of straw mulch. Rot? Too much water or poor drainage. And if yields are low, try a larger bucket or more seed potatoes next time.
This method proves that big harvests don’t need big spaces—just the right setup.
📚 In This Guide
- What you need
- Instructions
- Tips and common mistakes
- Wrapping up and next steps
What you need
- ● 5-gallon bucket (with drainage holes drilled at the bottom) – 1 per potato plant
- ● Potting soil – High-quality, well-draining mix (avoid garden soil) – About 3-4 gallons per bucket
- ● Seed potatoes – Certified disease-free, cut into 2-inch chunks with at least 2-3 "eyes" each – 1-2 per bucket
- ● Drainage material – Pebbles, gravel, or broken pottery – 2-3 inches for the bucket’s base
- ● Watering can or spray bottle – For gentle, even moisture
- ○ Fertilizer – Balanced, organic option (e.g., 5-5-5 or compost tea) – Optional but recommended
- ● Drill with small bit – For creating drainage holes if your bucket doesn’t have them
- ● Grow lights or sunny windowsill – 6-8 hours of light daily (south-facing window or LED grow lights)
- ● Thermometer/hygrometer – To monitor ideal temps (60-70°F) and humidity
- ● Twine or trellis – If growing longer varieties (like fingerlings)
- ● Bucket with lid – To protect from pests or drafts
Step-by-Step instructions for growing potatoes in a bucket indoors
Here’s how to turn a simple bucket into a thriving potato patch—no yard required.
🪴 Step 1: Select and Prepare Your Bucket
Choose a 5-gallon bucket with drainage holes drilled near the bottom (use a ¼-inch drill bit). Line the holes with landscape fabric to prevent soil from washing out. I like to add a 2-inch layer of gravel at the bottom first—this ensures excess water drains freely and prevents root rot. If your bucket lacks a handle, cut one on the side for easy access.
Sterilize the bucket by rinsing it with a 10% bleach solution (1 part bleach to 9 parts water), then rinse thoroughly with clean water. This kills any lingering bacteria or fungi that could harm your potatoes. Leave it to dry completely before adding soil—damp buckets invite mold growth during the long growing season.
🌱 Step 2: Layer Soil and Plant Seed Potatoes
Fill the bucket halfway with lightweight potting mix (avoid garden soil—it compacts and suffocates roots). Break 4-5 seed potatoes (each with at least 2-3 "eyes" or buds) into smaller chunks if needed. Place one potato per 4-inch layer of soil, eyes facing upward. Cover them with another 4-inch layer of soil, leaving just the top of the potatoes exposed.
Water gently until the soil feels evenly moist but not soggy. The key here is to avoid displacing the potatoes—gently press the soil around them instead of packing it down. I like to use a fine-mist spray bottle for this step to control moisture precisely. Place the bucket in a cool, dark spot (like a closet) for the first 2-3 weeks until sprouts appear.
☀️ Step 3: Provide Light and Gradually Add Soil
Once 2-inch green shoots emerge, move the bucket to a bright, indirect light spot (like a sunny windowsill). Potatoes need 12-14 hours of light daily, so supplement with a grow light if natural light is insufficient. You’ll know your setup is right when the stems stay upright and sturdy—if they stretch or bend, your light source is too weak or too far away.
Every 2-3 weeks, add another 4-inch layer of soil up to the bucket’s rim, burying the stems except for the top 6 inches. This encourages more tuber formation along the buried portions. Water deeply but infrequently—aim for 1 inch of water per week—letting the top inch of soil dry out between waterings. Overwatering here leads to rot, while underwatering stunts growth.
⏰ Step 4: Harvest and Store Your Potatoes
After 8-12 weeks, when the flowers appear and the foliage yellows, it’s harvest time. Empty the bucket carefully, brushing away excess soil to reveal your potatoes. Handle them gently—tuber skins are delicate and bruise easily. I like to let them cure in a cool, dark, dry place (like a basement) for 1-2 weeks before storing them in a paper bag at 40-50°F for long-term use.
If you spot any shriveled or green potatoes, discard them immediately—green patches indicate toxic solanine buildup from too much light. The rest should keep for months if stored properly. This method yields about 2-3 pounds of potatoes per bucket, enough for a family of four to enjoy fresh harvests year-round.
Tips & tricks for perfect indoor potato growth
Common pitfalls—and how to sidestep every one—when growing potatoes in a bucket indoors.
Drainage is Non-Negotiable: Those drainage holes in Step 1 aren't optional—they're the difference between thriving tubers and a bucket full of mush. If you skip lining them with landscape fabric, soil will clog the holes over time. I've seen buckets turn into swampy messes when water pools at the bottom. Pro tip: Test your setup by filling the bucket with water—if it drains completely in under 10 minutes, you're golden.
Light Matters More Than You Think: The 12-14 hours of daily light in Step 3 isn't just a suggestion—it's critical for photosynthesis. If your windowsill setup isn't cutting it, invest in a basic LED grow light (they're cheaper than you'd think). I've grown potatoes successfully under a simple 10-watt bulb placed 12 inches above the bucket. Watch for those stems—if they start bending toward the light like sunflowers, you need to move the light closer or add more bulbs.
Soil Layering Secret: When you add those 4-inch soil layers every 2-3 weeks, don't just dump and forget. Gently pat the soil around the stems to secure them without compacting. I use my fingers to create little trenches around each stem—this gives the tubers more room to grow without competing with the main plant. Think of it like creating little pockets for your future potatoes to settle into.
Harvest Timing Tell-Tales: Those 8-12 weeks until harvest aren't just random numbers—they're based on visual cues. Start checking for doneness when you see flowers appear (around week 6). The real giveaway? The foliage will yellow and die back naturally. If you harvest too early, you'll get small potatoes; too late, and you risk them turning shriveled. I always do a "test dig"—gently brush away soil from one side of the bucket to peek at progress without disturbing the whole plant.
Pro Tips for Grow Potatoes In A Bucket Indoors
- Common pitfalls—and how to sidestep every one—when growing potatoes in a bucket indoors.
- Drainage is Non-Negotiable: Those drainage holes in Step 1 aren't optional—they're the difference between thriving tu...
- Light Matters More Than You Think: The 12-14 hours of daily light in Step 3 isn't just a suggestion—it's critical for...
Frequently asked questions
Got questions about growing potatoes in a bucket? You’re not alone! Here are answers to the most common concerns—plus a few pro tips to set you up for success.
Can I use any bucket, or does it need to be a specific size?
Most buckets work, but aim for at least 5 gallons per plant (bigger is better!). Drill drainage holes near the bottom—no holes = soggy soil = rotten potatoes. Avoid plastic buckets with harmful chemicals (like those used for paint or toxic substances). A clean, food-safe bucket (like a 5-gallon paint bucket or fabric grow bag) is ideal.
How long does it take to harvest potatoes grown in a bucket?
With the right variety (like Yukon Gold or Red Pontiac), you can harvest new potatoes in 2-3 months after planting. For full-sized tubers, wait 3-4 months. Check for readiness by gently tugging on the stems—if they pull up easily, it’s time!
What if my potatoes aren’t growing? Troubleshooting tips?
No sprouts? Try these fixes:
- Not enough light: Move your bucket to a sunniest spot (6+ hours of light daily) or add a grow light.
- Overwatering: Let the top 1-2 inches of soil dry out between waterings. Soggy soil = root rot.
- Poor soil: Mix in compost or worm castings for nutrients. Avoid heavy clay or sand.
- Cold temps: Keep buckets in a 60°F+ (15°C+) area—potatoes hate frost!
Can I grow potatoes in a bucket without soil?
Yes! Hydroponics or aquaponics work, but it’s trickier for beginners. You’ll need:
- A nutrient-rich water solution (like fish emulsion or hydroponic mix).
- Clay pebbles or coconut coir to anchor roots.
- More frequent monitoring (pH, nutrients, water levels).
Are bucket-grown potatoes as tasty as store-bought?
Absolutely!
Homegrown potatoes are far fresher, often sweeter, and packed with more nutrients (like potassium and vitamin C). The key is harvesting at the right time—new potatoes (small, tender) have a buttery texture, while fully mature ones are great for baking or mashing. Plus, no pesticides or long shipping = better flavor and food safety.
Wrapping up and next steps
Growing potatoes in a bucket indoors is a rewarding way to enjoy fresh, homegrown produce—no yard or garden required! 🌱 With just a few simple steps, you can harvest crisp, flavorful spuds in as little as 3 months, saving space and cutting costs.
Whether you're a beginner or a seasoned gardener, this method proves that small spaces can yield big results.
Now that you’re armed with the know-how, why not take the next step? Start with one bucket today—experiment with different varieties, track your progress, and soon you’ll be sharing your harvest with friends (or enjoying extra crispy fries! 🍟). Happy growing!