
Propagation
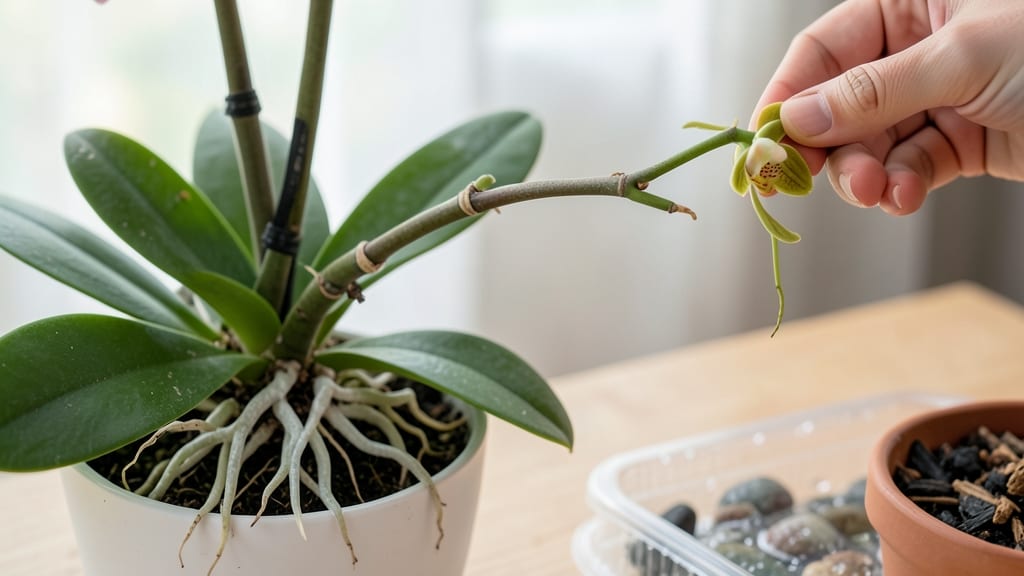
How to grow orchids to form keiki feels like watching magic happen in your hands. ✨ The secret isn’t complicated—just the right balance of light, warmth, and patience to coax those tiny baby plants from your mature orchid. I’ve watched Phalaenopsis orchids produce keiki after adjusting just a few things, and the process is easier than most gardeners think.
You’ll need a healthy orchid (Phalaenopsis work best), bright indirect light, humidity around 60-70%, and temperatures between 75-85°F. The trick is to keep conditions stable—no sudden changes that stress the plant.
Once your orchid starts showing signs of new growth at the base, you’re on your way to a thriving keiki.
By the time your keiki reaches 2-3 inches tall, you’ll have a tiny orchid ready to separate and grow on its own. The best part? These babies inherit the parent plant’s strength, so they’re hardier than store-bought seedlings.
With the right care, you could end up with a whole new collection from just one plant.
Fair warning: keiki formation takes time—sometimes months—but the payoff is worth it. Whether you’re a beginner or an orchid enthusiast, this method lets you multiply your plants without breaking the bank. Let’s get those keiki growing!
📚 In This Guide
- What you need
- Instructions
- Tips and common mistakes
- Wrapping up and next steps
What you need
- ● Mature orchid plant: Choose a healthy Phalaenopsis (moth orchid) with at least 3-5 mature leaves and a thick pseudobulb.
- ○ Keiki-inducing spray: A commercial orchid keiki spray (e.g., Cytokinin-based sprays like Orchid Keiki Gel) or a homemade mix (see optional section).
- ● Fine mist spray bottle: 8–16 oz (240–470 mL) with a soft spray nozzle for gentle hydration.
- ● Humidity dome or plastic bag: Clear, breathable cover (e.g., a humidity tent) to maintain 70–80% humidity.
- ● Sharp, sterilized scissors or knife: For trimming (soak in rubbing alcohol or bleach solution for 5+ minutes).
- ● Small pots (2–3 inches in diameter): With drainage holes, filled with orchid bark mix (e.g., Fir bark chips, 1/4–1/2 inch size).
- ○ Rooting hormone (optional but helpful): A gel or powder (e.g., Clonex) to boost root development.
- ○ Grow lights (optional but recommended): LED or fluorescent 12–16 hours/day for low-light conditions.
- ● DIY keiki spray: Mix 1 tsp honey + 1 tsp cinnamon + 1 cup water (sterilized) for a natural alternative.
- ● Thermometer/hygrometer: To monitor 75–85°F (24–29°C) temps and humidity levels.
- ● Twist ties or rubber bands: For securing keiki to the mother plant during early growth.
- ● Peat moss or sphagnum moss: For extra moisture retention around keiki.
Step-by-Step instructions for encouraging keiki formation in orchids
Here’s the simple method I’ve used to coax healthy keiki from my orchids—no stress, just patience and the right technique.
🌱 Step 1: Choose a Healthy, Mature Orchid Spike
Pick a spike that’s at least 6-12 months old with 3-5 mature pseudobulbs behind it. These spikes have stored energy to support new growth. Look for one with green, plump nodes—these are where keiki form. Avoid spikes with brown or shriveled nodes, as they won’t produce keiki.
Gently examine the spike for signs of dormancy, like a slight thickening at the nodes. If the spike is still producing flowers, wait until blooming finishes before attempting keiki induction. I like to work with Phalaenopsis or Cattleya spikes—they respond best to this method.
☀️ Step 2: Provide Ideal Light and Temperature Conditions
Move your orchid to a spot with bright, indirect light for 12-14 hours daily. Too much direct sun will scorch the leaves, while low light slows growth. You’ll see the leaves turn a deeper green—this is your signal the light is just right.
Keep temperatures between 70-85°F during the day and 60-70°F at night. A 10°F temperature drop at night triggers natural keiki formation. If your home stays too warm, place a small fan nearby to create gentle airflow—this mimics outdoor conditions and encourages stress responses that prompt keiki.
💧 Step 3: Adjust Watering to Stress the Plant Gently
Reduce watering by half for 4-6 weeks—let the top 1-2 inches of the potting mix dry out between waterings. Overwatering drowns roots and prevents keiki formation. You’ll notice the leaves may slightly wrinkle at the edges, but don’t let them shrivel completely.
After this period, return to normal watering but avoid wetting the spike directly. Instead, water at the base of the plant and let the roots absorb moisture. This controlled stress tells the orchid to redirect energy toward producing keiki instead of new growth.
✂️ Step 4: Apply Hormone Gel (Optional but Effective)
If you’re impatient (like me!), use a keiki-inducing gel like Orchid Max or Clonex. Apply a pea-sized dab to 2-3 nodes on the spike, avoiding the tips. The gel contains cytokinins, which trick the plant into thinking it’s time to reproduce. You’ll see tiny bumps form within 2-4 weeks—these are baby keiki!
Don’t overdo it—too much gel can cause the spike to rot. If you skip the gel, wait 8-12 weeks for natural keiki to appear. Either way, keep the humidity around 50-70% with a humidity tray or pebble tray to support new growth.
🌿 Step 5: Monitor and Support New Keiki Growth
Once keiki form, they’ll start as tiny bumps that swell into 1-inch buds. At this stage, do not remove the mother spike—it’s still feeding the keiki. Wait until the keiki develop 2-3 leaves and their own roots (about 3-6 months total).
When roots are 1-2 inches long, carefully snip the keiki from the spike with sterilized scissors. Pot it in its own 2-3 inch container with orchid bark mix and keep it in bright, indirect light. Mist lightly daily to maintain humidity until it’s established.
Tips & tricks for perfect orchid keiki formation
These little-known tricks will help you coax healthy baby orchids from your mature plants without the guesswork.
Spike Selection Matters: In Step 1, focus on spikes with green, plump nodes—these are your keiki hotspots. I've found Phalaenopsis and Cattleya spikes respond best because their nodes store more energy. Avoid spikes with flowers still blooming; they're too busy supporting blooms to produce keiki. The slight thickening at nodes is your visual cue they're ready for action.
Lighting Secret: For that 12-14 hours of bright, indirect light in Step 2, position your orchid near an east-facing window or use a grow light on a timer. Too much direct sun causes leaf burn, while insufficient light means weak, leggy growth. I test light levels by observing leaf color—deep green means perfect lighting. A sheer curtain helps diffuse harsh afternoon sun while maintaining brightness.
Watering Strategy: The 4-6 week reduction by half in Step 3 is crucial—it mimics natural dry seasons that trigger keiki formation. Let the top 1-2 inches dry out between waterings, but don't let leaves wrinkle completely. I use a moisture meter to check soil moisture at this stage, as visual cues can be misleading. Once you return to normal watering, always water at the base to avoid wetting the spike directly.
Gel Application Technique: When using keiki-inducing gel in Step 4, apply only a pea-sized dab to 2-3 nodes—more can cause rot. I sterilize my fingers with rubbing alcohol first to prevent bacterial contamination. The gel works by tricking the plant into thinking it's time to reproduce, so timing matters. Apply in the morning so any excess can dry before nighttime humidity sets in.
Pro Tips for Grow Orchids To Form Keiki
- These little-known tricks will help you coax healthy baby orchids from your mature plants without the guesswork.
- Spike Selection Matters: In Step 1, focus on spikes with green, plump nodes—these are your keiki hotspots. I've found...
- Lighting Secret: For that 12-14 hours of bright, indirect light in Step 2, position your orchid near an east-facing w...
Frequently asked questions
Got questions about growing orchid keiki? You’re not alone—this process can feel tricky at first! Here are answers to the most common queries to help you propagate like a pro.
How long does it take for keiki to form on an orchid?
Patience is key! With the right conditions (like proper humidity, light, and a mature mother plant), keiki can appear in 4–12 weeks. Some orchids, like Phalaenopsis, may take longer—especially if they’re not yet blooming. Consistency in care speeds up the process!
What if my orchid isn’t producing keiki? What’s going wrong?
No keiki yet? Check these common culprits:
- Age: Young plants (<1 year old) rarely produce keiki. Wait until your orchid is mature (usually 2+ years).
- Light: Too little light = no keiki. Place your orchid near bright, indirect light (east/west windows are ideal).
- Stress: Overwatering or sudden temperature shifts can stall growth. Keep conditions stable!
- Species: Some orchids (like Cattleya) are keiki-proof without tricks. Try the keiki paste method if natural growth is slow.
Can I use keiki paste on any orchid type?
Keiki paste works on most orchids, but results vary. Best for:
- Phalaenopsis (moth orchids)
- Dendrobium
- Cymbidium
For Vandas or Cattleyas, natural keiki formation is often easier. Always research your orchid’s needs first—some species prefer air layering over paste!
Are there cheaper alternatives to commercial keiki paste?
DIY options include:
- Honey + Cinnamon: Mix 1 tsp honey + pinch of cinnamon (antibacterial). Apply to nodes.
- Banana Peel: Rub a ripe peel on the node—natural sugars can stimulate growth.
- Aloe Vera Gel: Soothes the plant while providing mild growth hormones.
Pro tip: Sterilize tools and nodes with rubbing alcohol to prevent rot.
When (and how) should I separate a keiki from the mother plant?
Wait until the keiki has:
- 3–4 leaves
- 2–3 aerial roots (at least 2 inches long)
- A sturdy base (no wilting when touched)
Use sterilized scissors to cut below the keiki’s base (leave a small scar on the mother plant). Dip cuts in cinnamon or activated charcoal to prevent infection. Repot the keiki in its own pot with orchid bark mix!
Wrapping up and next steps
Growing orchids to form keiki is a rewarding journey that combines patience, care, and a little science! By mastering the right conditions—like humidity, temperature, and proper feeding—you can coax those adorable baby plants to sprout naturally.
Remember, every orchid is unique, so don’t be discouraged if it takes time; your persistence will pay off with lush, thriving keiki ready for repotting.
Now that you’re armed with the knowledge, start experimenting! Pick an orchid, follow the steps, and enjoy the magic of propagation. Happy growing—your orchid family is about to get a whole lot bigger! 🌱✨