
Propagation
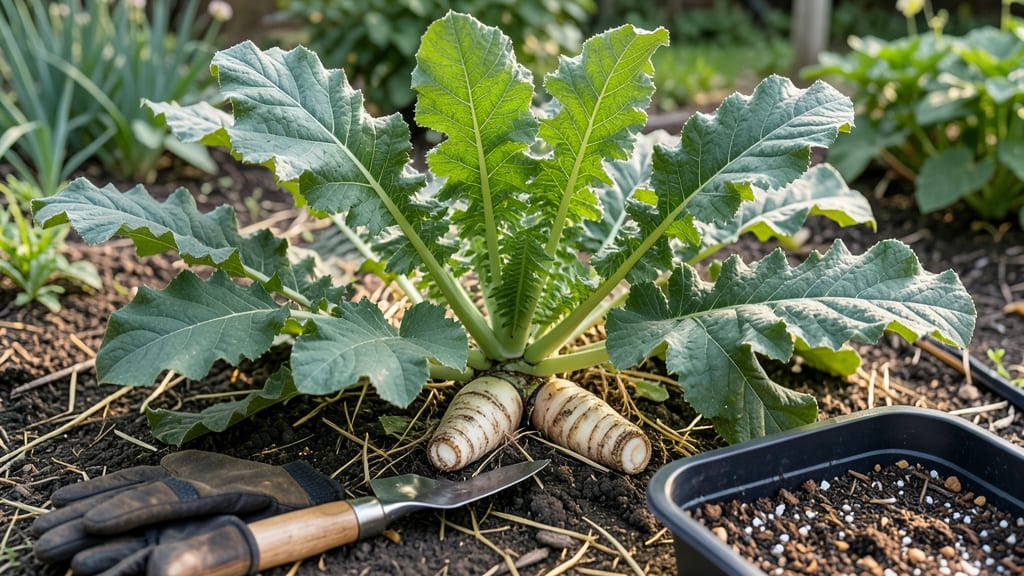
Store-bought horseradish roots hide a secret: they’re packed with growth potential. 🌱 I’ve revived wilted grocery store roots into thriving, pungent plants—here’s how to skip the nursery and grow your own fiery harvest.
The key starts with selecting firm, unblemished roots (no wrinkles or soft spots) and giving them a 24-hour soak in water before planting. Horseradish loves rich, slightly acidic soil and full sun, but it’ll tolerate partial shade if you’re in a hotter climate.
Plant the roots 2-3 inches deep in early spring or fall, spacing them 12-18 inches apart—they’ll spread like a living spice factory. Within 6-8 weeks, you’ll see shoots emerge, and by next spring, your plants will be bold, leafy, and ready for harvest.
The roots grow deeper each year, so patience pays off—dig carefully to avoid damaging the plant. This method works for any climate, though colder regions may need winter mulch. Avoid overwatering (horseradish hates soggy soil), and watch for aphids—neem oil keeps them at bay.
Ready to turn that grocery bag into a garden? Let’s dig in!
📚 In This Guide
- What you need
- Instructions
- Tips and common mistakes
- Wrapping up and next steps
What you need
- ● Store-bought horseradish root: A fresh, firm root (preferably organic or pesticide-free). Look for roots with multiple "eyes" (buds)—these are your growth points!
- ● Sharp knife or pruning shears: A clean, sterilized blade (rubbing alcohol works) to cut the root without damaging it.
- ● Well-draining potting mix: A high-quality, loamy soil blend (or a mix of 60% garden soil + 40% compost). Horseradish hates soggy roots!
- ● Large container or garden bed: Container option: A 5-gallon pot or deeper (horseradish roots can grow 3–4 feet long!). Ensure it has drainage holes.
- ● Garden bed option: A sunny, loose spot (full sun to partial shade) with 6+ inches of loose soil.
- ● Watering can or hose with gentle spray: Horseradish roots need consistent moisture but hate waterlogging.
- ○ Mulch (optional but helpful): Straw or shredded leaves to retain moisture and regulate soil temperature.
- ● Rooting hormone: Speeds up growth when cutting roots into sections (especially useful if your root has few buds).
- ● Compost or worm castings: Boosts nutrient-rich soil for faster, healthier growth.
- ● Fertilizer (balanced 10-10-10 or organic option): Apply lightly 4–6 weeks after planting to avoid burning roots.
- ● Garden twine or stakes: Supports long, sprawling roots if growing in containers.
- ● Plastic wrap or humidity dome: Creates a mini greenhouse effect to encourage sprouting in cooler climates.
Step-by-Step instructions for reviving store-bought horseradish roots
Here's how I consistently coax stubborn grocery-store horseradish back to life—no special equipment needed.
🌱 Step 1: Inspect and Prepare the Root
Start by examining your store-bought horseradish root for any signs of life. Look for firm, white sections with visible buds or "eyes" where new growth might emerge. If the root feels spongy or smells foul, it's already past saving—start fresh with a different piece. I like to peel away any papery outer skin with my fingers, exposing the cleaner interior where roots will regenerate.
Trim away any blackened or mushy sections using a sharp knife, cutting back to healthy tissue. This prevents rot from spreading to your new growth. For roots with multiple buds, I make a shallow cut around each one to encourage multiple shoots. Place the prepared root in a glass of cool water, submerging only the bottom inch—this mimics natural moisture conditions and prevents rot while you wait for roots to form.
💧 Step 2: Encourage Root Regeneration in Water
Change the water every 2-3 days to prevent bacterial growth. You'll know it's working when you see tiny white root hairs forming along the submerged portion after about 7-10 days. These roots need darkness to develop properly, so keep the glass in a cupboard or covered with a paper bag during this stage. I've found that adding a pinch of cinnamon to the water helps inhibit mold without harming the plant.
Watch for the first signs of new growth at the buds—tiny green shoots that appear after the roots have established. This can take another 1-2 weeks depending on your root's vitality. Don't be tempted to move it to soil until you see both healthy roots and green shoots. The water culture stage is critical for preventing transplant shock later.
🪴 Step 3: Transplant to Soil When Ready
Once your horseradish has both 1-inch roots and 2-inch shoots, it's time to plant. Fill a 6-inch pot with well-draining potting mix—horseradish hates soggy conditions. I always add a handful of perlite to improve drainage. Make a hole in the center and gently place your prepared root, covering it with soil up to the base of the shoots. Press lightly to secure but don't compact the soil.
Water thoroughly until water runs from the drainage holes, then let it drain completely. Place the pot in a location with partial shade for the first week to reduce stress. Horseradish is hardy but can get sunburned when transitioning from water culture. After a week, you can gradually move it to full sun for 6-8 hours daily—this is when the real growth spurt begins.
☀️ Step 4: Maintain Growth Conditions
Keep the soil consistently moist but never waterlogged—horseradish roots rot easily. I water when the top inch feels dry to the touch, which is usually every 3-4 days depending on your climate. Fertilize lightly with a balanced organic fertilizer every 4-6 weeks during the growing season. Horseradish is a heavy feeder but responds poorly to over-fertilization, so I use half-strength fertilizer to be safe.
You'll notice new leaves emerging from the center of the plant after about 4-6 weeks. These leaves will turn deep green and form a rosette shape. The plant may look slow initially, but be patient—horseradish stores energy underground. After 6-8 months, you'll see small white shoots pushing through the soil surface. These are your harvestable roots, ready to be dug and used.
Tips & tricks for reviving store-bought horseradish roots
Real talk: Not every store-bought horseradish root makes it past Step 1. These tricks will help you spot the winners early and give your plants the best possible start.
Selection Tip: The first key to success is choosing the right root. Look for firm, white sections with visible buds—these are your growth points. If the root feels heavy for its size, it's a good sign it still has moisture and potential. I've had the most success with roots that have at least three visible buds, as they tend to produce multiple shoots. Avoid any roots with soft spots or a strong, unpleasant odor—they're already too far gone to revive.
Water Culture Secret: During the critical 7-10 day root regeneration period in water, I've found that using filtered or distilled water makes a noticeable difference. Tap water often contains chlorine and minerals that can stress the plant. If you don't have filtered water, let tap water sit uncovered in a glass container for 24 hours before using—this allows chlorine to evaporate. The water should always cover just the bottom inch of the root, never more, to prevent rot while encouraging root hair development.
Transplant Timing: The moment you move your horseradish from water to soil is delicate. Wait until you have both 1-inch roots AND 2-inch shoots—don't rush this stage. I've seen many gardeners transplant too early, which leads to shock and failure. When transplanting, I like to make the soil hole slightly larger than the root to avoid compacting the soil around the delicate new growth. Gently pat the soil around the root rather than pressing firmly, which can damage the emerging roots.
Sunlight Transition Strategy: Horseradish can get sunburned when moving from water culture to soil, especially if you've been keeping it in darkness. Start with partial shade for the first week to acclimate the plant. I place mine near an east-facing window where it gets morning sun but is protected from harsh afternoon rays. After that initial week, you can gradually increase sunlight exposure to the full 6-8 hours daily recommended in Step 4.
Pro Tips for Grow Horseradish From Store Bought Roots
- Real talk: Not every store-bought horseradish root makes it past Step 1.
- Selection Tip: The first key to success is choosing the right root.
- Water Culture Secret: During the critical 7-10 day root regeneration period in water, I've found that using filtered or distilled water makes a noticeable difference.
Frequently asked questions
Got questions about growing horseradish from store-bought roots?
You’re not alone! Here are answers to the most common concerns—so you can grow bold, pungent horseradish with confidence.
Can I grow horseradish from any store-bought root?
Not all store-bought horseradish works for propagation. Look for fresh, firm roots (not pre-sliced or pasteurized varieties). Avoid roots with soft spots or mold—these won’t regrow. Opt for organic or specialty grocers for the best success!
How long does it take for horseradish to regrow?
Patience is key! Expect slow but steady growth. In 6–8 weeks, you’ll see new shoots emerge. A full harvest (ready for harvest) takes 1–2 years, depending on climate and care. Don’t rush—great horseradish rewards persistence!
What if my horseradish root sprouts but dies back?
This is common! Horseradish is hardy but finicky. Check for:
- Watering: Keep soil consistently moist (not soggy).
- Sunlight: Ensure 6+ hours of sun daily.
- Pests: Watch for aphids or cabbage worms—spray with neem oil if needed.
Can I use horseradish leaves in cooking?
While the root is the star, the leaves are edible and mild—great for teas, soups, or as a peppery garnish. Harvest young leaves for the best flavor. Pro tip: Blend them into pesto or infuse oil for a unique twist!
Does horseradish need winter protection?
In cold climates (Zone 5 and below), horseradish benefits from mulch or straw to insulate roots. In warmer zones (Zone 6+), it’s usually hardy year-round. If your plant dies back in winter, it’ll often resprout in spring—don’t give up!
What if my horseradish spreads too aggressively?
Horseradish is invasive—it can take over gardens! To control it:
- Harvest roots regularly to limit spread.
- Plant in containers if space is tight.
- Use barriers (like buried plastic) to contain roots.
Wrapping up and next steps
Growing horseradish from store-bought roots is a rewarding adventure that connects you to bold flavors and sustainable gardening! 🌱 With just a little patience and care, you’ll soon enjoy fresh, fiery horseradish straight from your garden. Now that you’re equipped with the know-how, why not share your harvest? Try gifting a few roots to friends or experimenting with new recipes—like homemade horseradish cream or tangy sauces.
Your green thumb is ready for action!
- Pro tip: Document your progress with photos—it’s a fun way to track growth and celebrate successes!