
Size
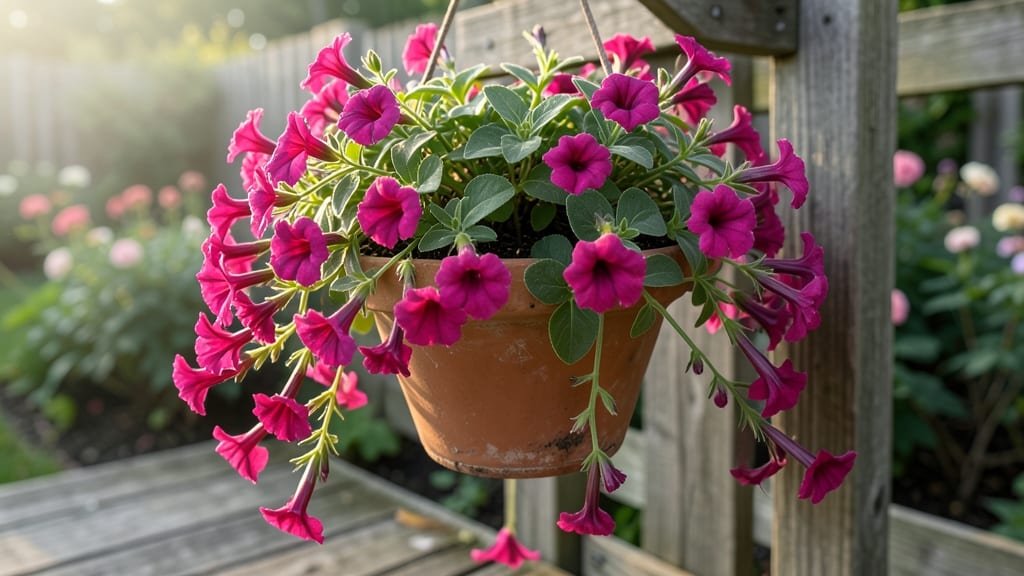
How to grow Calibrachoa turns summer into a nonstop floral show. 🌸 I've grown these sun-loving beauties for years, and they're the secret weapon for vibrant hanging baskets and borders that never quit blooming—once you know their quirks. The key is treating them like the high-maintenance divas they are (but in a good way). They crave full sun, well-draining soil, and consistent moisture—think of them as thirsty sunbathers who need frequent drinks. Start with transplants for easiest results, or grow from seed if you're patient (they're slow starters). By midsummer, you'll have trays of tiny trumpet-shaped flowers in every color, spilling over edges like confetti. The blooms keep coming as long as you deadhead regularly and feed them every two weeks—no dead branches, just endless color. Works perfectly for containers, window boxes, or garden beds. Here's how to keep them thriving all season!"
📚 In This Guide
- What you need
- Instructions
- Tips and common mistakes
- Wrapping up and next steps
What you need
- ● Seeds or seedlings: Choose disease-resistant varieties (e.g., 'Superbells' or 'Kabloom'). Start with 5–10 seeds or 3–5 seedlings per pot.
- ● Containers: 4–6-inch pots (or hanging baskets) with drainage holes. Use 1–2 plants per pot for optimal growth.
- ● High-quality potting mix: A well-draining blend (e.g., 60% peat moss, 20% perlite, 20% vermiculite). Avoid garden soil—it’s too dense!
- ● Slow-release fertilizer: A balanced 10-10-10 or 20-20-20 granular fertilizer mixed into the soil at planting.
- ● Watering can or spray bottle: Calibrachoa hates soggy roots, so opt for gentle watering at the base.
- ● Sunlight access: A south-facing window or grow lights (12–16 hrs/day) for indoor growing.
- ● Epsom salt: 1 tsp per gallon of water monthly for magnesium boosts (prevents yellowing leaves).
- ● Mulch: Light organic mulch (e.g., coconut coir) to retain moisture without suffocating roots.
- ● Plant supports: Small stakes or cages if your variety tends to flop (e.g., trailing types).
- ● pH test kit: Aim for 5.8–6.2 pH—slightly acidic soil keeps nutrients available.
Step-by-Step instructions for growing calibrachoa
Here's how I keep my calibrachoa blooming like crazy all season long—no fancy tricks, just smart care.
🌱 Step 1: Start Seeds Indoors 8-10 Weeks Before Last Frost
Calibrachoa seeds are tiny, so I use seed-starting trays with individual cells to avoid overcrowding. Fill each cell with moistened seed-starting mix and press one seed into the surface—no need to bury it. The seeds need light to germinate, so I barely cover them with a sprinkle of mix.
Place the tray in a warm spot (70-75°F) under a grow light or in a sunny window. Keep the soil consistently moist but never soggy. You'll see sprouts in 10-14 days—watch for the first tiny leaves to appear. This is your signal to remove any humidity dome immediately to prevent damping-off.
☀️ Step 2: Provide Bright Light and Fertilize Weekly
Once seedlings emerge, they need 14-16 hours of bright light daily. A south-facing window rarely cuts it, so I use a full-spectrum LED grow light just 2-3 inches above the seedlings. You'll know your light is right when the stems stay thick and the leaves are dark green—not stretched or pale.
Start fertilizing with a balanced liquid fertilizer (10-10-10) at half-strength when the first true leaves appear. I feed every 7-10 days to keep them growing strong. Overwatering is the biggest mistake here—let the top inch of soil dry between waterings, or roots will rot.
🪴 Step 3: Transplant to Larger Containers Before Outdoor Planting
Calibrachoa hates root disturbance, so I transplant seedlings to 4-inch pots when they have 3-4 sets of leaves—about 6-8 weeks after sowing. Use the same well-draining potting mix and water lightly after transplanting. This step helps them bulk up before facing outdoor conditions.
Two weeks before your last frost, start hardening off the plants by placing them outside in a sheltered spot for 1-2 hours daily, gradually increasing time. You'll know they're ready when they bounce back from a full day outside without wilting. Plant them in hanging baskets or containers with at least 6 hours of direct sun.
💧 Step 4: Water and Feed for Nonstop Blooms
Once planted outdoors, calibrachoa needs consistent moisture—water when the top inch of soil feels dry. I use a drip irrigation system or water early in the day to avoid fungal issues. Deadhead spent blooms regularly to encourage new flowers, but don’t overdo it—calibrachoa blooms so profusely, they often self-clean.
Feed with a high-phosphorus fertilizer (5-10-5) every 2 weeks to keep blooms coming. I also add a slow-release granular fertilizer at planting time for steady nutrition. Mulch with 2-3 inches of organic mulch to retain moisture and keep roots cool.
Tips & tricks for growing calibrachoa trays
Here's what I've learned after growing calibrachoa for years—these small details make all the difference for vibrant, long-lasting blooms.
Lighting Secret: In Step 2, calibrachoa needs that 14-16 hours of light to thrive, but don't just rely on natural sunlight. I've seen leggy seedlings from windows that seemed sunny—always use a grow light if your space gets less than 6 hours of direct sun. The key is keeping the light just 2-3 inches above the seedlings, and adjusting as they grow. If your seedlings stretch toward the light, they're not getting enough brightness.
Transplanting Timing: The 6-8 weeks before outdoor planting is critical for hardening off. I start with just 1-2 hours outside in a sheltered spot, then gradually increase exposure. Watch for wilting—if they bounce back within an hour, they're ready for more time outside. This slow process prevents shock when they finally go into their permanent containers.
Fertilizer Strategy: In Step 4, I switch to a high-phosphorus (5-10-5) fertilizer specifically for blooms, but here's the trick: I mix it with water and apply it to the soil—not the leaves. This prevents leaf burn while giving roots the phosphorus they need for abundant flowers. I also add a slow-release granular fertilizer at planting time for steady nutrition throughout the season.
Watering Wisdom: Calibrachoa loves moisture but hates soggy roots. I check the top inch of soil daily—if it's dry, it's time to water. For containers, I use a drip irrigation system set to early morning to avoid fungal issues from evening moisture. And here's a pro move: I always water at the base, never from above, to keep those delicate blooms dry and lasting longer.
Pro Tips for Grow Calibrachoa
- Here's what I've learned after growing calibrachoa for years—these small details make all the difference for vibrant,...
- Lighting Secret: In Step 2, calibrachoa needs that 14-16 hours of light to thrive, but don't just rely on natural sun...
- Transplanting Timing: The 6-8 weeks before outdoor planting is critical for hardening off. I start with just 1-2 hour...
Frequently asked questions
about growing calibrachoa—because even pros need a little help sometimes! Here are answers to the most common queries to keep your plants thriving.Can I grow calibrachoa from seed, or should I buy seedlings?
While possible, growing calibrachoa from seed is tricky due to their tiny size and slow germination. For beginners, start with nursery seedlings—they’re hardier, bloom faster, and save you the fuss of seed-starting. If you’re adventurous, use a heating mat and fine seed-starting mix for better success!
How long does it take for calibrachoa to bloom after planting?
With proper care, calibrachoa can bloom 6–8 weeks after transplanting (or sooner if started indoors early). Deadhead spent flowers weekly to encourage nonstop blooms. Patience pays off—once established, they’ll reward you with months of vibrant color!
What pests or diseases should I watch for?
Calibrachoa attracts aphids, spider mites, and whiteflies. Check undersides of leaves and spray with neem oil or insecticidal soap if needed. Overwatering can cause root rot, so ensure well-draining soil and avoid soggy conditions. Fungus gnats may appear in damp soil—use yellow sticky traps to deter them.
Can I grow calibrachoa in containers or hanging baskets?
Calibrachoa loves containers—they thrive in hanging baskets, window boxes, or pots (at least 6–8 inches deep). Use a lightweight, well-draining potting mix and fertilize regularly. Just ensure they get 6+ hours of sun daily and water consistently (they dry out fast in heat!).
Do calibrachoa survive winter, or are they annuals?
In most climates, calibrachoa are tender annuals and won’t survive freezing temps. However, in USDA Zones 9–11, they may overwinter with mulch and protection. For cooler areas, treat them as annuals and replant each spring. Pro tip: Take cuttings in fall to propagate for next year!
Wrapping up and next steps
Growing calibrachoa is a rewarding way to add vibrant color and endless blooms to your garden—whether in containers, hanging baskets, or garden beds! 🌸 With the right mix of sunlight, well-draining soil, and consistent care, these sun-loving beauties will thrive and reward you with nonstop flowers.
Now that you’re armed with the essentials, it’s time to roll up your sleeves and create a stunning display that’ll make your neighbors green with envy.
Ready to dive in? Start by gathering your supplies and pick a sunny spot—your calibrachoa’s dream home is waiting! 🌞