
Container Gardens
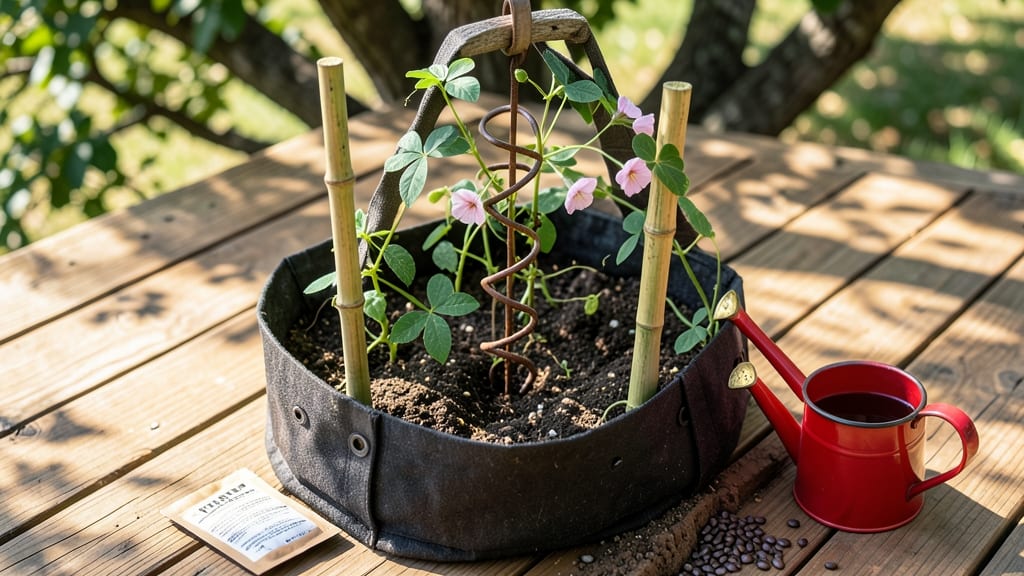
How to grow black-eyed peas in containers? Absolutely—these drought-tough vines thrive in pots and deliver early harvests with minimal fuss. 🌱 I’ve grown them in everything from 5-gallon buckets to hanging baskets, and they’ve never disappointed. The key is mimicking their natural, loose soil and giving them room to sprawl (or not, if you prefer bush varieties). You’ll need at least a 10-gallon container per plant, well-draining soil mixed with compost, and a sunny spot getting 6-8 hours of light daily. Water when the top inch feels dry, but don’t overdo it—these plants are surprisingly drought-resistant. The secret? Their nitrogen-fixing roots feed themselves, so you skip heavy fertilizing. Just toss in a handful of bone meal at planting time for a little boost. By mid-summer, you’ll be snipping tender pods straight from the vine—no need to wait months like with traditional garden peas. The flavor? Richer, nuttier, and sweeter than store-bought. Plus, they’re pest-resistant and handle heat like champs, making them perfect for container gardens in hot climates. Here’s the best part: pair them with basil or marigolds to repel pests naturally, and you’ve got a self-sustaining, space-saving harvest machine. Ready to grow yours?
📚 In This Guide
- What you need
- Instructions
- Tips and common mistakes
- Wrapping up and next steps
What you need
- ● Containers: At least 2-3 containers (5+ gallons each) with drainage holes. Options include: Fabric grow bags (great for airflow)
- ● Plastic or ceramic pots (ensure they’re sturdy)
- ● Wooden barrels or half whiskey barrels (for a rustic look)
- ● Potting Mix: 1-2 bags of high-quality, well-draining container mix (avoid garden soil—it compacts). Look for blends labeled for vegetables or heavy feeders.
- ● Black-Eyed Pea Seeds: 1-2 packets (aim for 3-5 seeds per container for bush varieties or 1-2 seeds per container for pole types). Choose heirloom varieties like "Purple Hull" or "Crowder".
- ● Compost or Organic Fertilizer: 1 cup of balanced organic fertilizer (5-5-5 or 10-10-10) or compost to enrich the soil.
- ● Drainage Material: 1-2 inches of gravel, perlite, or broken pottery for the bottom of each container.
- ● Watering Can or Hose with Nozzle: A gentle spray setting works best to avoid displacing soil.
- ● Trowel or Small Shovel: For planting and mixing soil.
- ● Mulch: Straw or shredded leaves to retain moisture and suppress weeds.
- ● Trellis or Stakes: If growing pole varieties, a 4-6 ft tall trellis or bamboo stakes will support vines.
- ● pH Test Kit: To ensure soil pH is between 6.0-6.8 (black-eyed peas prefer slightly acidic to neutral soil).
- ● Plant Labels: To track varieties and planting dates.
- ● Sunlight: A location with 6-8 hours of full sun daily (black-eyed peas are heat-loving!).
- ● Warmth: Wait until after the last frost and soil temps are 60°F+ (they germinate slowly in cold soil).
- ● Space: Ensure containers are spaced 12+ inches apart for airflow (especially in humid climates).
Step-by-step instructions for growing black eyed peas in containers
Ready to grow these nutrient-packed legumes? Here’s my battle-tested method for thriving black eyed peas in containers.
🌱 Step 1: Choose the Right Containers and Soil Mix
Black eyed peas need 5-gallon containers or larger—they’re vigorous climbers and require deep roots. I use fabric grow bags because they prevent root circling and allow excellent drainage. Fill each container with a mix of 60% potting soil, 30% compost, and 10% perlite to ensure aeration and moisture retention.
Don’t skimp on drainage—add a 2-inch layer of gravel or coarse sand at the bottom before filling with your soil mix. Press it down lightly so the surface is firm but not compacted. This ensures roots stay oxygenated and prevents waterlogging, which can rot tender seedlings.
🌿 Step 2: Plant Seeds at the Correct Depth and Spacing
Sow 3-4 seeds per container, placing them 1 inch deep and 2 inches apart. Black eyed peas germinate best in warm soil—wait until nighttime temperatures stay above 60°F before planting. If starting indoors, use a seedling heat mat to maintain 75-80°F soil temperatures for faster germination.
Once seedlings reach 2-3 inches tall, thin to the strongest plant per container. Gently snip the weaker stems at the base with clean scissors—don’t pull, or you’ll disturb the roots of the remaining plant. This prevents competition and gives your winner room to bush out.
☀️ Step 3: Provide Support and Optimal Light Conditions
Black eyed peas are twining vines that need support to climb. Install a 4-5 foot tall trellis or stake in each container at planting time. As vines emerge, gently weave them through the trellis or tie them to the stake with soft twine. This encourages vertical growth and prevents sprawling, which can lead to disease.
Place containers in a spot with 6-8 hours of direct sunlight daily. Morning sun is ideal—it warms the plants gradually without scorching tender leaves. If growing in partial shade, supplement with a grow light for 12-14 hours per day to ensure strong, bushy growth.
💧 Step 4: Water and Fertilize for Healthy Growth
Keep the soil consistently moist but never soggy—water when the top 1-2 inches feel dry to the touch. Deep watering once or twice weekly is better than frequent shallow watering, which encourages shallow roots. I use a watering can with a narrow spout to direct moisture straight to the base, avoiding wet foliage that can invite fungal diseases.
Fertilize lightly—black eyed peas fix their own nitrogen, so too much fertilizer can harm them. Mix in 1 tablespoon of balanced 10-10-10 fertilizer at planting, then side-dress with ½ cup of compost when vines start to climb. Avoid high-nitrogen fertilizers, which promote leafy growth at the expense of pods.
✂️ Step 5: Harvest and Maintain for Continuous Production
Black eyed peas are ready to harvest when pods are 3-4 inches long and firm to the touch. Pick every 2-3 days to encourage more production—overripe pods toughen and lose flavor. Use clean scissors to snip the stem just above the pod, leaving the vine intact for continued growth.
After the first harvest wave, prune back any leggy or overgrown vines to redirect energy into new pods. If your plants stop producing, a light trim of the top growth can stimulate bushier regrowth. With proper care, containers can yield 2-3 harvests per season, making them a rewarding choice for small spaces.
Tips & tricks for perfect black eyed pea containers
Here's what nobody tells you about maximizing your container-grown black eyed peas—these tricks will transform your harvest!
Container Size Matters: While 5-gallon containers work, I've found that 7-gallon fabric grow bags give you better root space for those bushy vines. The extra depth lets roots establish more thoroughly, which translates to stronger plants that produce more pods. If you're limited to smaller containers, choose the most vigorous seedlings during thinning to give them the best chance to thrive.
Germination Hack: The magic 75-80°F soil temperature isn't just about speed—it's about consistency. I use a simple DIY heat mat by placing a heating pad (set to low) under my seedling tray. This creates the perfect environment for those first critical days. If you don't have a heat mat, group containers together to create a microclimate that retains warmth better than individual pots would.
Lighting Strategy: Those 6-8 hours of direct sunlight are non-negotiable, but here's the secret: rotate your containers every few days. Plants grow toward the light, and this ensures even growth all around. For indoor growers, position your grow light 12-18 inches above the plants and adjust the height as they grow—closer for seedlings, further as they mature. This mimics natural sunlight patterns and prevents leggy growth.
Pruning for Productivity: When you're harvesting every 2-3 days, don't just pick the pods—look for the first set of leaves below each pod. Snip those off too! This technique, called "pod thinning," redirects the plant's energy to produce more pods rather than just leaves. It's like giving your plant a little energy boost right when it needs it most.
Pro Tips for Grow Black Eyed Peas In Containers
- Here's what nobody tells you about maximizing your container-grown black eyed peas—these tricks will transform your h...
- Container Size Matters: While 5-gallon containers work, I've found that 7-gallon fabric grow bags give you better roo...
- Germination Hack: The magic 75-80°F soil temperature isn't just about speed—it's about consistency. I use a simple DI...
Frequently asked questions
Got questions about growing black-eyed peas in containers?
You’re not alone! Here are some of the most common concerns—and straightforward answers—to help you cultivate a thriving crop with confidence.
How deep should my container be for black-eyed peas?
Black-eyed peas thrive in containers that are at least 12–18 inches deep. Their roots need room to spread, and deeper containers prevent overcrowding. If your container is shallower (like 10 inches), opt for dwarf varieties or pair them with shallow-rooted companions like lettuce.
When is the best time to plant black-eyed peas in containers?
Plant seeds 2–3 weeks after your last frost date when soil temps reach 60–65°F (15–18°C). They’re heat-tolerant but germinate best in warm soil. For cooler climates, start indoors 4–6 weeks before transplanting. Pro tip: Use black plastic pots to warm the soil faster!
Why aren’t my black-eyed peas germinating?
Slow germination often stems from cold soil or old seeds. Soak seeds overnight before planting, and ensure soil stays consistently moist (not soggy). If seeds are over 2 years old, replace them—fresh seeds sprout faster. Try planting deeper (1–2 inches) for extra moisture.
Can I grow black-eyed peas in hanging baskets?
Yes! Choose dwarf or bush varieties (like ‘Purple Hull’ or ‘California Blackeye’) and use 10–12 inch deep baskets with drainage holes. Train vines gently with lightweight trellises or let them spill over edges. Just ensure baskets get 6+ hours of sun daily—they’re not shade lovers!
How do I keep pests away from my container-grown black-eyed peas?
Watch for aphids, spider mites, and Mexican bean beetles. Spray plants with neem oil or insecticidal soap weekly as a preventative. Pro tip: Introduce beneficial insects like ladybugs or plant marigolds nearby to deter pests naturally. Remove yellowing leaves promptly to reduce attractants.
Wrapping up and next steps
Growing black-eyed peas in containers is a rewarding way to enjoy fresh, homegrown veggies—even in small spaces! With the right soil, sunlight, and care, you’ll harvest flavorful pods in just a few months.
Whether you’re a beginner or a seasoned gardener, these bushy vines prove that big results come from small pots.
Now that you’re ready to plant, take the next step: mark your calendar for your first harvest! Share your progress with fellow gardeners or experiment with different varieties next season. Happy growing—your future meals will thank you! 🌱💚