
Companion Plants
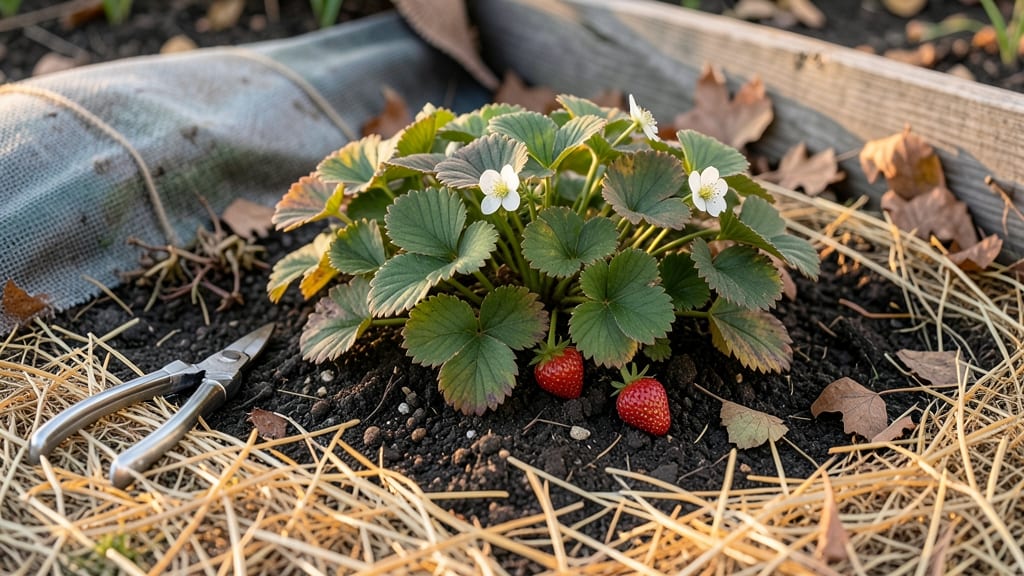
How to get your strawberry plants ready for winter depends on three simple moves—and skipping any means frost-killed plants next spring. 🌱 I learned this the hard way when my entire June-bearing patch turned to mush after a late freeze. The secret isn't complicated: prune, mulch, and protect the crown, then let the plants rest like they would in the wild.
You'll need sharp pruners, straw or leaves for mulch, and cardboard or burlap for frost protection (if your zone drops below 5°F). The goal is to remove old leaves—where diseases hide—and insulate the crown where new growth emerges.
Even in mild winters, this prep prevents rot and weakens pests before spring.
By early November, your plants will look like dormant sticks, but that's normal. The 3-inch mulch layer acts like a blanket, keeping soil temps stable, while the cardboard shield blocks extreme cold from penetrating.
In warmer climates, you can skip the cardboard but keep mulching—just add a light frost cloth if temps dip below 20°F.
Common mistakes? Over-mulching (which suffocates roots) or using plastic (that traps moisture). In Zone 6+, you might even get second harvests from everbearing varieties if you protect them right. The payoff? Faster, healthier growth in spring and bigger berries all season.
📚 In This Guide
- What you need
- Instructions
- Tips and common mistakes
- Wrapping up and next steps
What you need
- ● Strawberry plants – Healthy, established plants (preferably in their second or third year).
- ● Organic mulch – 2–4 inches of straw, pine needles, or shredded leaves (avoid fresh grass clippings—they can mat down and suffocate roots).
- ● Garden soil or compost – A small bag (5–10 lbs) for amending beds if needed.
- ● Pruning shears or sharp scissors – For trimming dead foliage and runners.
- ● Garden gloves – A pair to protect your hands from thorns and soil.
- ● Row cover or frost cloth – Lightweight fabric (3–4 oz per sq. yd.) for extra protection in harsh winters.
- ● Small rake – To fluff mulch and clear debris.
- ● Plant tags or labels – If you’re overwintering new varieties.
- ● Watering can or hose with a gentle nozzle – For final hydration before mulching.
- ● Know your USDA Hardiness Zone (strawberries thrive in Zones 3–10 but need adjustments for extreme cold).
- ● A dry, mild day (40–60°F) for mulching—avoid wet conditions to prevent rot.
- ● Time of day: Late afternoon or early evening to reduce stress on plants.
Step-by-Step instructions for preparing strawberry plants for winter
Here's the straightforward method I use every fall to protect my strawberries—and keep them producing for years.
🌿 Step 1: Stop Fertilizing and Reduce Watering Gradually
About 4-6 weeks before your first frost, stop applying any fertilizer. Strawberries go dormant in winter, and new growth at this stage makes them vulnerable to cold damage. You'll notice the leaves start yellowing naturally—that's your cue to slow down watering too.
Reduce irrigation to about half the summer amount until the soil feels dry 1 inch down between waterings. Overwatering now encourages weak growth that won't survive freezing. I check soil moisture by pushing my finger in—if it feels damp past that first inch, I wait another day.
✂️ Step 2: Trim Dead and Diseased Foliage
When 75% of leaves have turned brown (usually 2-3 weeks before frost), it's time to clean up. Use sharp pruners to cut back all dead leaves and any foliage showing signs of disease—look for black spots, mold, or discolored patches. This prevents pathogens from overwintering in plant debris.
Leave the healthy green leaves intact until they die back naturally. These still photosynthesize and store energy in the roots for next spring. I never remove more than what's clearly dead—healthy foliage acts like a blanket, protecting the crown from temperature swings.
🪴 Step 3: Apply 3-4 Inches of Mulch
Once the ground freezes at night but thaws during the day (usually 1-2 weeks before hard frost), cover the bed with 3-4 inches of straw mulch. This thickness insulates roots while allowing moisture to escape—critical for preventing rot. I use clean, weed-free straw because it breaks down slowly and adds organic matter.
Spread mulch evenly over the entire bed, including between rows. Pile it higher around the crowns of established plants where frost damage is most likely. Avoid plastic or thick layers of leaves—these trap too much moisture and smother the plants.
☀️ Step 4: Protect Crowns During Hard Freezes
When temperatures drop below 15°F (or your local hardiness zone's minimum), add extra insulation. I mound an additional 2 inches of straw over the crowns, then cover the entire bed with burlap or cardboard to block wind. This prevents frost heave—when soil expands and contracts, lifting roots out of the ground.
Remove the windbreak during daytime thaws to prevent overheating. You'll see frost crystals on the mulch in the morning—that's normal. The key is keeping the soil temperature within 10°F of air temperature, not matching it exactly. Too much insulation can cause rot, so check occasionally.
⏰ Step 5: Monitor and Adjust Through Winter
Check your strawberries once a month during winter for signs of heaving or mold. If you notice roots exposed, gently push mulch back around them. In areas with heavy snow, shovel a light covering over the bed to add insulation without compacting the soil.
Spring prep starts in early March when you'll see green shoots pushing through the mulch. That's your signal to remove winter protection gradually—first the windbreak, then thin the mulch down to 1-2 inches. Don't rush this; sudden warming can shock dormant plants.
Tips & tricks for preparing strawberry plants for winter
Winterizing strawberries doesn't have to be complicated—these key tricks ensure your plants survive and thrive next season.
Pruning Precision: When cutting back foliage in Step 1, focus on removing only the diseased or yellowed leaves while keeping the healthy green ones. The 1-2 inches above the crown guideline is critical—this preserves the plant's energy reserves for spring while eliminating hiding spots for pests. I've found that using sterilized pruners (dipped in rubbing alcohol) prevents spreading fungal spores between plants.
Mulch Depth Matters: The 4-6 inches of straw mulch in Step 2 should feel like a cozy blanket for your plants. I've learned the hard way that settling after rain can reduce this to just 3 inches—so always check after heavy precipitation. For extra insulation in extreme cold, add a second layer of mulch in early winter. The key is maintaining that consistent depth right up to the crown.
Cold Protection Hacks: For temperatures below 10°F, I've had great success with DIY mini hoop tunnels using PVC pipes and frost cloth. Secure the edges tightly with bricks or landscape staples to prevent wind from lifting the cover. For individual plants, plastic milk jugs work perfectly—they create a mini greenhouse effect while allowing some airflow. Just remember to remove these covers in late February to prevent overheating.
Watering Wisdom: The 2-3 weeks before frost is the critical window for tapering off water. I've noticed that strawberries often start showing brown foliage naturally during this time—this is your cue that they're ready for dormancy. For the final watering, aim for deep saturation (about 1 inch of water) to ensure roots are hydrated before the ground freezes. This prevents winter desiccation.
Pro Tips for Get Strawberry Plants Ready For Winter
- Winterizing strawberries doesn't have to be complicated—these key tricks ensure your plants survive and thrive next season.
- Pruning Precision: When cutting back foliage in Step 1, focus on removing only the diseased or yellowed leaves while keeping the healthy green ones.
- Mulch Depth Matters: The 4-6 inches of straw mulch in Step 2 should feel like a cozy blanket for your plants.
Frequently asked questions
Got questions about winterizing your strawberry plants? You’re not alone! Here are answers to the most common concerns to help you prep like a pro.
When is the best time to winterize strawberry plants?
Start preparing your strawberries for winter 4–6 weeks before the first hard frost. This gives roots time to harden off and mulch time to decompose slowly. In most regions, aim for late fall (October–November). If you’re in a mild climate, wait until temperatures consistently drop below 40°F (4°C) at night.
Can I leave strawberry plants in the ground over winter?
Yes! Strawberries are perennial and can survive winter in the ground if properly protected. Just remove old leaves, apply a thick layer of mulch (straw or leaves), and cover with frost cloth in extreme cold. Avoid digging them up unless you’re in Zone 3 or colder—then, consider container growing or overwintering indoors.
What if my strawberries freeze despite winter prep?
Don’t panic! Strawberries are resilient. If leaves turn black or wilt, cut them back to 1–2 inches above the crown in early spring. The plant will regrow from the roots. For extra insurance, water deeply before freezing—hydrated roots handle cold better. New growth should appear by late April or May, depending on your zone.
Should I harvest strawberries before winter?
Harvest all ripe fruit before the first frost, but avoid picking green berries—they won’t ripen. After harvest, remove any remaining leaves (but leave the crown intact) to reduce disease risk. If birds or pests are an issue, cover plants with netting during the final harvest to protect your yield.
Can I reuse last year’s mulch for winterizing?
Fresh mulch is best, but if you’re short on supplies, sterilize used mulch first. Spread it in the sun for a few days to kill pests/disease, then reapply. Avoid wet or moldy mulch—it can suffocate roots. For long-term health, rotate mulch materials (e.g., straw one year, leaves the next) to prevent soil depletion.
What’s the easiest way to winterize strawberries in containers?
Move pots to a cool, sheltered spot (like a garage with ventilation) before temps drop below 20°F (-7°C). Wrap containers in bubble wrap or burlap, and reduce watering. In spring, unpot and replant outdoors once soil warms to 50°F (10°C). For extra protection, add a thick layer of mulch around the base.
Wrapping up and next steps
Preparing your strawberry plants for winter is all about proactive care—mulching, pruning, and protecting them from harsh elements ensures they’ll bounce back stronger in spring! 🌱 With these simple steps, you’re setting the stage for a bountiful harvest next season.
Now that you’re armed with the know-how, take action: grab your gloves, gather supplies, and give your plants the cozy winter prep they deserve. Your future strawberry treats start with today’s effort!