
Blooming
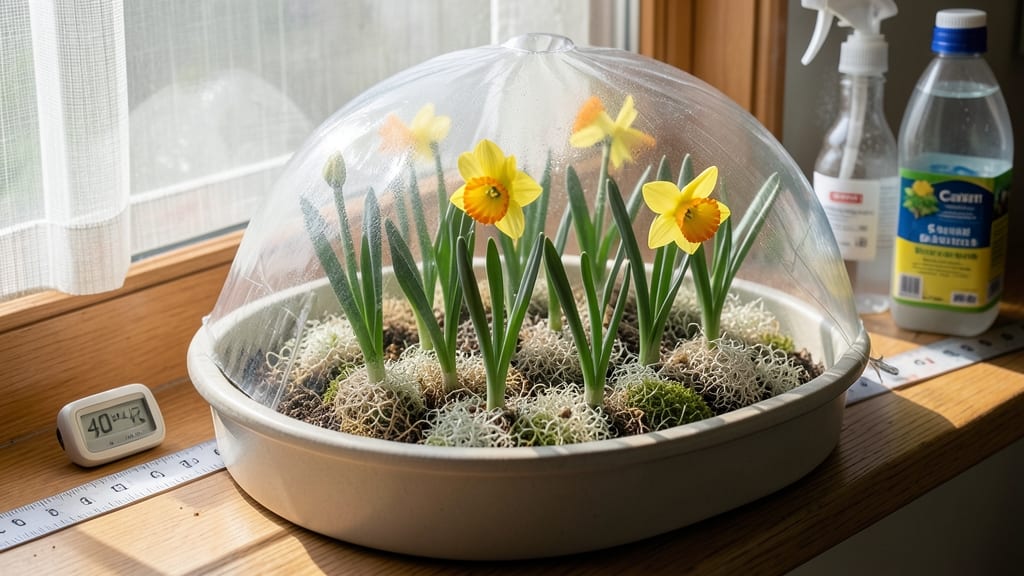
How to force daffodils means beating winter with sunshine-yellow blooms by Valentine’s Day. 🌷 I’ve done this for years—starting in November, when the garden’s asleep, and ending with fragrant bouquets indoors. The secret? Mimicking nature’s chill-and-warm cycle, but on your schedule. You’ll need mature bulbs (no smaller than 5 inches across), a container with drainage, and 6-8 weeks of cold. The setup is simple: plant bulbs in pots, keep them cool (40-50°F) and dark for weeks, then move to bright light. No fancy equipment—just patience and a sunny windowsill. By February, you’ll have stems reaching for the light, their buds swelling with promise. The results are worth the wait: weeks of early color when the garden’s still dormant outside. Even my black thumb can’t mess this up. Works for paperwhites too, but daffodils reward you with bold, cheerful blooms that last longer. Here’s how to avoid mold and weak stems—trust me, I’ve learned the hard way.
📚 In This Guide
- What you need
- Instructions
- Tips and common mistakes
- Wrapping up and next steps
What you need
- ● Daffodil bulbs: 3–5 healthy, firm bulbs (preferably Narcissus papyraceus or Narcissus jonquilla for best results). Choose bulbs that are plump, dry, and free of soft spots.
- ● Forcing pot or container: A narrow, deep pot (6–8 inches deep) with drainage holes. Terracotta or ceramic works best—just avoid plastic!
- ● Well-draining potting mix: A lightweight, peat-based mix (e.g., 50% peat moss, 30% perlite, 20% sand) to prevent rot. No garden soil!
- ● Gravel or pebbles: Small, clean stones (¼–½ inch) for drainage at the pot’s base.
- ● Trowel or spoon: For planting bulbs gently.
- ● Watering can or spray bottle: To keep soil moist but not soggy.
- ● Cooling location: A dark, cool spot (35–45°F) like a garage, basement, or refrigerator (no veggie crisper!).
- ● Bright, indirect light source: A sunny windowsill or grow light (after chilling).
- ○ Optional but helpful: Fertilizer (balanced 10-10-10, lightly applied after sprouting).
- ● Decorative pot or vase (for styling once blooms appear!).
- ● Thermometer (to monitor chilling temps).
Step-by-step instructions for forcing daffodils indoors
Here's the foolproof method I use every winter to bring bright daffodils indoors weeks before spring.
🌱 Step 1: Select and Prepare Healthy Daffodil Bulbs
Choose firm, plump bulbs with no soft spots or mold—these are your secret to vibrant blooms. I always pick bulbs labeled "forcing" or "paperwhite" varieties since they're bred specifically for this process. Remove any dried outer skins and trim the stems to about 6 inches to prevent them from drying out during storage.
Here's the thing—don't wash the bulbs before storing. Any moisture will encourage rot during the chilling period. Instead, gently brush off loose soil with your fingers. Place them in a paper bag or mesh container with good airflow to prevent moisture buildup that could cause rot.
⏰ Step 2: Chill Bulbs for 10-14 Weeks
Store the bulbs in a cool, dark place where temperatures stay between 35-45°F. I keep mine in my unheated garage during winter months—this mimics natural winter conditions and triggers blooming. A refrigerator works too, but avoid the crisper drawer where humidity levels are too high.
Check the bulbs every 2-3 weeks to ensure they're not drying out or developing mold. If you notice any soft spots, remove that bulb immediately to prevent spreading. You'll know the chilling period is complete when you see tiny green shoots emerging from the top—this usually happens after 10-14 weeks.
☀️ Step 3: Move to Warmth and Light
Once you see those first green shoots, it's time to move the bulbs to a warmer spot. Place them in a bright location where temperatures stay between 60-65°F during the day and 55-60°F at night. A sunny windowsill facing east or south works perfectly, but avoid direct midday sun which can scorch the emerging leaves.
Here's where it gets fun—watch the shoots grow about 2 inches before you transplant them into soil. This ensures the roots have established enough to support the blooming process. I like to use small pots (about 4-6 inches wide) with drainage holes to prevent waterlogging.
💧 Step 4: Plant and Water Gently
Fill your chosen pots with well-draining potting mix, leaving about 1 inch of space at the top. Make a small hole for each bulb and plant them with the necks (the part that was above soil) just barely visible. This positioning encourages strong root growth while keeping the bulb stable.
Water gently but thoroughly after planting, allowing water to drain completely from the bottom. You'll know you've got the right moisture level when the soil feels damp but not soggy to the touch. Place the pots in a bright spot but avoid direct sunlight for the first few days to help the bulbs acclimate to their new environment.
🌿 Step 5: Care Until Blooming
Keep the soil consistently moist but never waterlogged—daffodils hate soggy roots. I water when the top ½ inch of soil feels dry to the touch. Fertilize lightly with a balanced houseplant fertilizer (half-strength) about 2 weeks after planting to encourage strong growth without overwhelming the bulbs.
You'll see buds forming after about 4-6 weeks of warm care. This is the moment that matters: keep the bulbs in bright, indirect light and maintain consistent moisture. Once the buds open, enjoy your early spring color! After blooming, you can plant the bulbs outdoors in fall for next year's garden display.
Tips & tricks for perfect indoor daffodil forcing
These simple strategies will help you avoid common pitfalls and get the most vibrant blooms possible.
Bulb Selection Matters: Look for bulbs that feel firm and heavy for their size—this indicates they're properly hydrated and full of energy. I always check the base for any soft spots or mold, which can spread during the chilling period. Forcing bulbs should be labeled specifically for indoor blooming, as these varieties are bred to handle the unique temperature shifts we're creating.
Chilling Zone Strategy: The 35-45°F range is critical for triggering blooming, but consistency matters even more than the exact temperature. I've found that a garage with natural temperature fluctuations works better than a refrigerator's constant cold. If using a fridge, place bulbs on a shelf where the temperature stays stable—avoid the crisper drawer where humidity levels can cause rot.
Light Transition Tip: When you move bulbs to warmth in Step 3, place them near a bright window but avoid direct sunlight for the first 24 hours. This gradual light exposure helps prevent shock to the emerging shoots. I like to rotate pots daily so all sides get even light exposure, which creates more balanced growth and stronger stems.
Post-Bloom Care: After your daffodils finish blooming, don't discard those bulbs! Plant them outdoors in fall for next year's garden. The forcing process actually strengthens them, and they'll often produce even more dramatic blooms after their indoor experience. Just wait until after the first frost to transplant them.
Pro Tips for Force Daffodils
- These simple strategies will help you avoid common pitfalls and get the most vibrant blooms possible.
- Bulb Selection Matters: Look for bulbs that feel firm and heavy for their size—this indicates they're properly hydrat...
- Chilling Zone Strategy: The 35-45°F range is critical for triggering blooming, but consistency matters even more than...
Frequently asked questions
Got questions about forcing daffodils to bloom indoors? You’re not alone! Here are answers to the most common queries to help you master this cheerful spring trick.
How long do daffodils need to chill before forcing?
Daffodils typically need 12–16 weeks of cold treatment (35–45°F) to break dormancy. Place them in a dark, cool spot (like a fridge) for this period—just remove them from the vase and wrap in damp paper towels to prevent drying. Patience pays off with vibrant blooms!
Can I use bulbs straight from the ground for forcing?
Yes! Freshly dug bulbs work great, but they’ll need at least 8–10 weeks of chilling before forcing. Store them in a breathable bag (like a paper towel-lined container) in the fridge. Avoid bulbs treated with pesticides—opt for organic or untreated varieties for safety.
What’s the best indoor location after chilling?
Move your chilled daffodils to a bright, indirect light spot (like a north-facing window or under grow lights). Avoid direct sunlight, which can scorch petals. Rotate the vase daily for even growth. A cool room (60–65°F) keeps blooms fresh longer.
Why aren’t my forced daffodils blooming?
Common culprits include insufficient chilling (too short or warm), dry bulbs (keep them moist but not soggy), or lack of light. Double-check your timing and placement. If stems are tall but no buds appear, extend the cold treatment by 2–4 weeks.
Can I reuse forced daffodil bulbs for next year?
Unfortunately, forced bulbs rarely rebloom because the energy used for indoor growth depletes their reserves. Plant them in your garden after forcing—they’ll naturalize and return stronger for future seasons! Choose healthy bulbs with firm, dry skins for the best results.
Wrapping up and next steps
Forcing daffodils is all about patience and timing—but the reward of bright, early blooms is worth every step! 🌼 By chilling your bulbs in a cool, dark spot (like a fridge) and then bringing them into warmth, you’ll coax those cheerful flowers indoors months before spring arrives.
Whether you’re a gardening newbie or a seasoned pro, this simple trick adds a burst of color to your home and your mood.
Ready to try? Grab those bulbs, follow the steps, and watch your patience bloom! Next, share your progress—or even gift your forced daffodils—to spread the joy. Happy forcing! 🌱✨