
How To
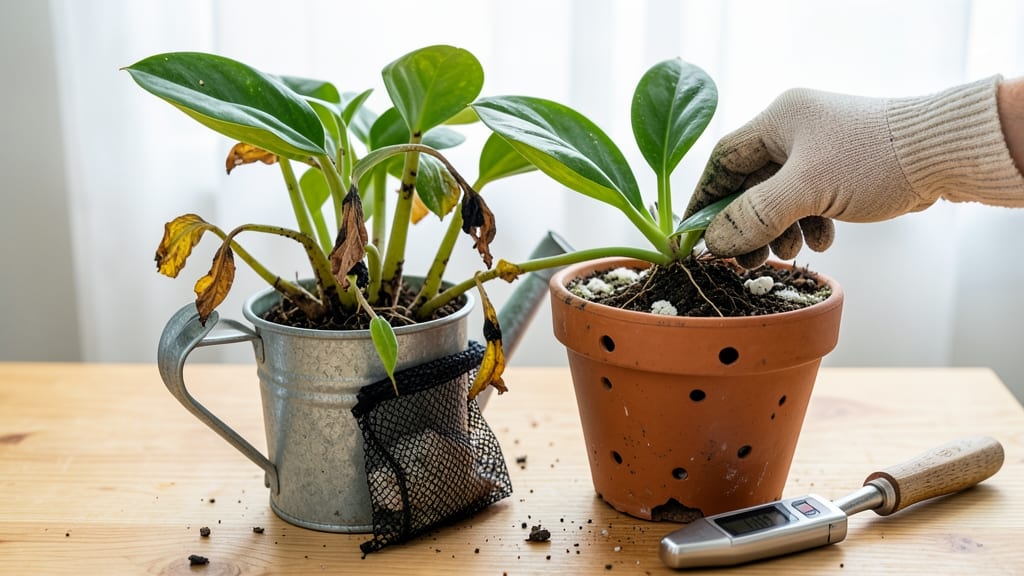
How to fix an overwatered ZZ plant—don’t panic, this drought-tolerant warrior can bounce back. 🌱 The moment you notice mushy stems or drooping foliage, you’ve got a 24-48 hour window to turn things around before root rot sets in. I’ve nursed back more overwatered ZZ plants than I’d like to admit, and the key is acting fast with the right steps. First, stop watering completely and repot the plant into fresh, well-draining soil—think cactus mix with perlite. Snip away any blackened roots with clean scissors, then let the soil dry out completely before touching it again. ZZ plants store water in their rhizomes, so they’d rather go thirsty than soggy. Within a week, you’ll see new growth pushing through, and those yellow leaves will start falling off naturally. The real secret? Water only when the top 2-3 inches of soil feel bone-dry—once every 3-4 weeks is normal for these tough plants. Here’s the thing—ZZ plants are basically the goldfish of houseplants: they can survive neglect but won’t thrive with constant moisture. Once you’ve got the watering routine dialed, your plant will reward you with glossy new leaves and that signature ZZ resilience.
📚 In This Guide
- What you need
- Instructions
- Tips and common mistakes
- Wrapping up and next steps
What you need
- ● Well-draining potting mix: A blend of cactus/succulent mix (or regular potting soil amended with 30-50% perlite, pumice, or coarse sand). You’ll need about 2-3 gallons, depending on your pot size.
- ● Pot with drainage holes: Ensure it’s 1-2 inches larger in diameter than the current pot to allow for root recovery. Terracotta or ceramic pots work best.
- ○ Gloves (optional but recommended): To protect your hands from soggy soil and potential root rot bacteria. Nitrile or rubber gloves are ideal.
- ● Pruning shears or clean scissors: For trimming yellow, mushy leaves or damaged stems. Make sure they’re sterilized with rubbing alcohol.
- ● Watering can or spray bottle: A spouted watering can (for repotting) or a fine-mist spray bottle (for gentle hydration post-recovery).
- ● Newspaper or towels: To line your workspace and catch excess water or soil mess.
- ○ Rooting hormone (optional but helpful): A powder or gel to encourage healthy regrowth if roots are severely damaged.
- ● Hydrogen peroxide (3% solution): Dilute 1 part H₂O₂ to 4 parts water for a gentle root soak to prevent bacterial/fungal growth.
- ● Fungicide (like neem oil or copper fungicide): If you spot signs of mold or mildew on roots or soil.
- ● Moisture meter: To accurately check soil moisture before watering again (aim for dryness down to 2-3 inches).
- ● Peat moss or coconut coir: For amending heavy soil if your current mix is too dense.
Step-by-Step instructions for reviving an overwatered ZZ plant
Here's how to rescue your struggling ZZ plant—fast and without stress.
💧 Step 1: Stop Watering and Assess the Damage
First, halt all watering immediately. ZZ plants are drought-tolerant, and overwatering creates root rot that blocks nutrient uptake. Check the soil by inserting your finger 2 inches deep—if it feels damp, wait another 3-5 days before reassessing. Yellow leaves are the first sign of distress, but black, mushy stems mean root rot has set in.
Gently pull the plant from its pot to inspect the roots. Healthy roots are firm and light tan, while rotten roots are dark, slimy, and crumble easily. If you see mold or a foul smell, the plant needs urgent intervention. This is the moment that matters: act now to prevent permanent damage.
🪴 Step 2: Remove and Trim Damaged Roots
Using clean, sharp pruning shears, snip away any black, mushy, or soft roots. Focus on the affected areas while preserving as much healthy root structure as possible. I know it seems drastic, but removing the rot stops it from spreading. If most roots are healthy, your plant has a strong chance of recovery.
After trimming, rinse the remaining roots under lukewarm water to remove soil and debris. This helps you spot any hidden damage and prepares the plant for repotting. Avoid using cold water—it can shock the roots further. Pat the roots dry with a clean paper towel before moving to the next step.
✂️ Step 3: Repot in Fresh, Well-Draining Soil
Choose a pot with drainage holes—ZZ plants despise soggy conditions. Fill the bottom 1 inch with a mix of perlite or pumice to improve drainage. This layer ensures excess water escapes quickly. Add a 2-inch layer of fresh, fast-draining potting mix (a cactus or succulent blend works best) and place the plant in the center.
Fill the remaining space with more potting mix, pressing lightly to secure the plant but not compacting the soil. Leave a ½-inch gap between the soil and the pot’s rim to prevent overwatering. The goal is airy, dry soil that mimics the ZZ plant’s natural habitat. Tap the pot gently to settle the soil without crushing it.
☀️ Step 4: Adjust Light and Watering Routine
Move your ZZ plant to a spot with bright, indirect light—a north or east-facing window is ideal. Direct sunlight can stress a recovering plant, while low light slows regrowth. You’ll notice new growth emerging within 2-4 weeks if conditions are right. Avoid fertilizing for at least 4-6 weeks; the plant needs time to recover.
Water only when the top 3 inches of soil feel completely dry. Stick your finger in the soil—if it’s dry to the touch, it’s time to water. Pour water slowly until it drains from the bottom, then empty the saucer to prevent soggy roots. Real talk: this is where most people fail. Overwatering again undoes all your hard work.
⏰ Step 5: Monitor and Encourage New Growth
Check your plant weekly for signs of recovery. New leaves should appear at the base of the stems, and existing yellow leaves may dry up and fall off naturally. If you see fresh, firm green growth, your plant is on the mend. Avoid moving it around during this time—ZZ plants dislike frequent changes in their environment.
If no new growth appears after 6-8 weeks, reassess the roots for remaining rot or adjust light conditions. Patience is key—ZZ plants are resilient but need consistent care. Once fully recovered, maintain a watering schedule of every 2-3 weeks, letting the soil dry completely between waterings. You’ve got this!
Tips & tricks for reviving an overwatered ZZ plant
Here's what nobody tells you about saving your ZZ plant—these tricks make all the difference.
Root Inspection Tip: When checking roots in Step 1, use a flashlight to spot hidden rot. Dark, slimy roots often hide behind healthy-looking stems. I’ve saved plants where only 20% of roots looked healthy—focus on preserving those while removing the rest. This step is where most people give up too soon.
Repotting Hack: In Step 3, don’t rush the soil layering. The 1-inch drainage layer at the bottom is non-negotiable—it prevents future waterlogging. I like to mix perlite with coarse sand for even better drainage. Also, avoid compacting the soil too much; ZZ plants need air pockets around their roots.
Light Condition Secret: For Step 4, if you don’t have a north-facing window, use a grow light for bright, indirect light. Place it 12-18 inches above the plant for 12-14 hours daily. I’ve seen ZZ plants recover faster with this setup than in dim natural light. Just avoid direct sunlight—it can scorch new growth.
Watering Rescue Strategy: If you’re unsure about soil dryness in Step 4, use a moisture meter. The top 3 inches should read "dry" before watering. I’ve had clients water too soon because the soil looked dark—moisture meters take the guesswork out. This is the fastest way to prevent recurring overwatering issues.
Pro Tips for Fix Overwatered Zz Plant
- Here's what nobody tells you about saving your ZZ plant—these tricks make all the difference.
- Root Inspection Tip: When checking roots in Step 1, use a flashlight to spot hidden rot. Dark, slimy roots often hide...
- Repotting Hack: In Step 3, don’t rush the soil layering. The 1-inch drainage layer at the bottom is non-negotiable—it...
Frequently asked questions
How often should I water my ZZ plant after fixing overwatering?
Let the top 2-3 inches of soil dry out completely before watering again—usually every 2-3 weeks in normal conditions. Stick your finger in the soil to check moisture; if it feels dry, it’s time. Overwatering is the #1 killer of ZZ plants, so err on the side of underwatering while it recovers!
Will my ZZ plant grow back if all the leaves turn yellow and mushy?
Don’t panic! If the roots are still healthy (firm and white, not brown/slimy), your ZZ plant can bounce back. Trim the mushy leaves at the base with clean scissors, repot in fresh, well-draining soil, and reduce watering. New growth should emerge from the rhizomes (thick stems) within a few weeks.
How long does it take for an overwatered ZZ plant to recover?
Recovery time varies, but you’ll typically see improvement in 2-4 weeks if you adjust care immediately. Focus on:
- Stopping watering until soil is bone-dry
- Ensuring bright, indirect light
- Avoiding soggy soil (use pots with drainage holes!)
Can I use hydrogen peroxide or cinnamon to save my overwatered ZZ plant?
Yes! Both can help prevent rot and promote healing:
- Hydrogen peroxide (3%): Mix 1 part with 4 parts water and use it to water your plant (1x/week) to kill fungus and bacteria.
- Cinnamon: Sprinkle a pinch on cut stems or soil to act as a natural antifungal. Avoid overusing—just a light dusting is enough!
What’s the best soil mix to prevent overwatering in the future?
ZZ plants thrive in fast-draining, chunky soil. Mix:
- 50% cactus/succulent soil
- 30% perlite or pumice (for aeration)
- 20% orchid bark or coarse sand
Wrapping up and next steps
Fixing an overwatered ZZ plant is totally doable—just take it slow and follow the steps! 🌱 Whether you’re adjusting your watering routine, repotting for better drainage, or trimming those yellow leaves, your plant will bounce back with patience and care. Celebrate small wins like firmer soil and new growth as signs of progress.
Now that you’ve got the know-how, put it into action! Start with one fix—like checking the soil moisture or trimming damaged leaves—and build from there. Your ZZ plant will thank you with lush, happy leaves in no time. Happy reviving! 💚