
Companion Plants
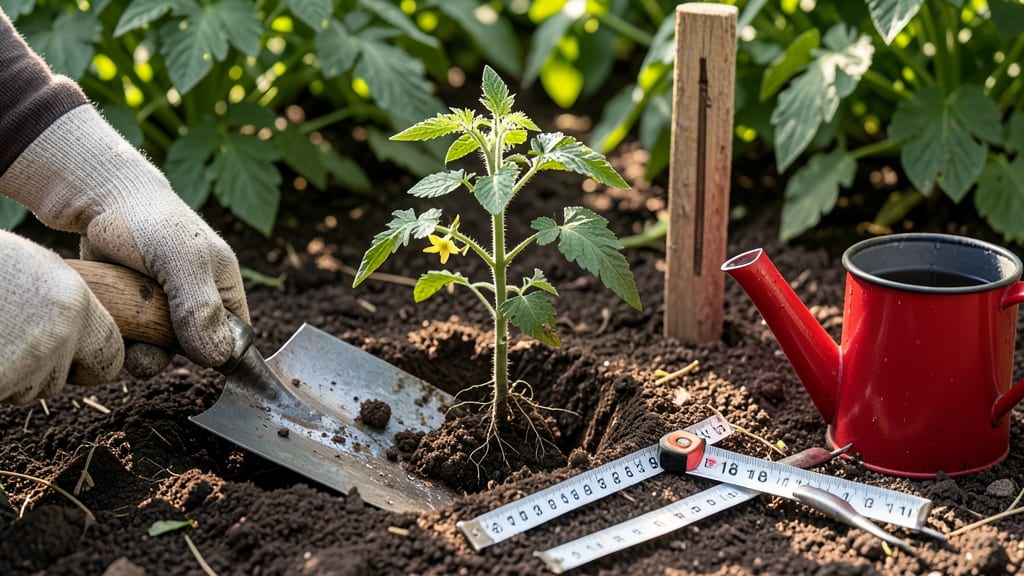
Digging holes the right way saves your plants from years of struggling. 🌱 I used to rush this step, only to watch new plants wilt because their roots couldn't breathe—or drain. The secret isn't brute strength, but precision: hole size, depth, and soil prep matter more than most beginners realize.
Start with the right tools—a trowel for small plants, a shovel for shrubs—and dig holes twice as wide as the root ball but no deeper than the container's base. Loosen the sides so roots spread easily, and always check drainage by filling the hole with water.
If it pools after 10 minutes, amend the soil with sand or gravel.
For small flowers, a 6-inch hole is plenty; for large shrubs, aim for 18 inches deep and 24 inches wide. The goal is to create a cozy, well-draining nest where roots can establish without stress.
Proper spacing now means fewer crowded plants later—and that means healthier growth from day one.
This method works for everything from delicate perennials to sturdy fruit trees. The key is consistency: always dig to the same depth, never pack soil too tightly, and never skip the drainage test. Your plants will thank you with stronger stems, better blooms, and years of trouble-free growth.
📚 In This Guide
- What you need
- Instructions
- Tips and common mistakes
- Wrapping up and next steps
What you need
Before you grab your shovel and dive in, let’s make sure you’ve got everything you need to dig holes like a pro! Whether you’re planting a delicate herb or a sturdy shrub, the right tools and materials will save you time, effort, and frustration. Here’s your
Step-by-Step instructions for digging planting holes
Here's how to dig perfect holes that give roots the space and drainage they need to thrive.
🪴 Step 1: Measure Hole Size Based on Root Ball
For container-grown plants, measure the root ball's diameter and width. The hole should be 2-3 times wider than the root ball and 1-2 inches deeper than the container's height. This extra space encourages roots to spread outward rather than circle in the pot.
For bare-root plants, dig a hole 12-18 inches wide and 12-15 inches deep—enough room for roots to unfurl naturally. Use a garden tape measure for precision. I always mark the hole's center with a small stake so I don't lose track as I dig.
🌱 Step 2: Dig the Hole with Proper Technique
Start by removing the topsoil and setting it aside in a wheelbarrow. Dig the hole with a spade or trowel, keeping the sides slightly sloped to prevent soil from collapsing. For large holes, use a garden shovel to loosen the soil in layers, working outward from the center.
Don't dig straight down like a well—this creates vertical walls that trap water. Instead, angle the shovel outward to create a cone-shaped hole. This helps roots grow outward where they'll find nutrients and moisture.
💧 Step 3: Check Drainage Before Planting
Fill the hole halfway with water and let it drain completely. If water pools at the bottom after 10-15 minutes, amend the soil with 2-3 inches of compost or coarse sand to improve drainage. Clay-heavy soil? Mix in 1 part perlite to 3 parts native soil.
For heavy clay or low spots, consider adding a 2-inch layer of gravel or broken pottery at the very bottom to create a drainage layer. This prevents root rot in plants that hate soggy feet, like azaleas or hydrangeas.
✂️ Step 4: Prepare the Plant and Backfill Carefully
Gently loosen the root ball of container plants by running your fingers around the edges. For bare-root plants, spread the roots outward in the hole before lowering the plant. The top of the root ball should sit 1 inch above ground level—settling will occur after watering.
Backfill with the reserved topsoil, tamping lightly every 2 inches to eliminate air pockets. Water deeply as you go to help soil settle naturally. Finish by creating a 2-inch water basin around the base to direct irrigation.
☀️ Step 5: Mulch and Monitor for Early Signs
Spread 2-3 inches of mulch (wood chips or straw) around the base, keeping it 6 inches away from the stem to prevent rot. This conserves moisture and regulates soil temperature. Watch for new leaf growth within 2-3 weeks—that's your sign the roots are establishing.
If leaves yellow or wilt, check the hole's depth. Roots that sit too deep suffocate, while those planted too high dry out. Adjust future holes based on what you see: healthy roots = healthy plant.
Tips & tricks for perfect planting holes
Here's what nobody tells you about digging holes that actually help your plants thrive.
Precision Matters: When measuring the hole size in Step 1, I always double-check the root ball's circumference rather than just diameter. Roots spread horizontally, so that extra width (2-3 times wider) makes all the difference for established plants. For large shrubs, I even sketch a quick diagram to visualize how roots will expand—this prevents overcrowding later.
Soil Preparation Secret: In Step 3, don't just test drainage once. After amending the soil with compost or perlite, mix it thoroughly with the native soil in the wheelbarrow. I use a garden fork to fluff the soil before backfilling—this creates tiny air pockets that roots love. For heavy clay, I add a handful of sand directly to the hole bottom before adding the gravel layer.
Plant Positioning Tip: The 1-inch above ground level rule in Step 4 is crucial, but here's the trick: After placing the plant, press down gently on the soil around the edges. This helps eliminate air pockets that could cause the plant to sink later. I also make a small notch in the soil surface to mark where the root flare should sit—this prevents planting too deep.
Drainage Test: That 10-15 minute drainage test in Step 3 reveals more than you think. If water drains too quickly (in under 5 minutes), your soil might be too sandy—add a bit more compost to retain moisture. If it takes longer than 15 minutes, you've got perfect drainage. I keep a small bucket handy to capture runoff water for my garden hose—nothing goes to waste!
Pro Tips for Dig Holes For Plants
- Here's what nobody tells you about digging holes that actually help your plants thrive.
- Precision Matters: When measuring the hole size in Step 1, I always double-check the root ball's circumference rather than just diameter.
- Soil Preparation Secret: In Step 3, don't just test drainage once.
Frequently asked questions
Got questions about digging holes for plants?
You’re not alone! Here are answers to the most common concerns—whether you're a beginner or just looking for a quick refresher.
What’s the best time of year to dig holes for planting?
The ideal time depends on your climate and plant type. For most temperate regions, spring or early fall is best—soil is workable, and roots establish before extreme heat or cold. Avoid digging in freezing or waterlogged ground. Perennials and shrubs often tolerate fall planting, while annuals thrive in spring.
Do I need special tools, or can I use a shovel?
A basic garden shovel or spade works for small plants, but larger holes (for shrubs or trees) benefit from a digging bar or post-hole digger. For rocky soil, a mattok or hand trowel helps loosen roots. Rent a power auger for deep, precise holes (like for fruit trees)—just call ahead for local rentals!
How do I ensure proper drainage in the hole?
Drainage is critical! Start by loosening the soil at the hole’s bottom (especially in clay soil). Add a 1–2 inch layer of gravel or sand if your area floods easily. For containers or heavy clay, mix in compost or perlite to improve airflow. Avoid compacting the amended soil—roots need space to spread.
What if my hole is too big or too small?
Too big? Backfill with native soil mixed with compost to avoid air pockets. Too small? Gently tease the roots outward before placing the plant—never force it. For container-grown plants, loosen the root ball first. If the hole’s depth is off, adjust by adding or removing soil under the plant, not around it.
What should I avoid when digging holes for plants?
- Disturbing nearby roots: Keep at least 12–18 inches away from existing plants’ root zones.
- Skipping soil amendments: Even native soil benefits from compost or fertilizer.
- Packing soil too tightly: Roots need room to grow—leave air pockets for expansion.
- Ignoring slope or erosion: On hillsides, dig terraced holes or use erosion-control fabric.
Pro tip: Mark hole locations with stakes before digging to avoid misalignment!
Wrapping up and next steps
Digging the perfect hole for your plants is all about precision, patience, and a little love for the earth! 🌱 Whether you’re planting flowers, veggies, or shrubs, the right depth and drainage will give your plants the strong foundation they need to thrive.
Now that you’ve got the know-how, grab your shovel and get ready to watch your garden grow—one well-placed plant at a time.
Ready for the next step? Plan your garden layout and start planting! 🌿 For extra guidance, check out our companion planting guides to pair your new additions with the best neighbors for a flourishing garden.