
Pruning
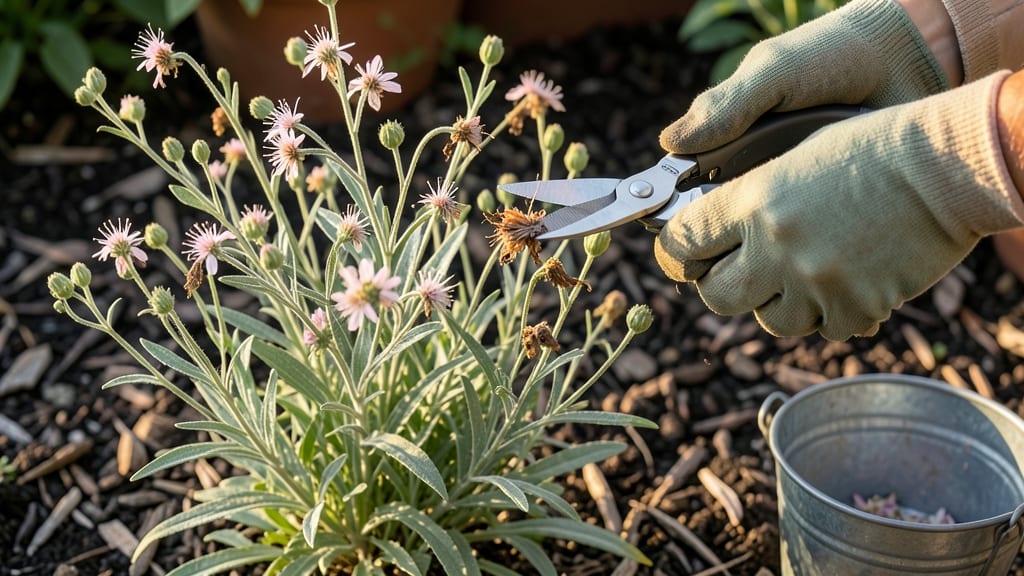
Deadheading gaura takes two minutes—but it keeps those airy blooms coming all season. 🌿 I used to let spent flowers drop, only to watch my gaura slow down by summer’s end. Now, with a quick trim, my plants stay bushy and flowering from spring through frost.
The tools you need are simple: clean pruners or even your fingers. Snip just above the next set of leaves where the stem meets the flower head. This tiny cut tells the plant, "Keep going!"—and within days, new buds form right at that spot.
You’ll notice a difference immediately: fewer leggy stems, more compact growth, and flowers that last weeks longer than neglected plants. The secret is consistency—check weekly during peak bloom, then ease up as seasons change. Works for all gaura varieties, from the classic white ‘Whirling Butterflies’ to deep pink ‘Crimson Butterflies’.
Here’s how to do it without ruining your plant’s natural shape.
📚 In This Guide
- What you need
- Instructions
- Tips and common mistakes
- Wrapping up and next steps
What you need
- ● Pruning shears or sharp scissors – Opt for bypass pruners (clean cuts) or small garden shears. Size: 4-6 inches (ideal for delicate gaura stems).
- ○ Gloves (optional but recommended) – Lightweight gardening gloves protect your hands from thorns (some varieties have them!) and dirt.
- ● Garden waste bag or bucket – A 5-gallon bucket or compostable bag (13-gallon) works well for collecting spent blooms.
- ● Water spray bottle (small, 8-16 oz) – For a quick rinse if your shears get sticky from sap.
- ● Rubbing alcohol or bleach solution (1:10 ratio) – 1 oz alcohol/bleach per 10 oz water to disinfect tools between cuts (prevents disease spread).
- ○ Sturdy pruning saw (optional for thick stems) – Only needed if your gaura has woody stems over ½ inch thick.
- ● Knee pad or small stool – Gaura can sprawl! A foldable kneeler or low stool saves your back.
- ● Hand lens or magnifying glass – Helps spot hidden pests or signs of disease on stems.
- ● Pruning sealant (like tree wound dressing) – Only if you’re making large cuts (gaura usually doesn’t need this).
- ● Notebook & pen – Jot down notes on bloom cycles or plant responses to deadheading.
Step-by-Step instructions for deadheading gaura
Here’s the simple method I use to keep my gaura blooming nonstop—no fancy tools or complicated steps.
✂️ Step 1: Wait for Flowers to Fade Naturally
Deadheading works best when you remove spent blooms just after they fade. Gaura’s delicate flowers turn from vibrant pink or white to a soft, papery brown—this is your cue. I wait until the petals look dry but haven’t yet fallen off on their own. This ensures you’re cutting at the right spot without disturbing new buds.
Don’t rush this step. If you snip too early, you might accidentally remove healthy buds still forming. Instead, watch for the center of the flower to flatten and lose color—that’s your signal. A quick pinch test works too: gently squeeze the flower. If it crumbles easily, it’s ready.
✂️ Step 2: Use Clean Pruners or Fingers
You don’t need fancy tools—just sharp pruners or your clean fingers. I grab the faded bloom between my thumb and forefinger and give it a firm twist to remove it at the base. If using pruners, cut just above the first set of healthy leaves below the flower stem. This encourages new growth from that node.
Skip the shears if you’re working with a large cluster. Gaura’s stems are thin but sturdy, so a gentle twist is all it takes. The key is to avoid tearing the stem—this can invite disease. If you’re unsure, snip about ¼ inch above a leaf joint to keep the plant happy.
✂️ Step 3: Prune Lightly to Encourage Bushier Growth
After removing spent blooms, take a quick look at the plant’s shape. If any stems look leggy or overcrowded, trim back the longest ones by about ⅓ of their length. This isn’t about heavy pruning—just a light touch to redirect energy toward new blooms and a fuller plant.
I focus on the oldest stems first. Gaura naturally grows in a mounding habit, so cutting back the tallest stems helps it stay compact. Avoid hacking into the center—this can leave bare spots. Instead, target the outermost stems to encourage a bushier, more balanced shape.
🌱 Step 4: Water and Fertilize for Continuous Blooms
After deadheading, give your gaura a deep drink of water to help it recover. The roots need moisture to support new growth, especially if you’ve trimmed back some stems. Water at the base in the morning so the foliage has time to dry out—this prevents fungal issues.
Feed your gaura with a balanced, water-soluble fertilizer every 4-6 weeks during the growing season. I use a 10-10-10 mix diluted to half strength. This keeps the blooms vibrant and the plant healthy without overloading it. Skip fertilizer in late summer to encourage fall blooms—gaura often puts on a second flush of flowers when stressed by cooler temps.
⏰ Step 5: Repeat Weekly for Year-Round Blooms
Deadheading gaura isn’t a one-time job—it’s a weekly habit. During peak bloom season (spring to early fall), I check my plants every 5-7 days. In cooler months, you can stretch this to every 10-14 days, as growth slows naturally.
Here’s the thing—gaura is forgiving. If you miss a week, don’t stress. The plant will still bloom, though you might see a few spent flowers lingering. The more consistent you are, though, the longer and more vibrant your blooms will stay. Think of it like a conversation with your plant: listen, respond, and enjoy the results.
Tips & tricks for perfect gaura deadheading
These simple strategies will help you keep your gaura blooming beautifully with minimal effort.
Timing is Everything: The key to successful deadheading lies in Step 1's timing—wait until flowers are completely faded and papery. I've learned this the hard way: cutting too early can remove buds still forming, while waiting too long means you're not encouraging new blooms. For best results, check your gaura every 2-3 days during peak bloom season to catch that perfect moment when flowers are ready to be removed.
Gentle Handling Matters: In Step 2, I can't stress enough how important it is to avoid tearing stems when removing spent blooms. Gaura's delicate stems are more resilient than they look, but rough handling can damage the plant and invite disease. For large clusters, I find that using my fingers to twist off blooms works better than pruners, which can accidentally cut too deeply. Remember, you're aiming to remove just the spent flower, not the entire stem.
Pruning Strategy: When you reach Step 3, focus on pruning the oldest stems first. This encourages bushier growth and prevents leggy plants. I like to visualize the plant as a mounding shape - cutting back the tallest stems helps maintain that compact form. If you're unsure which stems to trim, look for the longest ones that have already produced flowers - these are the ones that need attention. Avoid cutting into the center of the plant, as this can create bare spots.
Seasonal Adjustments: The 4-6 week fertilization schedule in Step 4 works well, but remember to adjust based on your climate. In hotter regions, you might need to fertilize more frequently, while cooler climates may require less. I've also found that gaura often responds well to a late summer fertilizer break, which can actually encourage a second flush of fall blooms. This is especially true if your summers are particularly warm.
Pro Tips for Deadhead Gaura
- These simple strategies will help you keep your gaura blooming beautifully with minimal effort.
- Timing is Everything: The key to successful deadheading lies in Step 1's timing—wait until flowers are completely fad...
- Gentle Handling Matters: In Step 2, I can't stress enough how important it is to avoid tearing stems when removing sp...
Frequently asked questions
about deadheading gaura—because even the pros need a little clarity! Here are answers to the most common queries to keep your plants thriving.How often should I deadhead gaura?
Deadhead gaura regularly—ideally every 1–2 weeks during peak bloom (spring to fall). For heavy bloomers, weekly checks prevent spent flowers from draining energy. In cooler months, reduce frequency to every 3–4 weeks or skip it entirely if blooms are sparse. Consistency is key!
Can I deadhead gaura in winter?
Gaura blooms year-round in mild climates, but in winter, skip deadheading unless you see faded flowers. Cold stress can slow growth, and pruning may stimulate new (but vulnerable) growth. Focus on protection instead—mulch stems and avoid heavy pruning until spring warmth returns.
What if I forget to deadhead?
No stress! Gaura is forgiving. If you miss deadheading, the plant may still bloom, though flowers might be fewer or shorter-lived. Over time, neglected plants can become leggy. Just catch up by trimming back 1/3 of the plant in early spring to encourage fresh growth.
Will deadheading kill my gaura?
Not at all! Deadheading encourages more blooms by redirecting energy to new flowers. Just avoid cutting into old wood (woody stems)—stick to removing only faded blooms and tender new growth. Think of it like a haircut: trim the ends, not the roots!
Are there alternatives to deadheading?
Yes! If deadheading feels tedious, try these low-maintenance options:
- Let it go wild: Gaura self-seeds and may still bloom sporadically without deadheading.
- Shear lightly: Use hedge shears to trim the entire plant by 1/3 in early spring for a fresh start.
- Plant companions: Pair gaura with low-maintenance perennials (like sedum or lavender) to reduce focus on it.
Pro Tip:
Use clean, sharp tools to avoid crushing stems. Dull shears can cause ragged cuts, inviting disease. A quick wipe with rubbing alcohol between plants keeps your tools sanitized!
Wrapping up and next steps
Deadheading gaura is a simple yet powerful way to keep your garden vibrant and encourage nonstop blooms—no green thumb required! By following these easy steps, you’ll enjoy months of color while keeping maintenance light. Now that you’re armed with the know-how, grab those shears and get pruning! 🌸✂️
For extra flair, consider planting gaura in layers or pairing it with complementary perennials. Happy gardening!