
Propagation
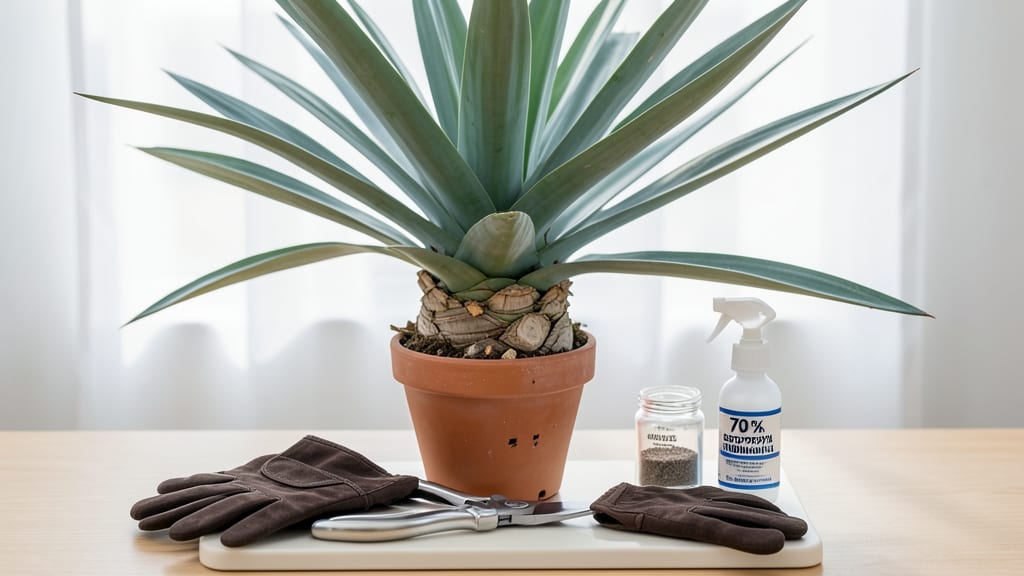
Yucca trunks don’t have to be a tangled mess—precision slicing turns them into perfect propagation pieces. 🌱 I’ve cut dozens of yucca trunks, and the right technique makes all the difference between healthy new plants and stressed stumps.
The key? Clean cuts, the right tools, and knowing when to do it.
You’ll need sharp pruning shears or a sterilized knife, rubbing alcohol for cleaning, and a bit of pruning sealant to protect the cuts. Timing matters too—spring or early summer gives your yucca the best chance to recover and regrow. Avoid cutting in fall or winter when the plant is dormant.
Start by removing any dead or damaged sections first. Then, make clean cuts just above a leaf node or growth point—this is where new shoots will emerge. Seal the cuts immediately to prevent rot or pests from sneaking in. Within weeks, you’ll see fresh growth sprout from those nodes.
Monitor your yucca closely after cutting for signs of stress like wilting or yellowing leaves. If you notice anything off, adjust watering or provide shade until it stabilizes. With the right care, your trimmed yucca will bounce back stronger—and you’ll have new plants ready for replanting.
📚 In This Guide
- What you need
- Instructions
- Tips and common mistakes
- Wrapping up and next steps
What you need
- ● Sharp pruning shears or handsaw – A clean, sterilized blade (preferably a bypass pruning shear or fine-toothed handsaw) to make precise cuts without crushing the trunk.
- ● Rubbing alcohol (70% or higher) or bleach solution – For sterilizing tools to prevent bacterial/fungal infections. Mix 1 part bleach to 9 parts water if using bleach.
- ○ Gloves (optional but recommended) – Garden or work gloves to protect your hands from sharp edges and potential sap irritation.
- ● Yucca trunk (3–5 inches in diameter, at least 12–18 inches long) – Choose a healthy, mature trunk with no signs of rot or disease.
- ● Cutting surface (clean workbench, cardboard, or tarp) – A stable, flat surface to prevent rolling and protect your workspace.
- ● Horticultural charcoal or cinnamon powder – 1–2 tablespoons to dust cut ends and promote faster healing.
- ● Well-draining potting mix or perlite/sand blend – For immediate rooting if propagating. A mix of 50% potting soil and 50% perlite works well.
- ● Spray bottle with water – To lightly mist cuttings and maintain moisture during rooting.
- ○ Rooting hormone (optional) – A gel or powder to boost root growth (especially for slower-rooting varieties).
- ● Clear plastic bag or propagation dome – To create a humidity tent and speed up rooting.
- ● Twine or zip ties – For securing cuttings to stakes if needed.
- ● Labeling tags – To track cuttings by date or variety.
Step-by-step instructions for cutting yucca trunks
Here’s how to slice yucca trunks with surgical precision for healthy propagation—no guesswork, just perfect pieces.
✂️ Step 1: Choose the Right Trunk for Cutting
Select a mature yucca trunk that’s at least 3-4 inches in diameter and shows signs of aging—think dry, brown patches or thicker growth near the base. The trunk should feel firm but slightly woody, not mushy or hollow. Avoid cutting trunks with active blooms; they’re still sending energy upward, and you’ll weaken the plant.
I like to work in late winter or early spring when the plant’s growth cycle is about to kick into gear. This timing gives your new cuttings the best chance to root before summer heat arrives. If you’re cutting in summer, do it on a cool, overcast day to minimize stress on the plant.
🪴 Step 2: Gather Your Tools and Prep the Workspace
You’ll need sharp pruning shears or a clean, sterilized knife—dull tools crush fibers and invite rot. Wipe the blade with rubbing alcohol before cutting to prevent disease transfer. Lay down a clean tarp or newspaper to catch debris, and have gloves handy; yucca sap can irritate skin.
Work in a well-ventilated area—yucca releases a mild sap that some people find irritating. I set up near an open window or outside on a shaded table. Keep a bucket of water nearby to clean tools between cuts and a small spray bottle for misting cuttings later.
✂️ Step 3: Make the Cut at the Perfect Angle
Identify the node, where leaves meet the trunk—this is where new growth will sprout. Hold your tool at a 45-degree angle, about ½ inch above a node, and make a clean, single cut. A diagonal cut increases surface area for faster healing and reduces water pooling, which can rot the base.
Slice through the trunk completely in one motion—hesitation causes jagged edges that slow propagation. If you’re cutting a long section, mark your cuts first with a pencil to avoid uneven lengths. Each piece should be 4-6 inches long for best results.
🌱 Step 4: Let Cuts Dry and Prepare for Propagation
Place cuttings in a shady, dry spot for 24-48 hours to let the ends callus over. This prevents rot when you plant them. You’ll see the cut edges turn light brown and feel slightly tougher to the touch—this is your signal they’re ready.
While waiting, fill small pots with cactus or succulent mix (not regular soil—it’s too dense). Add a layer of perlite at the bottom for drainage. Yucca roots need airflow, so avoid compacted soil. Water the mix lightly before planting to settle it without drowning the roots.
💧 Step 5: Plant and Care for New Cuttings
Dip the callused end of each cutting in rooting hormone (optional but helpful for faster growth). Tap the base gently into the soil until ½ inch is buried. Space pots 3-4 inches apart if planting multiple cuttings in one container.
Water sparingly—yucca roots rot easily. Mist the soil lightly until water drips from the drainage hole, then let it dry completely before watering again. Place cuttings in bright, indirect light for the first 2 weeks to avoid sunburn on tender new growth. After that, gradually introduce morning sun for hardening.
Tips & tricks for perfect yucca trunk slicing
Precision cutting is everything when propagating yucca—here's how to avoid common pitfalls and get flawless results every time.
Timing Secret: The 24-48 hour callusing period is non-negotiable for preventing rot. I've learned this the hard way—skipping this step led to mushy bases that never rooted. Place your cuttings on a wire rack in a dry, shaded spot during this time. The edges should develop a light brown color and feel slightly tougher when ready. If you're in humid conditions, extend to 48 hours—this is your insurance against bacterial infections.
Tool Technique: Don't underestimate the importance of a sharp blade! I've ruined multiple cuttings using dull shears that crushed the fibers. Sterilize your tools with rubbing alcohol before each cut to prevent disease transfer between pieces. For long trunks, mark your cuts with a pencil first—this ensures even 4-6 inch sections. Pro tip: Use a miter box if you have one to maintain that perfect 45-degree angle consistently.
Environmental Intelligence: Yucca propagation thrives on timing and conditions. Late winter or early spring is ideal because the plant's growth cycle is about to activate. If you must cut in summer, choose cool, overcast mornings to minimize stress. I've had success with summer cuttings by working before 10am when temperatures are still mild. The key is reducing heat shock to the plant during this vulnerable period.
Soil Strategy: Never use regular potting soil for yucca cuttings—it's too dense and retains moisture. The cactus/succulent mix with perlite is crucial for preventing root rot. I like to pre-moisten the mix lightly before planting to settle it without drowning the roots. For extra insurance, add a handful of coarse sand to improve drainage. Remember, yucca roots need airflow almost as much as they need soil!
Pro Tips for Cut Yucca Trunk
- Precision cutting is everything when propagating yucca—here's how to avoid common pitfalls and get flawless results e...
- Timing Secret: The 24-48 hour callusing period is non-negotiable for preventing rot. I've learned this the hard way—s...
- Tool Technique: Don't underestimate the importance of a sharp blade! I've ruined multiple cuttings using dull shears ...
Frequently asked questions
Got questions about cutting yucca trunks like a pro? Here are some of the most common queries—plus clear, actionable answers to keep your propagation game strong!
When is the best time of year to cut yucca trunks for propagation?
The ideal window is late winter to early spring (just before new growth begins). This timing ensures your cuttings have energy reserves for rooting while avoiding extreme heat or cold. Avoid cutting during dormancy (winter) or peak summer—both stress the plant and reduce success rates.
What should I do if my yucca trunk starts rotting after cutting?
Rotting usually happens from overwatering or poor wound care. Act fast: trim away mushy tissue with sterilized shears, dust the cut with cinnamon powder or sulfur, and let it dry for 24 hours before replanting. Reduce watering until new roots form—yucca prefers dry conditions!
Can I use a regular knife or do I need a specialized tool for cutting yucca?
A sharp, sterilized knife or pruning shears works fine for small trunks, but for thicker stems (3+ inches), a handsaw or machete makes the job cleaner. Just ensure your tool is clean to prevent bacterial infections. Avoid dull blades—they crush fibers, slowing healing.
How long should I let yucca trunk cuttings dry before planting?
Let cuttings air-dry for 1–3 days in a shady, dry spot (like a garage or porch). This forms a protective callus, reducing rot risk. Skip this step only in humid climates—shorten drying time to 24 hours and use fungicide powder for extra protection.
What’s the difference between cutting a yucca trunk vs. a pupping offset?
Trunk cuts are vertical slices (1–2 feet long) from the main stem, while pupping offsets are horizontal divisions (small side shoots). Trunks root faster but need more care; offsets are easier for beginners but may take longer. Both methods work—choose based on your plant’s size and your comfort level!
Wrapping up and next steps
Cutting a yucca trunk may seem daunting at first, but with the right tools, technique, and patience, you’ll unlock a world of propagation potential! Whether you’re dividing a mature plant or preparing pieces for replanting, precision is key—clean cuts, sharp tools, and proper healing time ensure healthy new growth.
Now that you’re equipped with the know-how, there’s no better time to roll up your sleeves and give it a try!
🌱 Next step: Gather your supplies, pick a sunny day, and start slicing with confidence. Your yucca’s future starts with your first cut—happy propagating! 🌿