
Pests
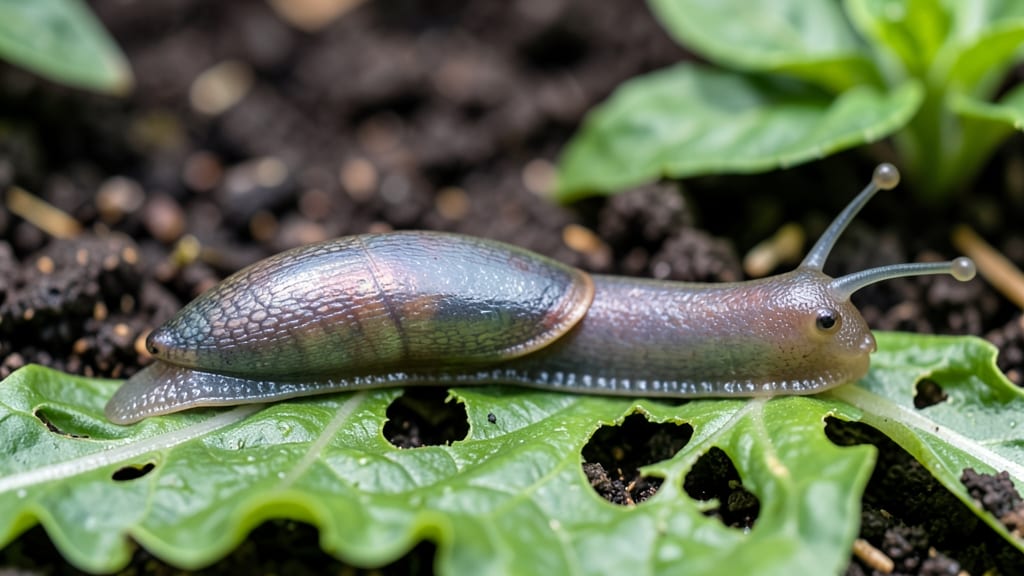
How to control slugs—I finally stopped them from turning my hosta leaves into lace overnight. The copper barrier trick stopped them dead in their tracks—literally. After years of losing plants to these slimy invaders, I finally found a solution that works in days without chemicals or traps.
You only need copper tape or strips, a pair of scissors, and about 30 minutes to set up. The secret? Slugs hate the electric shock they get from copper, so they avoid crossing it. It’s simple, reusable, and safe for pets and kids.
By morning, you’ll see fewer slimy trails and more intact leaves. The barrier lasts for years, and you can bend it around pots or create full garden borders. No more waking up to chewed zucchini or ragged lettuce.
Works for vegetable gardens, flower beds, and container plants alike. Here’s exactly how to make it work—no more slug damage in sight.
📚 In This Guide
- What you need
- Instructions
- Tips and common mistakes
- Wrapping up and next steps
What you need
- ● Copper tape or wire: At least 10 feet (for small gardens) or 20+ feet (for larger areas). Choose 1-2 inch wide tape or 1/8-inch thick wire for best results.
- ● Scissors or wire cutters: For trimming copper to fit edges, corners, or curves.
- ● Measuring tape or ruler: To ensure precise placement along garden beds, planters, or raised edges.
- ○ Sticky tape or double-sided tape (optional but helpful): A small roll to secure copper edges temporarily while installing.
- ● Gloves (recommended): To protect your hands from slug slime and sharp copper edges.
- ● Copper spray or copper-based slug repellent: For extra protection on vulnerable plants or areas where tape isn’t practical.
- ● Garden stakes or clips: To anchor copper tape in windy areas or along uneven surfaces.
- ● Beer traps (small containers with beer): A DIY backup plan for stubborn slug hotspots.
- ● Flashlight (for evening checks): Slugs are most active at night—spot them early to adjust your barriers!
Step-by-step instructions for creating a copper slug barrier
This simple trick uses materials you likely already have to create a nearly invisible barrier slugs refuse to cross.
Gather Your Materials
You'll need copper tape (the wider the better, up to 2 inches) and scissors for cutting it to size. I like to use copper flashing tape because it's durable and sticks well to most surfaces. If you don't have copper tape, copper sheeting cut into strips works too—just bend it slightly to create a raised edge.
Measure the perimeter of the area you want to protect—garden beds, containers, or even individual plants. Add 10-15% extra for overlaps and turns. A 10-foot garden bed might need 12 feet of tape to account for corners and overlaps. Mark the tape with a pencil before cutting to avoid mistakes.
Clean and Prepare the Surface
Slugs are most active at night when the ground is damp, so the barrier must be completely unbroken. Start by clearing away any debris, mulch, or loose soil from the top 1 inch of the planting area. Use a small brush or your fingers to remove dirt from where the tape will go—even tiny particles can create gaps.
If you're protecting containers, wipe the outer rim with a damp cloth to remove dust or residue. For garden beds, focus on the top edge of the soil where slugs most commonly travel. A clean surface ensures the tape sticks properly and creates a smooth, uncrossable line for slugs.
Apply the Copper Tape
Unroll the copper tape and press it firmly along the outer edge of your planting area, starting at one corner. Use your fingers to smooth it down, ensuring no bubbles or gaps remain. The tape should form a continuous, slightly raised barrier—slugs detect the electrical charge from copper and avoid crossing it.
At corners, overlap the tape by at least 1 inch to prevent slugs from slipping underneath. For extra security, bend the edges slightly upward with your fingers. This creates a mini lip that’s even harder for slugs to navigate. If you’re using copper sheeting, bend it into a U-shape and press it into the soil for a more permanent barrier.
Monitor and Reinforce as Needed
Check the barrier every 2-3 days for the first week, especially after rain. Copper can lose its effectiveness if it becomes covered in dirt or mulch, so gently brush away any debris that accumulates. If you notice slugs attempting to cross, reinforce that section by pressing down the tape again or adding an extra layer.
For long-term protection, consider reapplying the tape every 3-4 weeks or when it starts to look dull. Over time, copper can oxidize slightly, but it remains effective as long as it’s clean and unbroken. If you’re dealing with a severe slug infestation, combine this method with beer traps or iron phosphate baits for even better results.
Expand for Full Garden Protection
Once you’ve protected your most vulnerable plants, extend the barrier to other high-risk areas like hostas, lettuce, or young seedlings. Slugs are opportunistic, so they’ll move to the next easy meal if given the chance. For large gardens, prioritize new plantings and tender foliage first.
If you’re using containers, wrap the copper tape around the outer rim to create a full barrier. Slugs rarely climb over edges, so this keeps them out entirely. For raised beds, apply the tape to the inner edge where slugs might try to crawl up from below. Consistency is key—slugs will find and exploit even the smallest gap.
Tips & tricks for creating an effective copper slug barrier
These practical tips will help you get the most out of your copper barrier—and keep those slimy pests at bay for good.
Material Selection: While copper tape is easiest, copper sheeting offers a more permanent solution if you're dealing with persistent slug problems. For sheeting, cut strips about 2 inches wide and bend them into a U-shape to create a raised edge that's even harder for slugs to cross. Just make sure to press the edges firmly into the soil or container rim to prevent gaps.
Precision Measuring: When calculating how much copper tape you need, don't forget to account for those tricky corners and turns. I always add an extra 15% beyond my initial measurement—this ensures you have enough to overlap properly without running short. A simple trick is to measure your garden bed's perimeter first, then multiply by 1.15 before cutting your tape.
Surface Preparation: The cleanliness of your surface makes all the difference. I've found that using a small handheld vacuum or even a damp paper towel to remove fine dust particles from container rims creates an even stronger barrier. Slugs are sensitive to texture changes, so eliminating any rough spots helps maintain that unbroken line they can't cross.
Long-Term Maintenance: To extend your barrier's effectiveness beyond the initial 3-4 weeks, store your extra copper tape in a dry place away from direct sunlight. When reapplying, I like to use a soft paintbrush to gently clean any accumulated debris from the tape before pressing it back down. This simple step can add weeks to your barrier's lifespan.
Pro Tips for Control Slugs
- These practical tips will help you get the most out of your copper barrier—and keep those slimy pests at bay for good.
- Material Selection: While copper tape is easiest, copper sheeting offers a more permanent solution if you're dealing with persistent slug problems.
- Precision Measuring: When calculating how much copper tape you need, don't forget to account for those tricky corners and turns.
Frequently asked questions
How long does it take for a copper barrier to work against slugs?
A copper barrier typically starts working within 24–48 hours, but slugs may take 3–5 days to fully avoid it. Consistency is key—recheck the tape for damage or dirt buildup, which can reduce effectiveness. For best results, combine it with other methods like diatomaceous earth for faster results.
Will copper tape harm pets or children if they touch it?
No, copper tape is non-toxic and safe for pets and kids. It works by giving slugs a mild electric shock when they crawl over it, not through chemicals. However, supervise pets near garden edges to prevent chewing (though copper isn’t harmful if ingested in small amounts).
What should I do if slugs keep climbing over the copper barrier?
If slugs persist, check for gaps, dirt buildup, or damage to the tape. Reinforce weak spots with extra strips or bend the edges slightly to create a sharper "shock" zone. For severe infestations, pair copper with beer traps or iron phosphate baits (pet-safe options).
Does rain wash away the effectiveness of a copper barrier?
Rain won’t damage copper tape, but dirt or organic debris (like fallen leaves) can insulate slugs from the shock. Wipe the tape down with a damp cloth every few weeks to maintain its effectiveness. Copper’s natural resistance to weather makes it a low-maintenance long-term solution.
Is copper tape more cost-effective than other slug control methods?
Yes! Copper tape is a one-time purchase (costing ~$10–$20 for a garden) that lasts years with minimal upkeep. Compare this to chemical baits (requiring reapplication) or manual picking (time-consuming). For organic gardens, it’s one of the most eco-friendly and budget-friendly options.
What’s the best time of day to install a copper barrier?
Install copper tape in the evening or early morning when slugs are most active. This gives them immediate exposure to the barrier, discouraging them faster. Avoid midday installation—slugs hide in shade or moisture during hot hours, delaying the deterrent’s effect.
Wrapping up and next steps
Controlling slugs doesn’t have to be a battle—with the right tools and a little persistence, you can reclaim your garden in days! 🌱 The copper barrier trick is a safe, chemical-free solution that works fast and keeps those slimy pests at bay.
Remember, consistency is key, so check your barriers after rain and reinforce as needed.
Now that you’re armed with these tips, take action! Start small—test a section of your garden first, then expand. Soon, you’ll be enjoying a slug-free space without the hassle. Happy gardening! 🌿