
Propagation
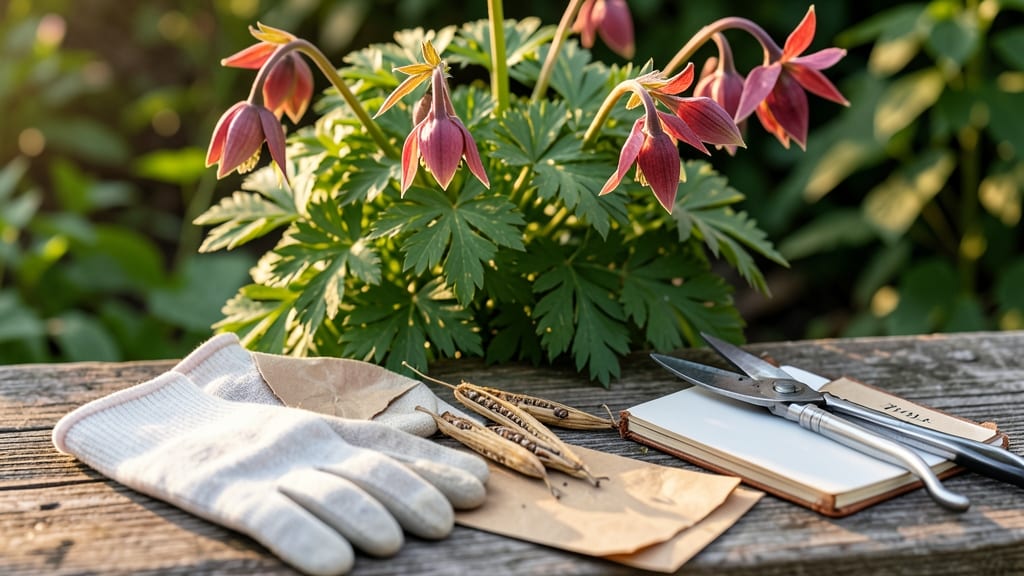
How to collect columbine seeds transforms your garden from seasonal blooms to year-round potential. 🌱 The key? Harvesting those papery pods at the perfect moment—too early and they won’t open, too late and they’ll scatter seeds everywhere. I’ve learned this the hard way after watching seeds vanish into the wind (or my neighbor’s yard).
You’ll need sharp scissors, a brown paper bag, and patience—columbine pods ripen unevenly, so check them weekly starting in late summer. Look for pods that turn from green to tan and split open at the seams. The seeds inside should be plump and dark, not shriveled or floating away.
Once collected, spread seeds on newspaper to dry completely (2-3 days), then store in a sealed envelope in your fridge. With proper timing, these seeds stay viable for 2-3 years, giving you free plants for future seasons. The first year might be spotty, but subsequent batches thrive like wildflowers.
Timing varies by region—cooler climates ripen pods earlier than hotter zones. In Zone 5, I harvest by mid-September, while Zone 8 gardens might wait until October. The trick is consistency: check weekly and act fast when pods split open.
📚 In This Guide
- What you need
- Instructions
- Tips and common mistakes
- Wrapping up and next steps
What you need
- ● Mature columbine plants: Healthy, established plants with fully ripened seed pods (dry, brown, and slightly papery to the touch). Aim for at least 3-5 plants for a good yield.
- ● Pruning shears or sharp scissors: Clean, sterilized tools to snip seed pods without damaging stems.
- ● Brown paper bags or breathable mesh bags: 1-2 bags per plant to collect seeds (avoid plastic—it traps moisture and causes mold).
- ● Labeling tags or masking tape + marker: To note variety, harvest date, and location (e.g., "Double Click Pink – 9/15/2024 – Shade Garden").
- ● Drying tray or cardboard box: A shallow, well-ventilated surface to spread pods for 2-4 weeks of drying.
- ● Fine-mesh sieve or colander: To separate seeds from chaff once pods are fully dry.
- ● Air-tight seed storage containers: Opaque, moisture-proof (e.g., glass jars with tight lids or resealable plastic bags with silica gel packets).
- ● Gloves: If your columbine has sticky or prickly pods (some varieties do!).
- ● Hair dryer on low heat: To speed up drying in humid climates (keep pods 1-2 feet away to avoid scorching).
- ● Seed catalog or notebook: To track germination rates or cross-pollination notes.
- ● Twine or rubber bands: For securing labels to bags or tying pods in bundles for drying.
- ● Humidity pack: A small packet of dried silica gel or uncooked rice in storage containers to absorb excess moisture.
Step-by-Step instructions for harvesting columbine seeds
Timing and technique make all the difference when collecting columbine seeds—here’s exactly how to do it right.
🌱 Step 1: Identify Mature Seed Pods
Columbine seed pods start green and firm but ripen into dry, papery husks that split open naturally. Watch for pods that turn from green to tan or brown—this signals they’re ready. The pods should feel lightweight and make a slight rattling sound when shaken, indicating seeds inside.
Harvest pods when they’re 70-80% dry—if you wait too long, the seeds will scatter on the ground. I like to check pods every 2-3 days during their ripening phase. Avoid harvesting pods that are still green or moist, as the seeds won’t be viable.
✂️ Step 2: Harvest Pods at the Right Time
Use clean, sharp pruning shears to snip the entire seed pod from the stem, leaving about ½ inch of stem attached. This prevents the pod from splitting open prematurely. Place the harvested pods in a paper bag (not plastic) to allow airflow while keeping seeds contained.
Harvest on a dry, sunny morning after dew has evaporated. Wet pods can develop mold, which ruins seeds. If rain is forecast, harvest immediately—columbine seeds won’t survive prolonged dampness.
🪴 Step 3: Dry and Extract the Seeds
Spread the harvested pods on a clean, dry surface like a mesh screen or paper towel in a warm, dry location (around 70°F). Let them dry for 7-10 days, flipping them occasionally to ensure even drying. The pods should become completely brittle and split open on their own.
Once dry, gently crush the pods between your fingers or use a small hammer to release the seeds. Columbine seeds are flat, oval, and slightly winged—discard any shriveled or discolored seeds. Store viable seeds in a paper envelope in a cool, dark place for up to 2 years.
💧 Step 4: Stratify Seeds for Better Germination
Columbine seeds benefit from cold stratification, which mimics winter conditions. Place seeds in a zip-top bag with slightly damp sand or peat moss, seal it, and refrigerate for 4-6 weeks. Check periodically to ensure the mix stays moist but not soggy.
After stratification, sow seeds in well-draining potting mix at a depth of ¼ inch. Keep the soil consistently moist (but not waterlogged) and place in a bright, indirect light spot. Germination typically takes 2-4 weeks—patience is key here, as seeds won’t sprout until conditions are just right.
Tips & tricks for perfect columbine seed collection
Timing and technique are everything when harvesting columbine seeds—here's how to avoid common pitfalls and maximize your yield.
Pod Maturity Check: In Step 1, when you're identifying mature pods, look for that subtle rattling sound when you gently shake them—this confirms seeds are inside. I also check for a slight translucency in the pod walls, which signals they're at that perfect 70-80% dry stage. Harvesting too early means immature seeds, while waiting too long risks them scattering on the ground.
Harvest Timing Strategy: For Step 2, I recommend harvesting on dry mornings after dew has evaporated, but there's a trick to this: if rain is forecast within 48 hours, harvest immediately regardless of the time. Columbine seeds are particularly sensitive to prolonged dampness, which can trigger mold growth within 24 hours of harvest. The paper bag storage method works beautifully for airflow while preventing seed loss.
Drying Optimization: When drying pods in Step 3, maintain that consistent 70°F temperature by placing them near a sunny window during cooler months, or using a small fan to circulate warm air. I've found that flipping pods every 24 hours (rather than daily) prevents uneven drying, which can cause some seeds to remain viable while others become brittle and unusable.
Stratification Secret: For Step 4, the cold stratification process is critical, but many people overlook the moisture balance. Your sand or peat moss mix should feel like a damp sponge—not dripping wet, but not bone dry either. I like to use a spray bottle to mist the mix every 7-10 days during stratification, keeping it consistently moist without creating anaerobic conditions that could lead to mold.
Pro Tips for Collect Columbine Seeds
- Timing and technique are everything when harvesting columbine seeds—here's how to avoid common pitfalls and maximize ...
- Pod Maturity Check: In Step 1, when you're identifying mature pods, look for that subtle rattling sound when you gent...
- Harvest Timing Strategy: For Step 2, I recommend harvesting on dry mornings after dew has evaporated, but there's a t...
Frequently asked questions
Got questions about collecting columbine seeds? You’re not alone! Here are answers to the most common queries—from timing to troubleshooting—to help you harvest with confidence.
When is the best time to collect columbine seeds?
Wait until the seed pods turn brown and papery (usually late summer to early fall). If you pick them too early, the seeds won’t be fully mature. Pro tip: Tap a ripe pod—if seeds rattle inside, it’s ready!
How long does it take for columbine seeds to mature?
Seed pods typically mature in 6–10 weeks after flowering, depending on your climate. In cooler regions, this may stretch to 12 weeks. Keep an eye on pods weekly for the perfect harvest window.
What if my columbine pods split open before I can collect seeds?
Don’t worry! If pods crack naturally, scatter the seeds immediately onto moist soil—they’ll still germinate. For extra security, cover the area with lightweight mesh to catch stray seeds.
Can I collect seeds from store-bought columbines?
Yes, but check the label first. Hybrid varieties (like ‘Queen of Hearts’) may not produce true-to-type seeds. For consistent results, opt for heirloom or open-pollinated columbines labeled as “seed-saving friendly.”
How do I store columbine seeds until planting?
Let seeds dry in a cool, dark place for 1–2 weeks, then store them in a paper envelope (not plastic) in the fridge. They’ll stay viable for 2–3 years if kept dry.
Still stumped? Drop your question in the comments—we’re happy to help!
Wrapping up and next steps
Collecting columbine seeds is a rewarding way to propagate these stunning wildflowers—and with the right timing and care, you’ll enjoy a bountiful harvest year after year. 🌱
Your next step? Grab those dried pods, sow your seeds, and watch your garden bloom with new columbine magic! Happy gardening! 🌸