
Succulent
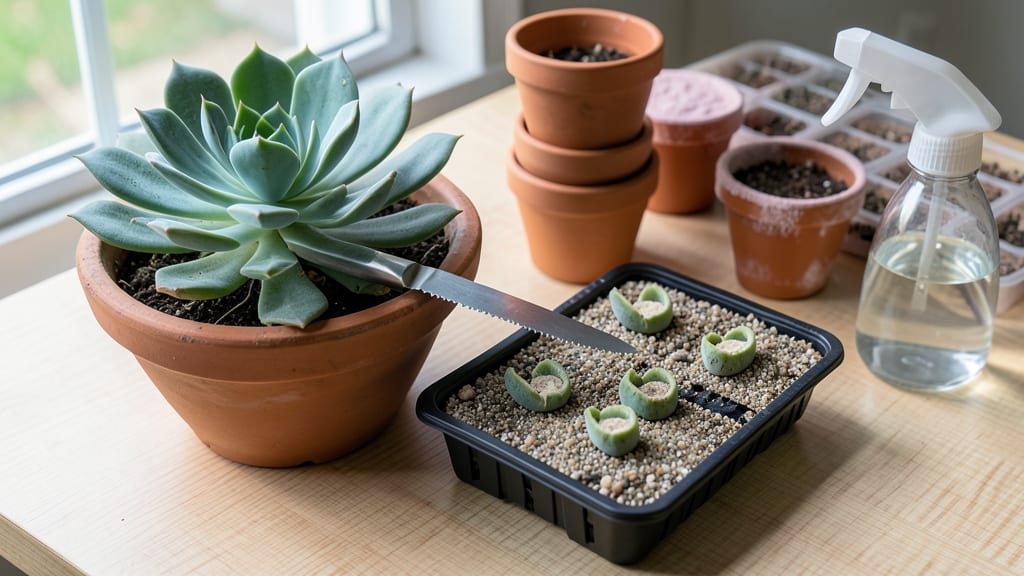
How to clone succulents from one leaf—this is how you multiply your collection without spending a dime. 🌱 I’ve turned my single jade cutting into a whole shelf of thriving plants using just a few household items and patience. The best part? No green thumb required—just follow these steps, and you’ll be watching roots sprout in just 2-4 weeks.
You only need three things: a healthy succulent leaf or stem, a small container with well-draining soil, and a spray bottle. No fancy tools, no complicated science—just a way to let nature do the work.
I’ve cloned echeverias, aloe, and even my stubborn haworthias using this same method, and the results are always the same: plump, happy plants that look just like their parents.
By the time you’re done, you’ll have a tray of tiny succulents ready to pot up or share with friends. The first few might look fragile, but with the right care—bright light, minimal water, and a little patience—they’ll grow into sturdy plants that’ll last for years.
And the best part? You’ll never buy another succulent again.
Works for almost any succulent type, from rosettes to trailing varieties, and scales from a single leaf to a whole stem cutting. Let’s get those roots growing!
📚 In This Guide
- What you need
- Instructions
- Tips and common mistakes
- Wrapping up and next steps
What you need
- ● Healthy succulent parent plant: Choose a mature, thriving succulent with at least one or two leaves (or offsets, if applicable).
- ● Sharp, clean scissors or pruning shears: A sterilized pair (use rubbing alcohol) to avoid introducing bacteria.
- ● Well-draining soil mix: A blend of cactus/succulent soil (or 50% potting soil + 50% perlite/pumice) in a small pot or tray.
- ● Small pots or propagation tray: 2–4 inch pots (or a shallow tray with drainage holes) for each cutting.
- ○ Rooting hormone (optional but helpful): A succulent-safe powder or gel to speed up root growth.
- ● Spray bottle with water: For lightly misting soil (avoid soaking!).
- ● Perlite or coarse sand: To improve drainage in soil mixes.
- ● Clear plastic bag or dome: Creates a humid microclimate for faster rooting (remove once roots form!).
- ● Grow lights or sunny windowsill: Succulents need bright, indirect light (4–6 hours/day) to thrive.
- ● Label markers: To track which succulent is which!
Step-by-Step instructions for cloning succulents
Here's my foolproof method for multiplying your favorite succulents—no green thumb required.
🌱 Step 1: Select and Prepare Healthy Cuttings
Choose a healthy stem or leaf from a mature, thriving succulent. The cutting should be free of damage or disease—look for plump, firm growth with no brown spots or mushy areas. I like to take cuttings in the morning when the plant is fully hydrated and the air is cool.
Use clean, sharp scissors or pruning shears to make your cut. For leaf cuttings, gently twist a single leaf from its base until it separates cleanly. For stem cuttings, snip just below a leaf node where new roots will form. Let the cuttings sit in a dry, shaded spot for 1-2 hours—this allows the cut end to callus over slightly, which prevents rot when planting.
💧 Step 2: Root the Cuttings in Soil or Water
For soil propagation, fill a small pot with a well-draining mix designed for succulents or cacti. I use a blend of 50% potting soil and 50% perlite or coarse sand to ensure proper drainage. Make a small hole with your finger and insert the cutting about ½ inch deep for leaves or 1 inch deep for stems.
If you prefer water propagation, place the cuttings in a jar of room-temperature water, ensuring only the base is submerged. Change the water every 3-4 days to prevent bacterial growth. You’ll see roots begin to form in 2-4 weeks—they’ll look like tiny white hairs sprouting from the base. Once roots are 1-2 inches long, you can transplant to soil.
☀️ Step 3: Care for New Plants Until Established
Place your newly planted cuttings in a spot with bright, indirect light for the first 1-2 weeks. Direct sunlight can scorch tender new growth, so a east-facing window or a shaded patio works best. Keep the soil lightly moist but never soggy—succulents rot quickly when overwatered.
After 4-6 weeks, your cuttings should have developed a strong root system and new growth. At this point, you can gradually introduce them to more sunlight and reduce watering. Once the new plants are 3-4 inches tall and have at least 3-4 sets of leaves, they’re ready to be potted up individually or transplanted to their permanent home in the garden.
Tips & tricks for perfect succulent propagation
A few simple tricks will help you avoid common pitfalls and maximize your success rate when cloning succulents.
Timing Secret: That 1-2 hour callusing period in Step 1 is crucial—don't skip it! This short wait helps prevent rot by allowing the cut end to form a protective layer. I've found that taking cuttings in the morning gives you the full 1-2 hours before afternoon heat sets in, which is ideal for callusing. If you must take cuttings later, place them in a cool, dark spot immediately.
Rooting Strategy: For soil propagation, make sure your 50/50 soil mix is completely dry before planting cuttings. Damp soil can cause rot before roots even form. When planting leaves, press them gently into the soil—they need good contact to root properly. For stems, insert them just deep enough so the bottom node is covered, but don't bury the entire stem.
Light Management: During that first critical 1-2 weeks in Step 3, bright indirect light is key. A south-facing window with sheer curtains works perfectly—it provides plenty of light without the intensity of direct sun. If you notice leaves turning yellow or looking translucent, they're getting too much light. Move them back a few inches or add a sheer curtain.
Watering Wisdom: The "lightly moist" rule in Step 3 means you should only water when the top inch of soil feels completely dry. Stick your finger in—if it comes out clean, it's time to water. Overwatering is the #1 killer of new succulent cuttings. I like to use a spray bottle for the first few weeks to give me better control over moisture levels.
Pro Tips for Clone Succulents
- A few simple tricks will help you avoid common pitfalls and maximize your success rate when cloning succulents.
- Timing Secret: That 1-2 hour callusing period in Step 1 is crucial—don't skip it! This short wait helps prevent rot b...
- Rooting Strategy: For soil propagation, make sure your 50/50 soil mix is completely dry before planting cuttings. Dam...
Frequently asked questions
Got questions about cloning succulents?
You’re not alone—propagation can feel tricky at first! Here are answers to the most common queries to help you grow your collection with confidence.
How long does it take for a succulent cutting to root?
Most succulent cuttings take 2–4 weeks to root, depending on the type, humidity, and conditions. Smaller cuttings (like leaves) may root faster (1–2 weeks), while stem cuttings can take longer. Be patient—once roots form, new growth will follow!
Can I clone succulents year-round, or is there a best time?
Succulents can technically be cloned anytime, but spring or early summer is ideal. Warmer temps and longer daylight boost success rates. Avoid winter in cold climates—plants are dormant, and cuttings may struggle to root.
Why is my succulent cutting rotting instead of rootting?
Overwatering is the #1 culprit! Succulent cuttings need dry conditions to root. Let the soil dry completely between waterings (every 2–3 weeks). If rot appears, trim the mushy part, let it dry for a few days, and replant in fresh, well-draining soil.
What’s the easiest succulent to clone for beginners?
Start with echeveria, sedum, or jade plants—they’re forgiving and root easily. Leaf cuttings (like from haworthia) are also beginner-friendly. Avoid delicate or rare varieties until you’ve mastered the basics!
Can I use water instead of soil to root succulent cuttings?
Yes! Some succulents (like string of pearls) root well in water. Just use a small jar, change the water every 5–7 days, and avoid submerging leaves. Once roots are 1–2 inches long, transplant to soil to prevent rot. Pro tip: Skip water propagation for thick-leaved types (e.g., aloe)—they’re prone to rot.
Wrapping up and next steps
Cloning succulents is a rewarding way to expand your green collection—without spending a dime! 🌱 Whether you’re using leaves, stems, or offsets, the key is patience and a little care.
Now that you’ve mastered the basics, why not level up? Try experimenting with different succulent types or even gifting your new clones to fellow plant lovers. Happy propagating!
🌟 Next Steps:
- Label your new clones to track progress.
- Share your success (and bloopers!) on social media—tag us!
- Explore advanced techniques like air layering for tougher species.