
Trees
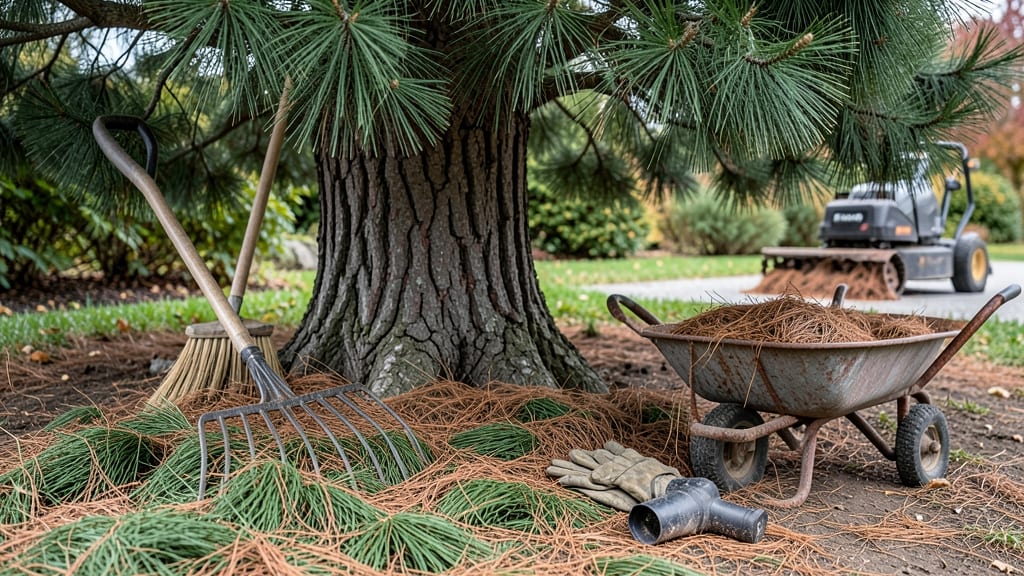
How to clean up pine needles efficiently is easier than you think—just pile them up faster than you can say "fall cleanup." 🌲 The good news? A fast rake and bag method transforms messy yards into clean, walkable spaces in under an hour—no heavy machinery required.
You’ll need a sturdy leaf rake (with wide tines for grip), thick contractor bags (or a wheelbarrow for hauling), and work gloves to protect your hands from sharp needles. The key is working in sections: rake needles into piles, then scoop them into bags before they scatter again.
This method works best on dry days when needles are lighter and easier to move.
Within 30 minutes, you’ll see dramatic results—no more tripping hazards or clogged mower decks. The real payoff? Sparkling paths, visible lawn edges, and a yard that actually looks maintained. Plus, you’ll avoid the frustration of needles clumping in flower beds or under shrubs where they smother plants.
For larger areas, consider renting a blower-vacuum to speed up the process. If you have a compost bin, shredded pine needles make excellent mulch (just avoid overdoing it—they acidify soil over time). The goal is efficiency, not perfection, so don’t stress about every last needle.
📚 In This Guide
- What you need
- Instructions
- Tips and common mistakes
- Wrapping up and next steps
What you need
- ● Heavy-duty rake – A bow rake (18–24 inches wide) works best for pine needles. Avoid lightweight models—they’ll bend!
- ● Sturdy trash bags – 20–30-gallon contractor bags (biodegradable if possible) to hold 5–10 lbs of needles each. Grab 5–10 bags depending on yard size.
- ● Work gloves – Garden gloves with grip to protect hands from sharp needles and debris.
- ● Knee pads or thick towels – For comfort if you’re kneeling or crouching for long periods.
- ● Garden twine or bungee cords – To tie bags securely (if not using twist-tie closures).
- ● Wheelbarrow or large bin – A 2–3 cubic foot capacity to haul needles to disposal areas.
- ○ Shovel or leaf blower – Optional but helpful for large piles or hard-to-reach areas.
- ● Leaf vacuum or mulching mower – For fast cleanup if you have power tools.
- ● Dust mask – If allergies or fine sawdust are a concern (pine pollen can be irritating!).
- ● Garden hose with spray nozzle – To lightly dampen needles before bagging (reduces dust).
- ● Compost bin or pile – If you want to recycle needles (they break down slowly—mix with browns like leaves!).
- ● Portable step stool – For reaching high areas under trees or decks.
Step-by-Step instructions for cleaning pine needles efficiently
Here's how to transform your yard from a pine needle jungle to a clean, inviting space in under an hour.
🪴 Step 1: Gather Your Tools and Prepare the Area
Start with a heavy-duty rake (the kind with sturdy tines designed for thick debris) and a sturdy trash bag that can handle at least 30 gallons of volume. I like to use a leaf blower attachment for my rake—it makes the job go twice as fast by blowing needles into piles as you go. Clear any loose debris from walkways first; you'll see how much faster the process goes when you're not working around scattered sticks or rocks.
Wear gloves and long sleeves to protect against scratches—pine needles pack a punch when they get tangled in skin. I keep a small broom nearby for edges and corners where the rake won't reach. The key here is working methodically from one side of the area to the other to avoid missing spots or having to backtrack.
✂️ Step 2: Rake in Systematic Sections
Divide your work area into 4-foot sections and tackle one at a time. Start at the farthest point from your trash bags—this prevents you from having to drag full bags across clean areas. Angle the rake at a 45-degree to gather needles into a tight pile, then use the leaf blower attachment to push them into a concentrated mound. You'll notice the needles clump together more easily when they're damp, so work on slightly dewy mornings if possible.
For thick accumulations, I make two passes: first to loosen the needles from the ground, then a second to gather them into piles. Don't worry about perfect piles—this isn't a landscaping competition. The goal is to create manageable heaps that you can bag efficiently. If you encounter stubborn patches, use the back of the rake to break up compacted needles before trying to gather them again.
💧 Step 3: Bag the Needles Strategically
Place your trash bag near the first section you'll clean, then work your way toward it. As you create each pile, walk to the bag, open it just enough to drop the needles in, then reseal it immediately. I've learned the hard way that leaving bags open invites wind to scatter needles everywhere—you'll spend more time cleaning up than you saved by bagging. Fill each bag about two-thirds full before tying it off; this prevents leaks and makes carrying easier.
For large yards, I use a dolly to move full bags to the curb or compost area. The dolly's wheels roll smoothly over pine needles, unlike a wheelbarrow which can get stuck. If you don't have a dolly, drag bags by their handles but keep them upright to avoid spilling. Here's the thing—don't overfill bags with mixed debris. Pure pine needles compress well, but adding sticks or rocks makes the bags heavier and more likely to tear.
🌿 Step 4: Finish with Edges and Final Touches
Use your small broom to sweep edges along fences, under decks, and around plants where the rake can't reach. You'll find the most stubborn needles collect in these tight spaces. For particularly tight areas, I use a putty knife to scrape needles from cracks in pavers or between deck boards. This might seem tedious, but it's the difference between a job well done and one that looks like you gave up halfway.
Once all visible needles are cleared, do a final walkthrough with your eyes about 6 inches off the ground. You'll spot any missed patches that need a quick sweep. I always do this before moving on to the next section—it saves me from having to re-clean areas later. For mulch beds, leave a thin layer of needles (about ¼ inch) to decompose naturally and enrich the soil.
⏰ Step 5: Dispose of or Repurpose Needles
Tie off your bags securely and consider your disposal options. Pine needles can be composted, but they take 6-12 months to break down completely—much longer than regular yard waste. If you're using them for mulch, spread them about 2-3 inches deep around acid-loving plants like azaleas or blueberries. For regular disposal, check your local regulations—some areas require special handling for pine needle waste.
Here's where it gets fun: if you have a wood-burning fireplace, dried pine needles make excellent kindling. Just let them dry completely in the sun for 2-3 days first. I always save a few bags for winter—nothing beats a crackling pine needle fire on a cold evening. The key is to work quickly but thoroughly; you'll have your clean pathways in under an hour if you stay organized and methodical.
Tips & tricks for fast pine needle cleanup
These pro strategies will help you tackle pine needles twice as fast while keeping your yard spotless.
Timing Strategy: The 4-foot section method in Step 2 works best when you work in a zigzag pattern rather than straight lines. This prevents you from missing spots between sections and lets you cover more ground efficiently. I've found that working in 4-foot sections takes about 10-15 minutes per section depending on needle density, so pace yourself accordingly. For large yards, consider breaking the job into two sessions if you're working alone—morning and afternoon.
Equipment Upgrade: If you don't have a leaf blower attachment, a stiff-bristled push broom works surprisingly well for gathering needles into piles. Just sweep in wide arcs to create concentrated mounds before bagging. For stubborn patches, I've had great success using a plastic tarp—drag it over the needles, then roll it up to collect everything at once. This is especially helpful for driveways where rakes struggle to reach.
Bagging Hack: In Step 3, when filling your 30-gallon bags to two-thirds capacity, I recommend using a small garden shovel to compact the needles before tying the bag. This creates more space and prevents leaks. For extra security, double-knot the bag and then twist the top before tying again—this keeps needles from escaping when you're moving them. If you're composting, consider using biodegradable bags to avoid plastic waste.
Edge Technique: The final walkthrough in Step 4 reveals most missed needles, but I've discovered a little-known trick for tight spaces: use a damp sponge to wipe down deck boards and pavers. The moisture helps loosen any remaining needles that you can then sweep up. For mulch beds, that ¼-inch layer recommendation is perfect—just remember to fluff it occasionally to maintain airflow and prevent matting.
Pro Tips for Clean Up Pine Needles
- These pro strategies will help you tackle pine needles twice as fast while keeping your yard spotless.
- Timing Strategy: The 4-foot section method in Step 2 works best when you work in a zigzag pattern rather than straigh...
- Equipment Upgrade: If you don't have a leaf blower attachment, a stiff-bristled push broom works surprisingly well fo...
Frequently asked questions
Got questions about tackling pine needles? You’re not alone—this task can be tricky! Here are answers to the most common concerns to make your cleanup smoother than ever.
When is the best time to clean up pine needles?
Timing matters! Clear needles before they turn into a thick, slippery mess—aim for late fall or early winter when they’re dry and brittle. If they’re already piled high, tackle them ASAP to prevent mold or pests. Pro tip: Weekdays are ideal to avoid weekend crowds if you’re working in shared spaces!
Can I just mulch pine needles instead of raking them up?
Pine needles make excellent mulch—they’re acidic, retain moisture, and suppress weeds. Just spread them thinly (½ inch or less) over garden beds or lawns. Avoid piling them near tree bases to prevent rot. Warning: Overdoing it can smother grass or plants, so balance is key!
Why do pine needles keep coming back even after I rake them?
Pine trees are prolific! Needles naturally shed year-round, but heavy drops happen in fall/winter. If they’re back quickly, your tree might be stressed (drought, pests, or disease). Try deep watering or consulting a local arborist. For stubborn spots, use a leaf blower to gather them faster.
What’s the best way to clean pine needles off a driveway or sidewalk?
Skip the rake—use a broom with stiff bristles or a plastic shovel to scoop them into piles. For large areas, a wet/dry vacuum (with a hose attachment) works wonders. Never use a pressure washer—it can clog nozzles and damage surfaces. Safety first: Wear gloves to avoid needle pricks!
Should I bag pine needles or compost them?
Both work! Bag them if they’re mixed with debris (like twigs or dirt). For pure needles, compost them in a separate pile (they break down slowly). Hot tip: Shred them first with a lawn mower to speed up decomposition. Avoid composting if they’re moldy or pest-ridden.
Wrapping up and next steps
Cleaning up pine needles doesn’t have to be a chore—with the right tools and techniques, you can transform your yard into a sparkling, low-maintenance space in no time! Whether you’re using a rake, leaf blower, or bagging method, consistency is key to keeping those needles under control.
Plus, you’ll be protecting your lawn, garden, and even your home’s foundation from hidden moisture and pests.
Ready to tackle the task? Start small—pick a section of your yard, gather your supplies, and get to work! Before you know it, you’ll be enjoying those crisp, clean pathways all season long. 🌲✨